-
Get It
$19.99
$19.99Civil 3D Essentials Book and Practice Files
Civil 3D Analysis by Quick Profiles: A step by step tutorial guide
Introduction to Civil 3D Analysis by Quick Profiles
Firstly, what is a Civil 3D Analysis by Quick Profiles? Well, let's find out in this online training course. Certainly, this step by step tutorial is a part of the Civil 3D essentials book and how-to manuals.
Doing a Civil 3D Analysis by Quick Profiles?
Another method of quickly analyzing a Civil 3D surface is by the Quick Profile Method.
- Now, draw a polyline that crosses our proposed site, from south of Jasmine Blvd all the way to the river.
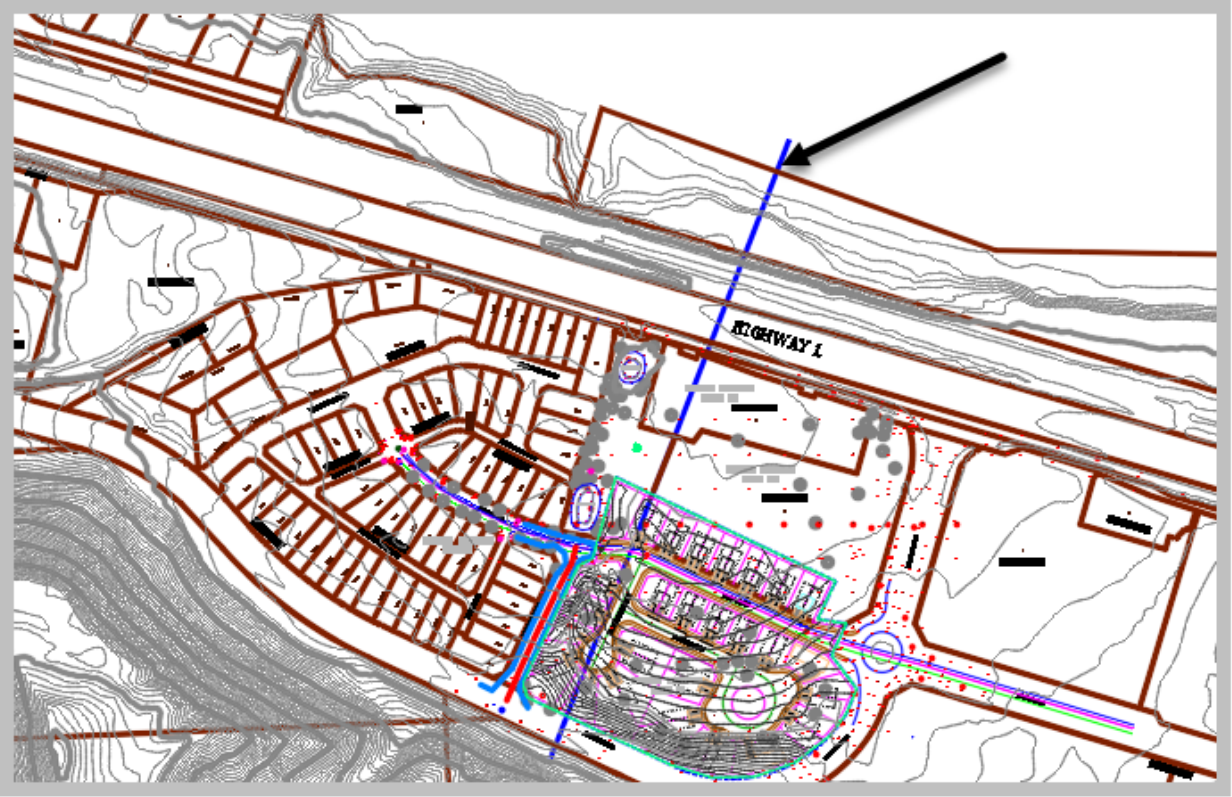
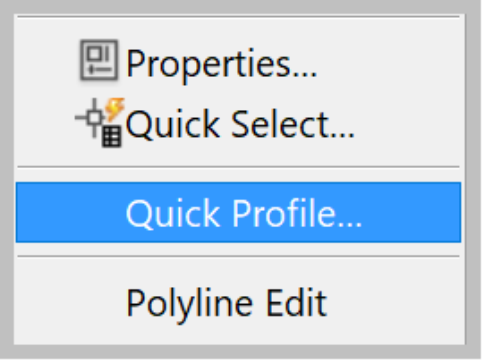
- Select the polyline, then Right-click and choose Quick Profile.
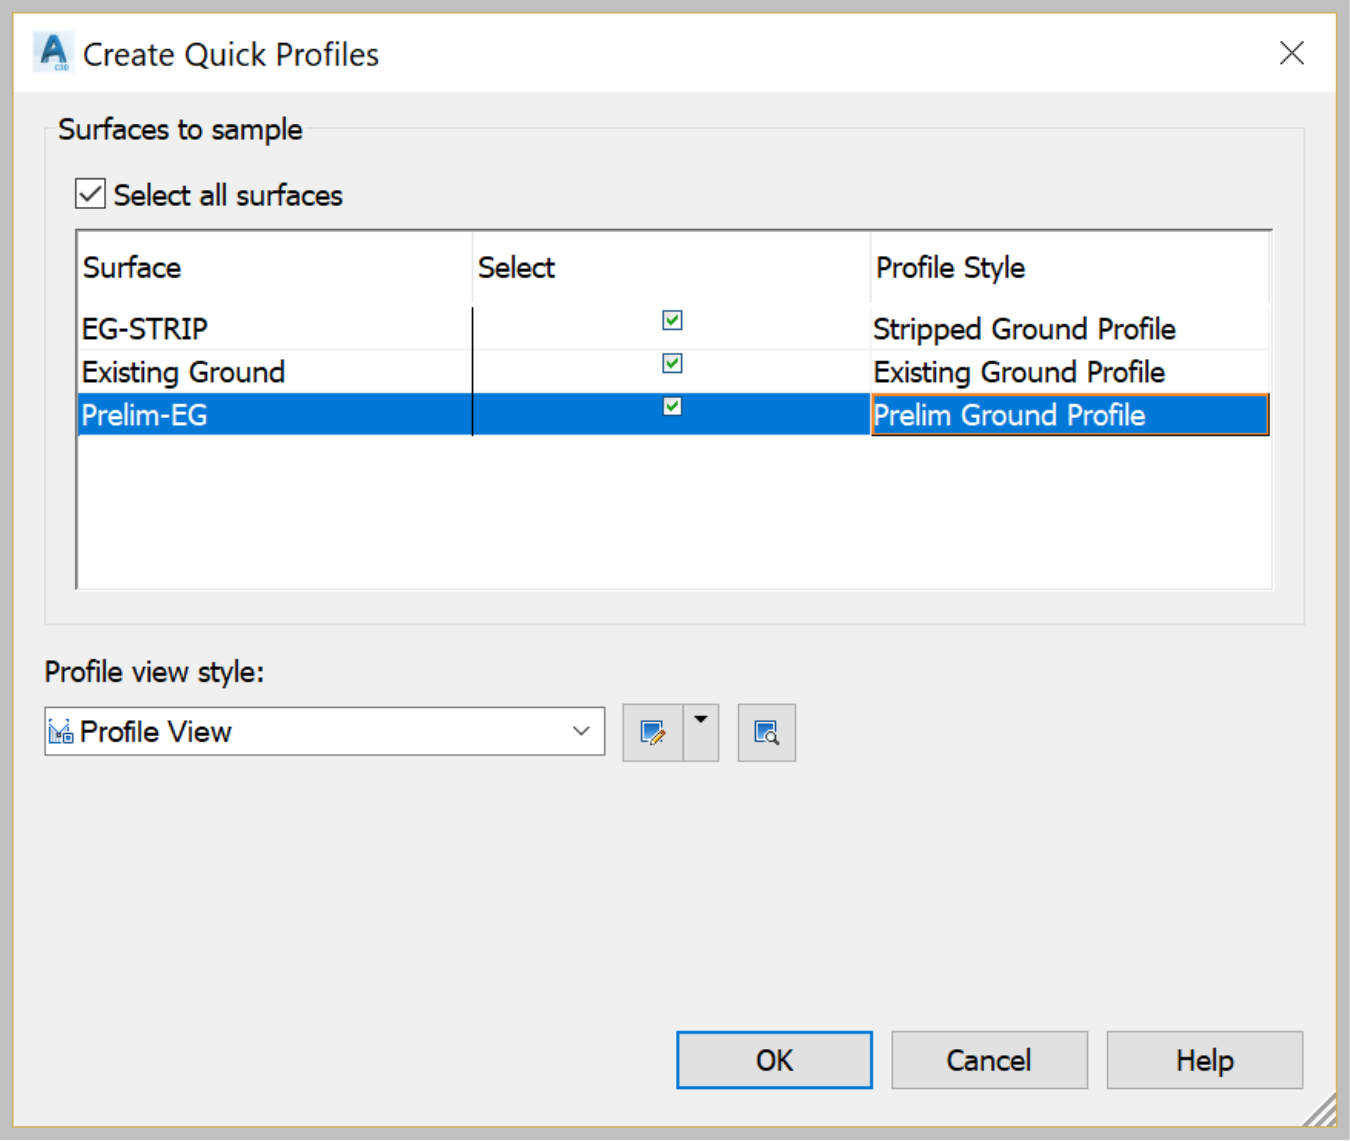
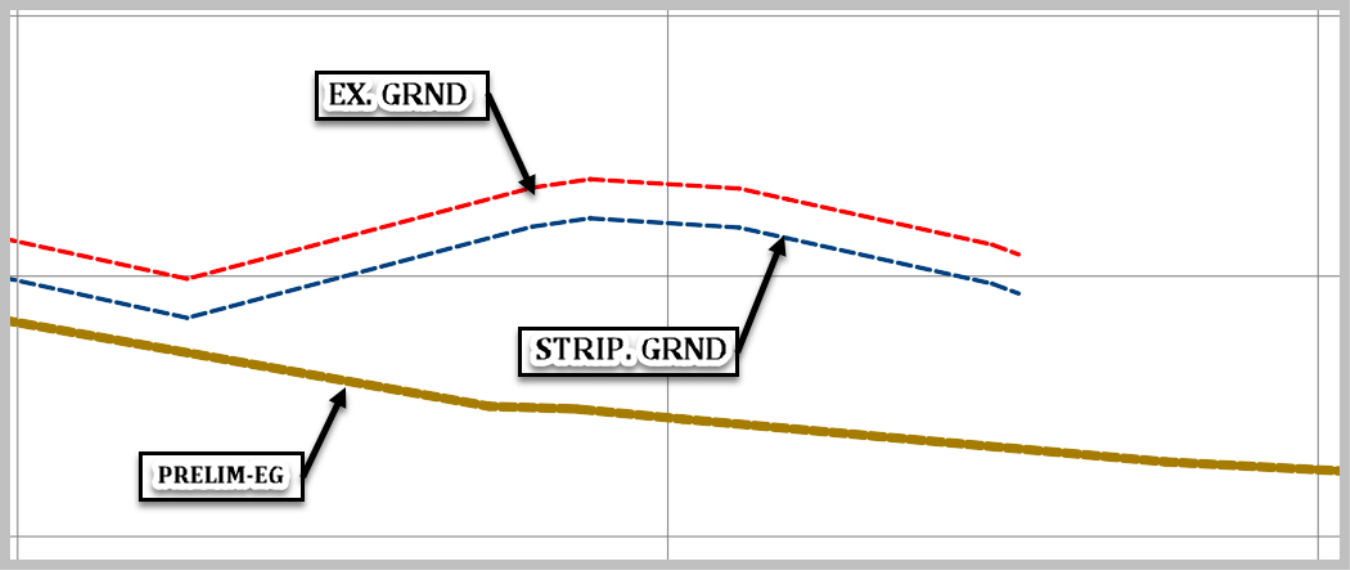
- In the Create Quick Profiles window, pick the adequate styles for the surface EG-STRIP, the Existing Ground and Prelim-EG surface.
- Next, click OK and click on an empty spot on the screen to select the origin of the profile. In the quick profile view, you should be able to identify the major features of the site, such as the hill, major roads, and the river.
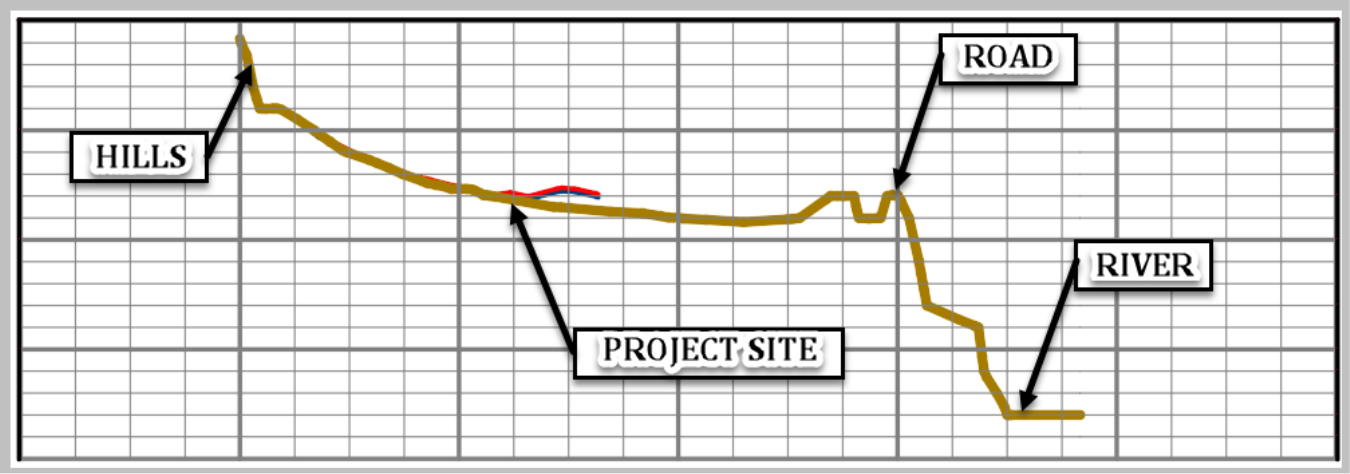
- If you zoom in closer, you will notice the different surfaces, including the surveyed existing ground, the stripped surface, and the preliminary contours surface.
- Furthermore, you can observe the profiles in two horizontal view windows. Then, interactively analyze different areas of the site. First, split the Drawing Area into two horizontal views. To do that,
- Click on the View tab.
- Then in the View Configuration drop-down menu, select Two Horizontal views.

- Now in the drawing area, in the top window, zoom in to see the polyline that you drew to cross the site.
- In the bottom window, zoom and center the view to fit the profile view just like this.

- When we start the design process, we are going to make changes to the existing ponds, since we are adding more impervious to the site. So, we probably need bigger ponds to retain all that extra runoff. To help the decision making, we probably need to know what is going on in the area of the ponds.
- Select the polyline and move it to cross the two ponds. Something like this.

- Notice how the profile automatically adjusts to reflect the area crossed by the polyline.
- From here, we can observe that Pond 1is higher than Pond 2, and that the ultimate project Outfall will be in Pond 2, right to the south of Highway 1.
- Now, select the quick profile polyline and hit delete. Notice how the profile disappears? That's because this profile is dependent on the polyline. One more thing to mention; if you ever saved the drawing, the profile will also disappear, as it’s a temporary analysis tool. That's why it's calledaQuick Profile. It cannot be saved and used later. To do that, we will need a more powerful profile. We will see later how to create them. For now, make sure the polyline is deleted and that you return to a single view. To do that, select Single in the View Configuration drop-down menu, from the View tab.