-
Get It
$19.99
$19.99Civil 3D Essentials Book and Practice Files
Civil 3D Cross Sections: A step by step tutorial guide
Introduction to Civil 3D Cross Sections
Firstly, what is a Civil 3D Cross Sections? Well, let's find out in this online training course. Certainly, this step by step tutorial is a part of the Civil 3D essentials book and how-to manuals.
Working with Civil 3D
To create the cross-sections,
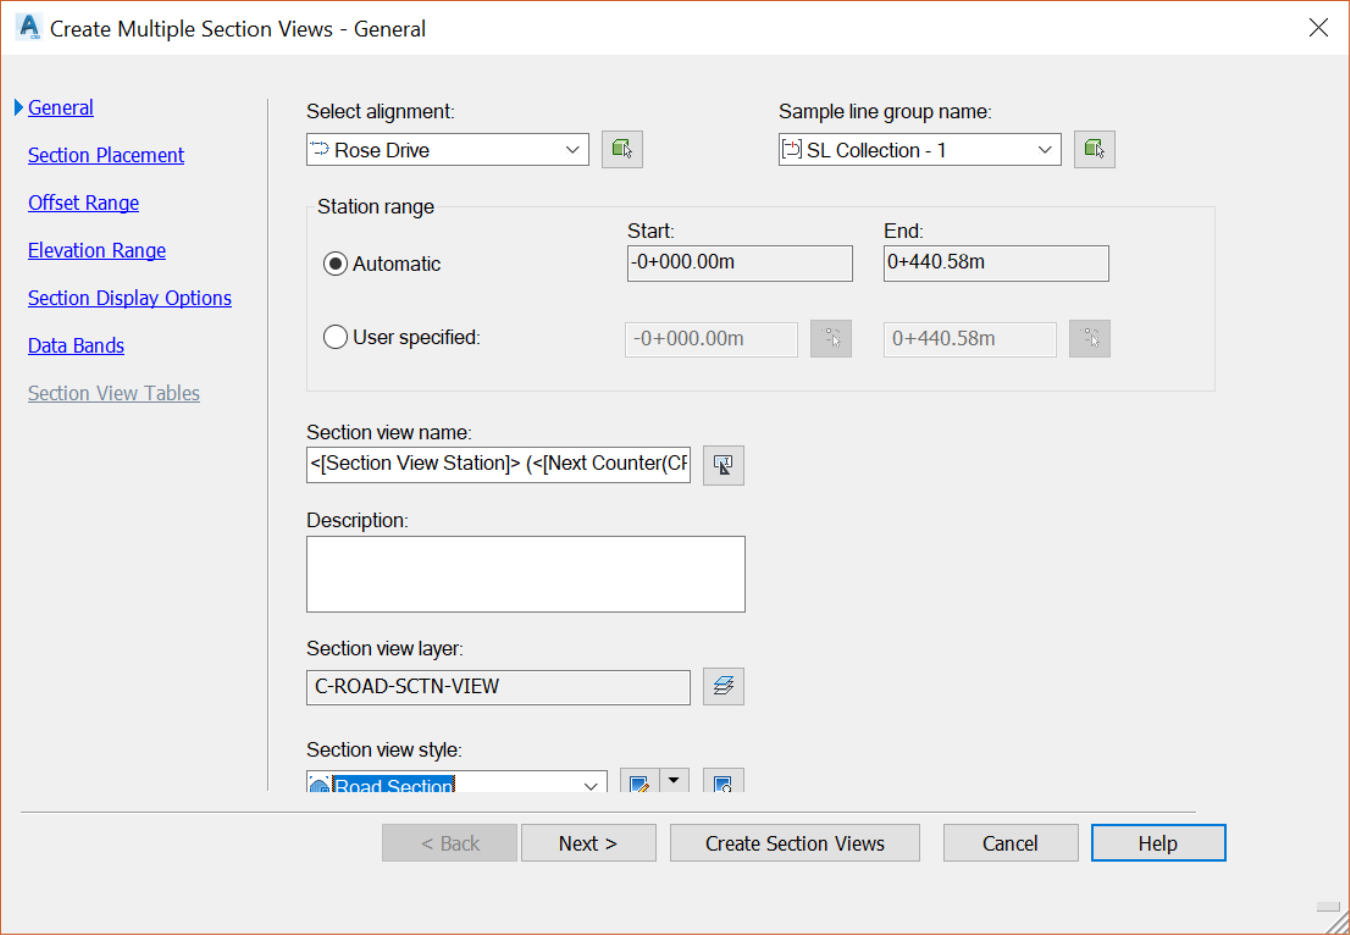
- From the ribbon, on the Home tab, run the Create Multiple Views command.

- On the General page, we can specify the parent alignment, sample line groups, stations, description, style, and more information. Select the automatic option and click on Next.
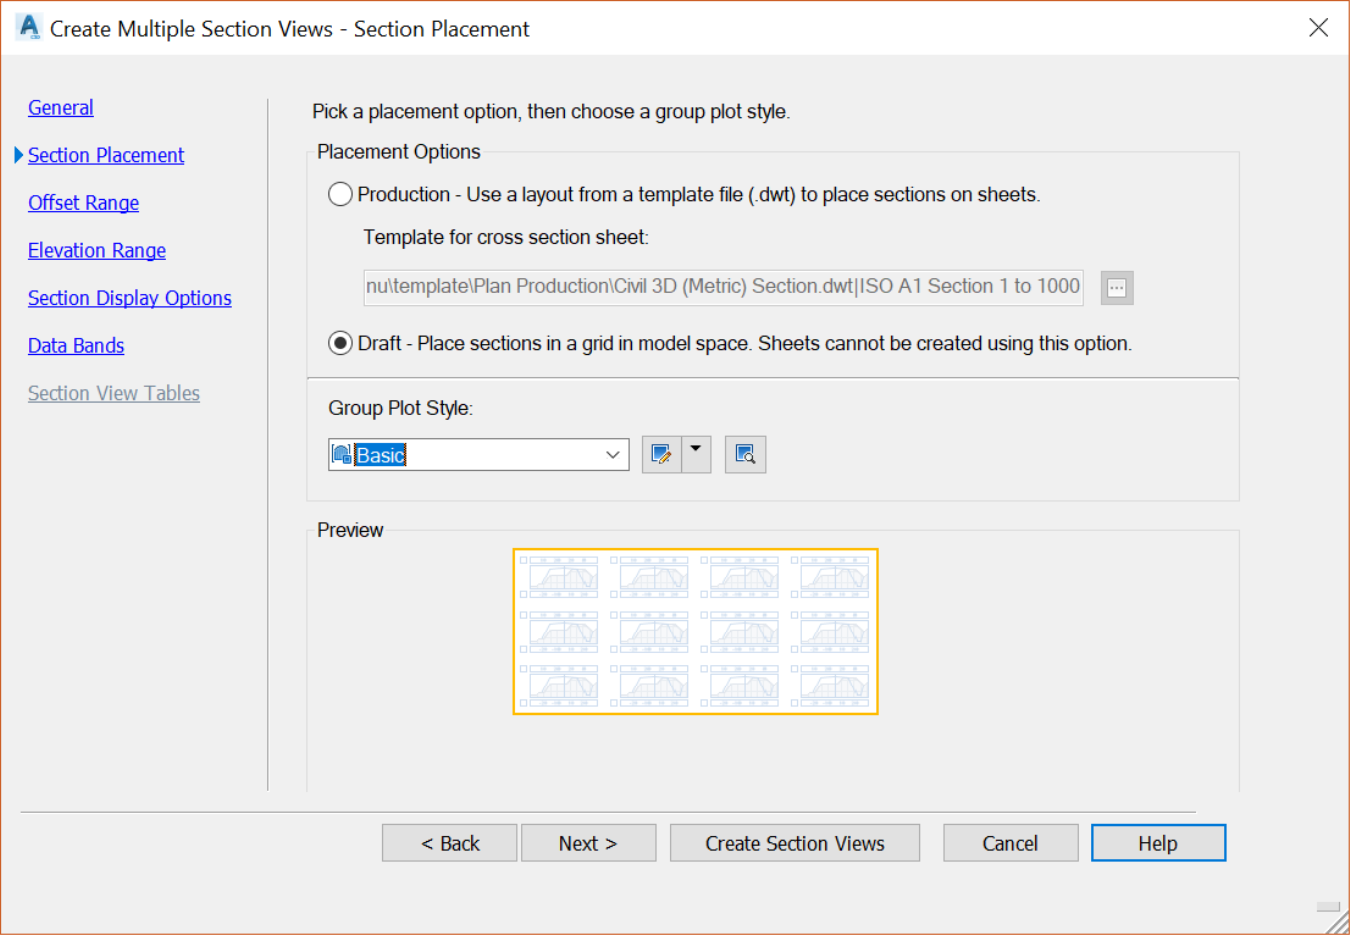
- On the Section Placement page, we have two options. We can either create the sections with a pre-existing drawing template or place them temporarily in the drawing area. For now, let’s place them as a draft in the model and click on Next.
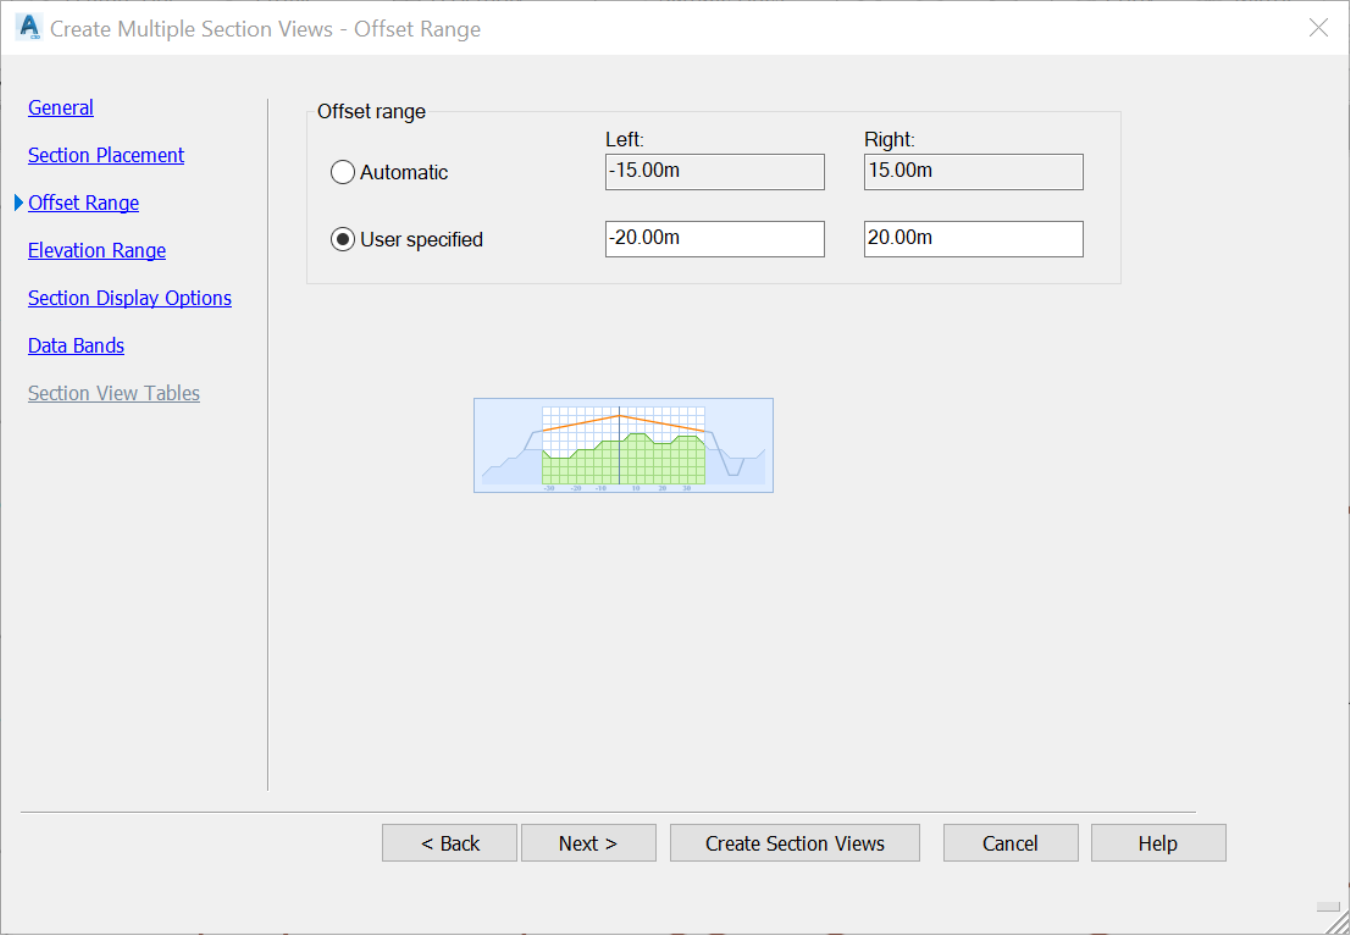
- On the Offset Range, we can specify the offset range of the section views. We have sampled 15m or 50ft on each side, but let’s create the view for 20m or 75ft on each side and click on Next.
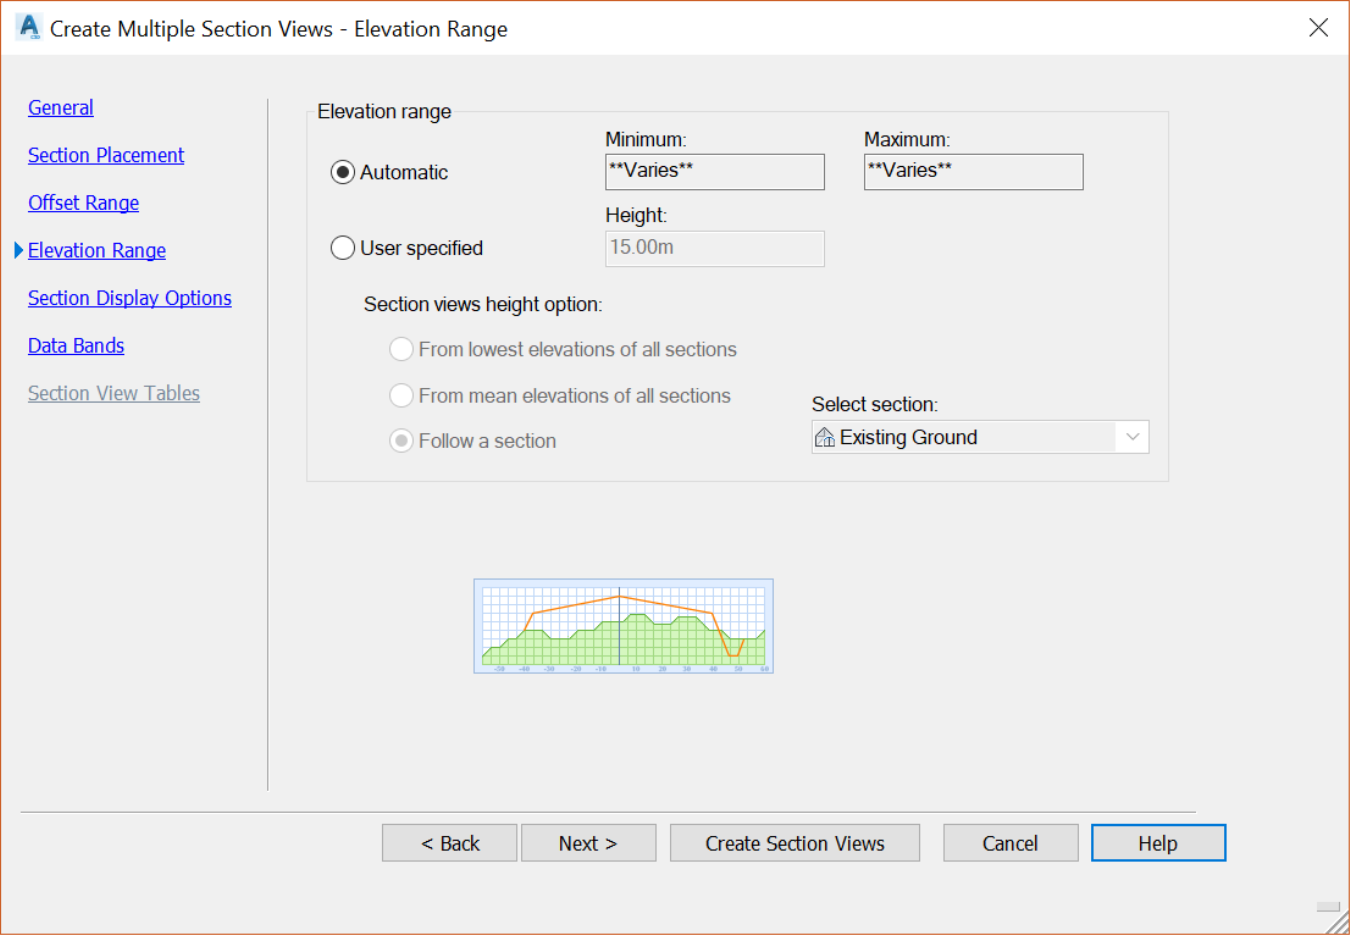
- On the Elevation Range page, specify the elevation range in the section view. Let’s go with the automatic range option and click on Next.
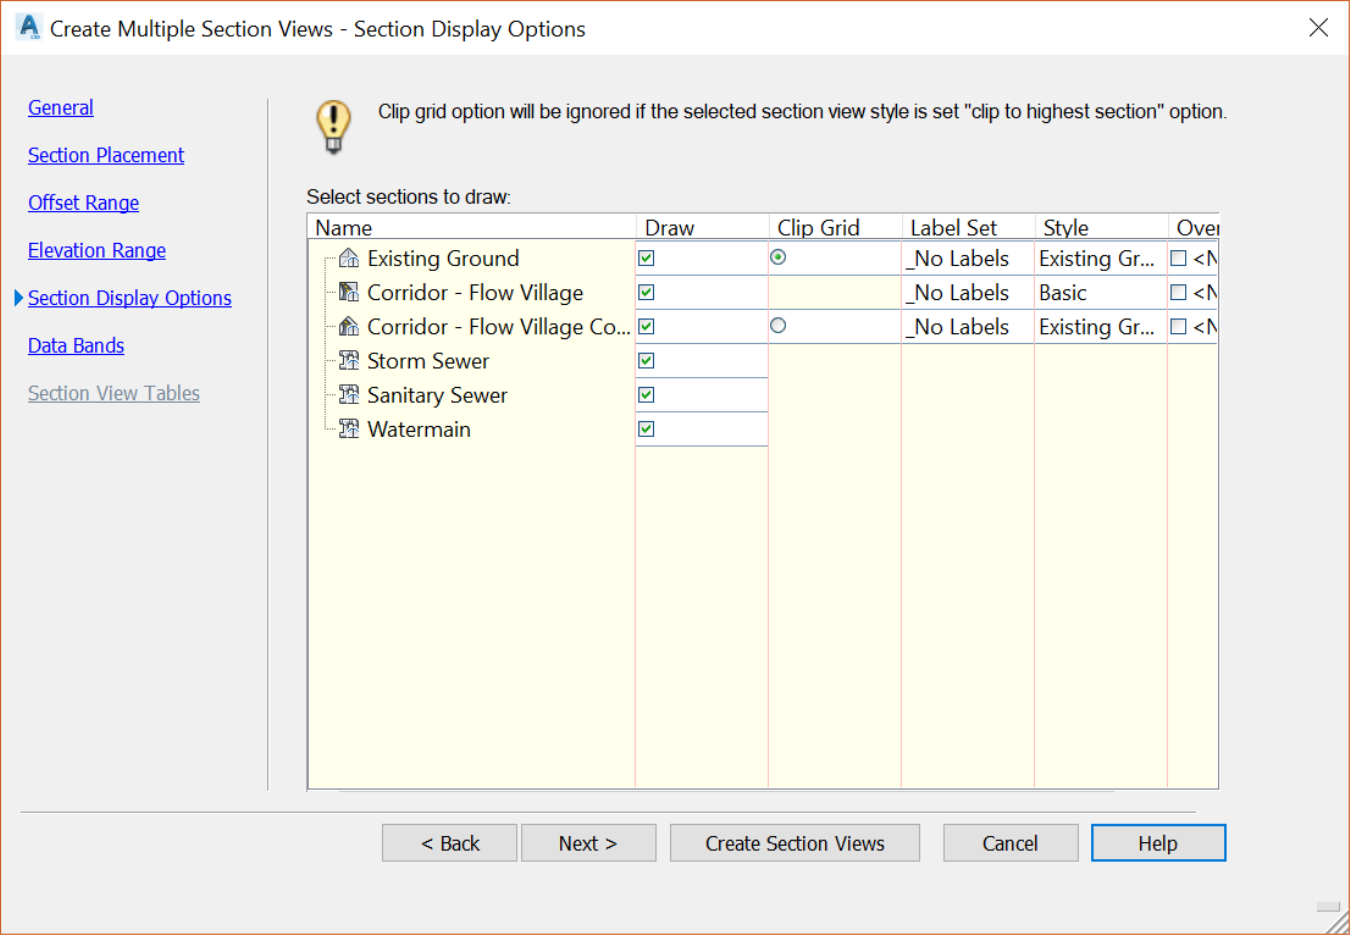
- On the Sections Display Options page, specify the sampled items we would like to display in the section views. Let’s choose to display all of them and click on Next.
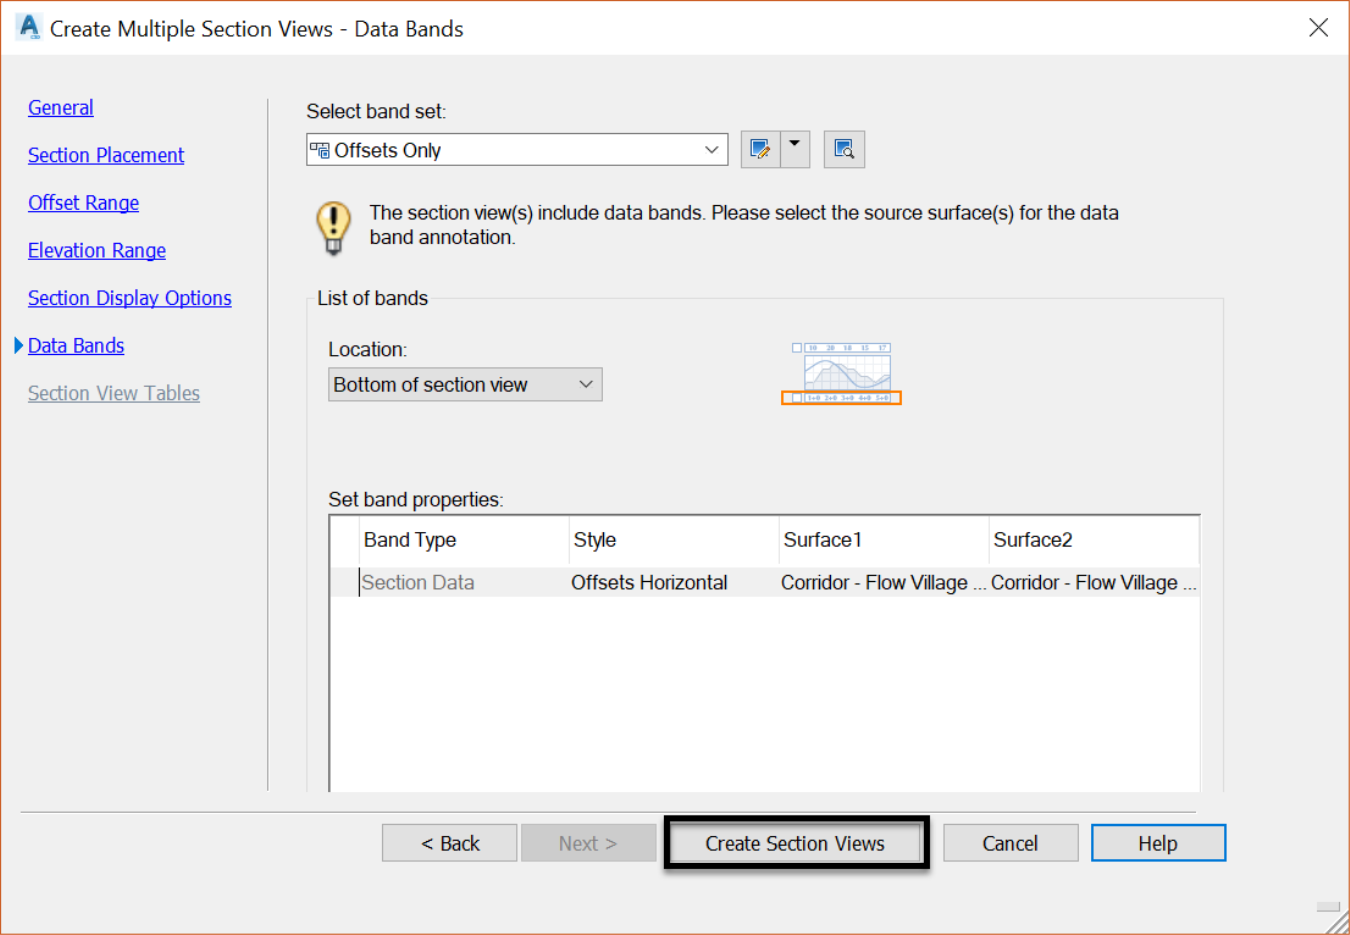
- On the Data Bands page, define the properties and locations of the data bands to attach to each section view. This can be information such as surface elevations, pipe data, and the like. The last page would have been the Section View Tables where we could set volume table properties for the section view. However, since we haven’t calculated the volumes yet, that option is greyed out. So, click on Create Section Views to create the sections.
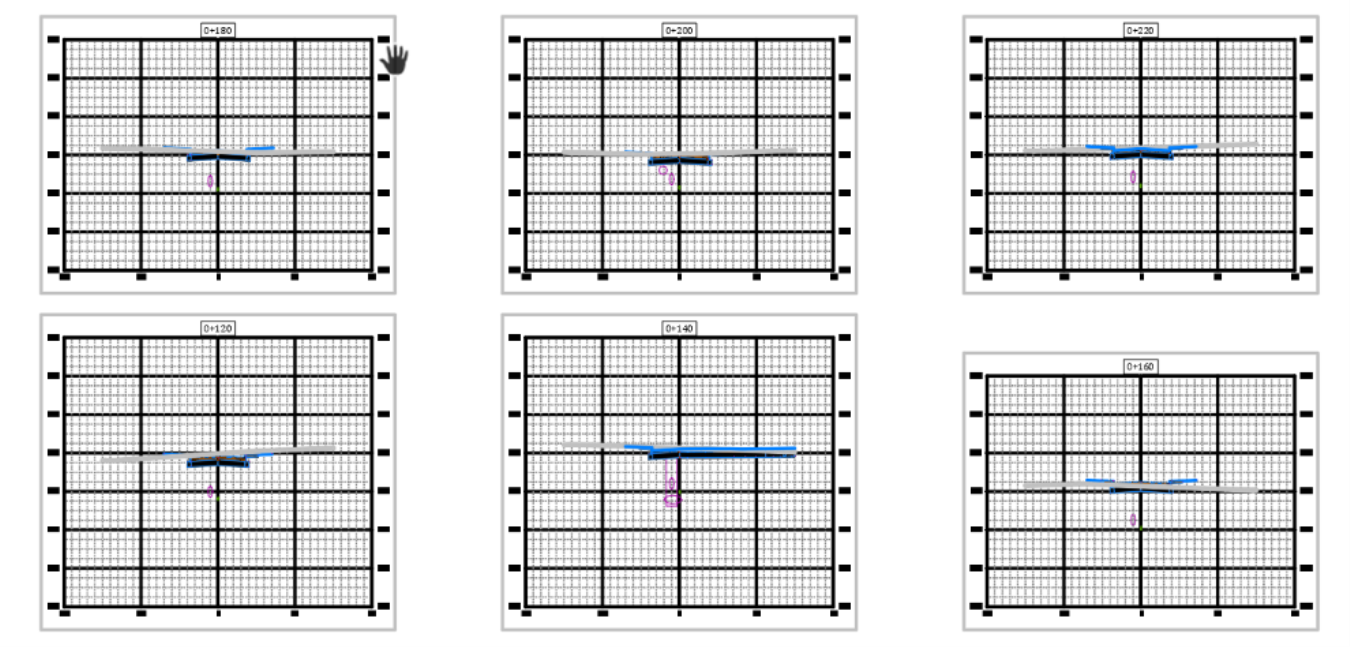
- Next, we are prompted at the command line to specify the origin of the section views.
![]()
- Click somewhere on the screen to create the section views. Here, we see an example of sections of the existing and final surfaces: