-
Get It
$19.99
$19.99Civil 3D Essentials Book and Practice Files
Civil 3D Parcel Free Form Create: A step by step tutorial guide
Introduction to Civil 3D Parcel Free Form Create
Firstly, what is the Civil 3D Parcel Free Form Create command? Well, let's find out in this online training course. Certainly, this step by step tutorial is a part of the Civil 3D essentials book and how-to manuals.
Working with Civil 3D?
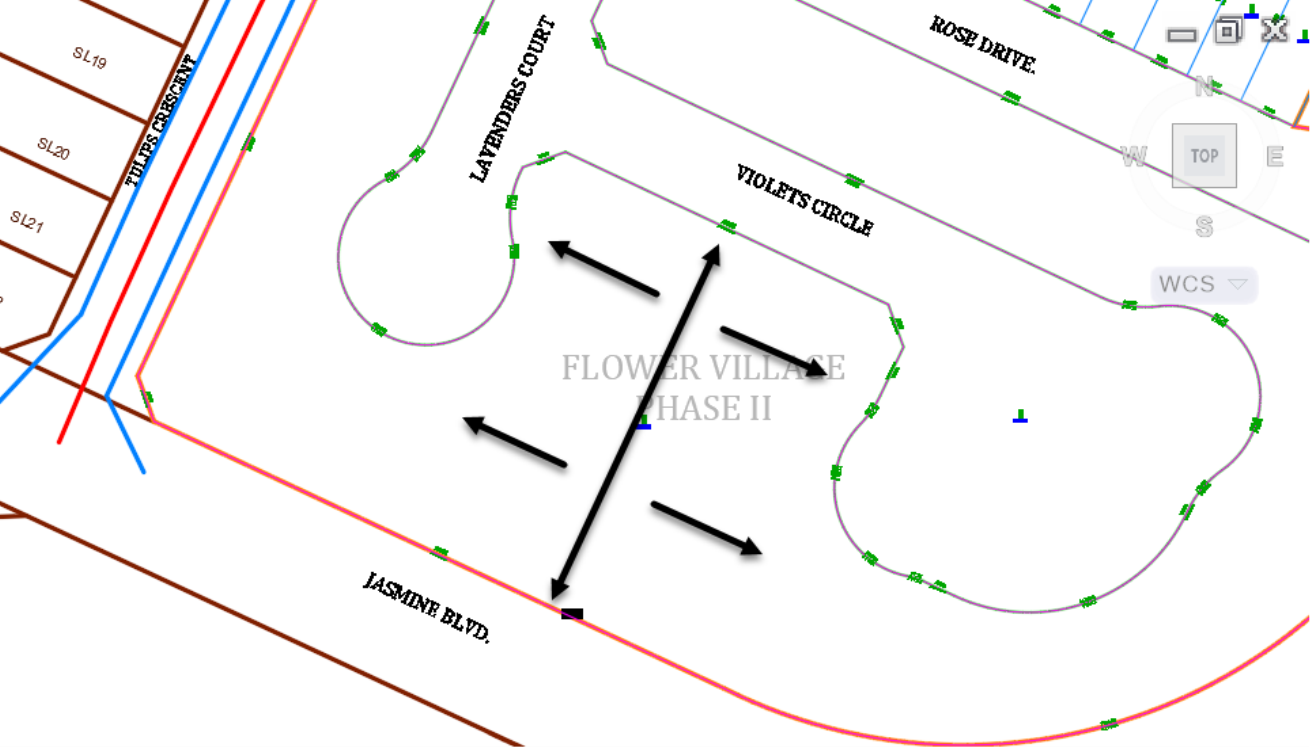
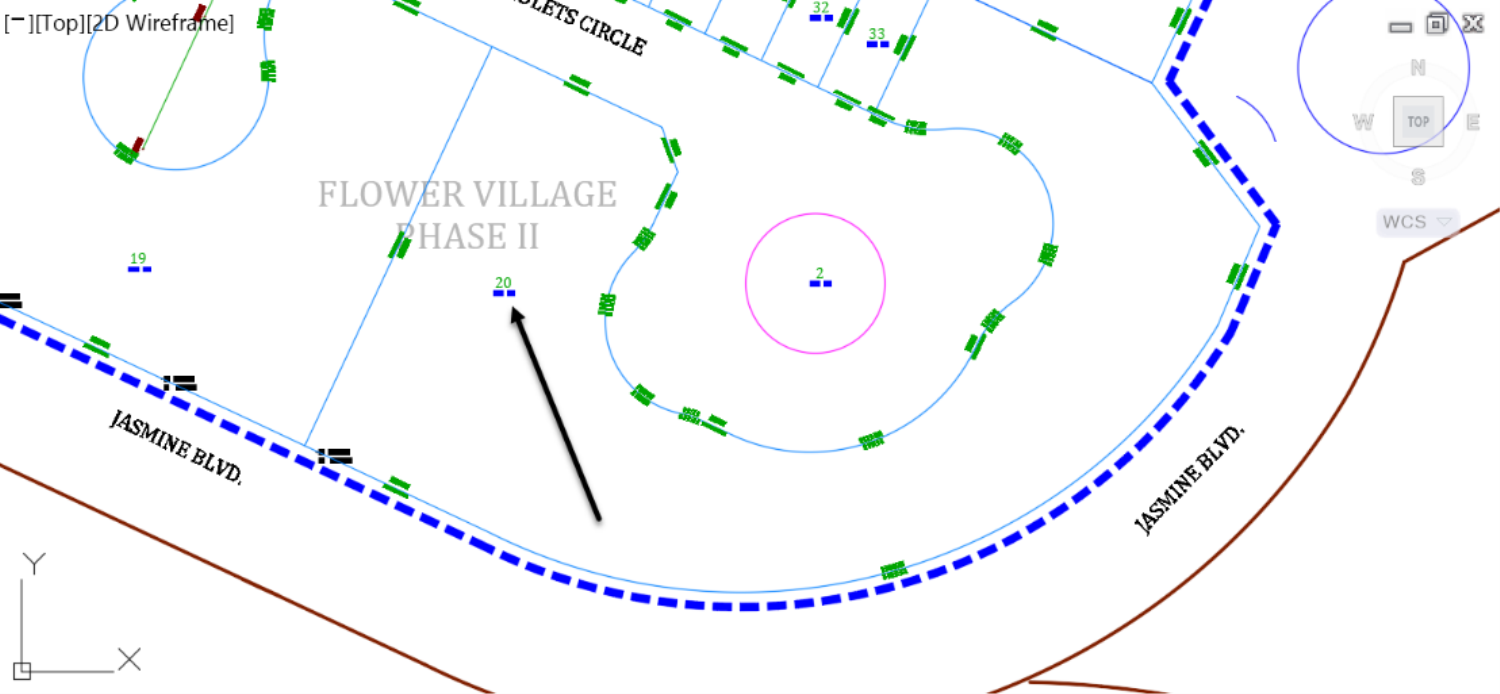
- Now let's introduce another common lot creation command, Free Form Create. Looking at the preliminary lot layout, we may need to split the cul-de-sac areas, to the south of Violets Circle. This will allow us to have back-to-back abutting lots. If not, we will have lots that are too deep to maximize our land.
- In case you have closed it, relaunch the Parcel Creation Tool. From there, launch the Free Form Create command.

- Use the same settings we previously had when creating the parcels along Rose Drive and click OK.

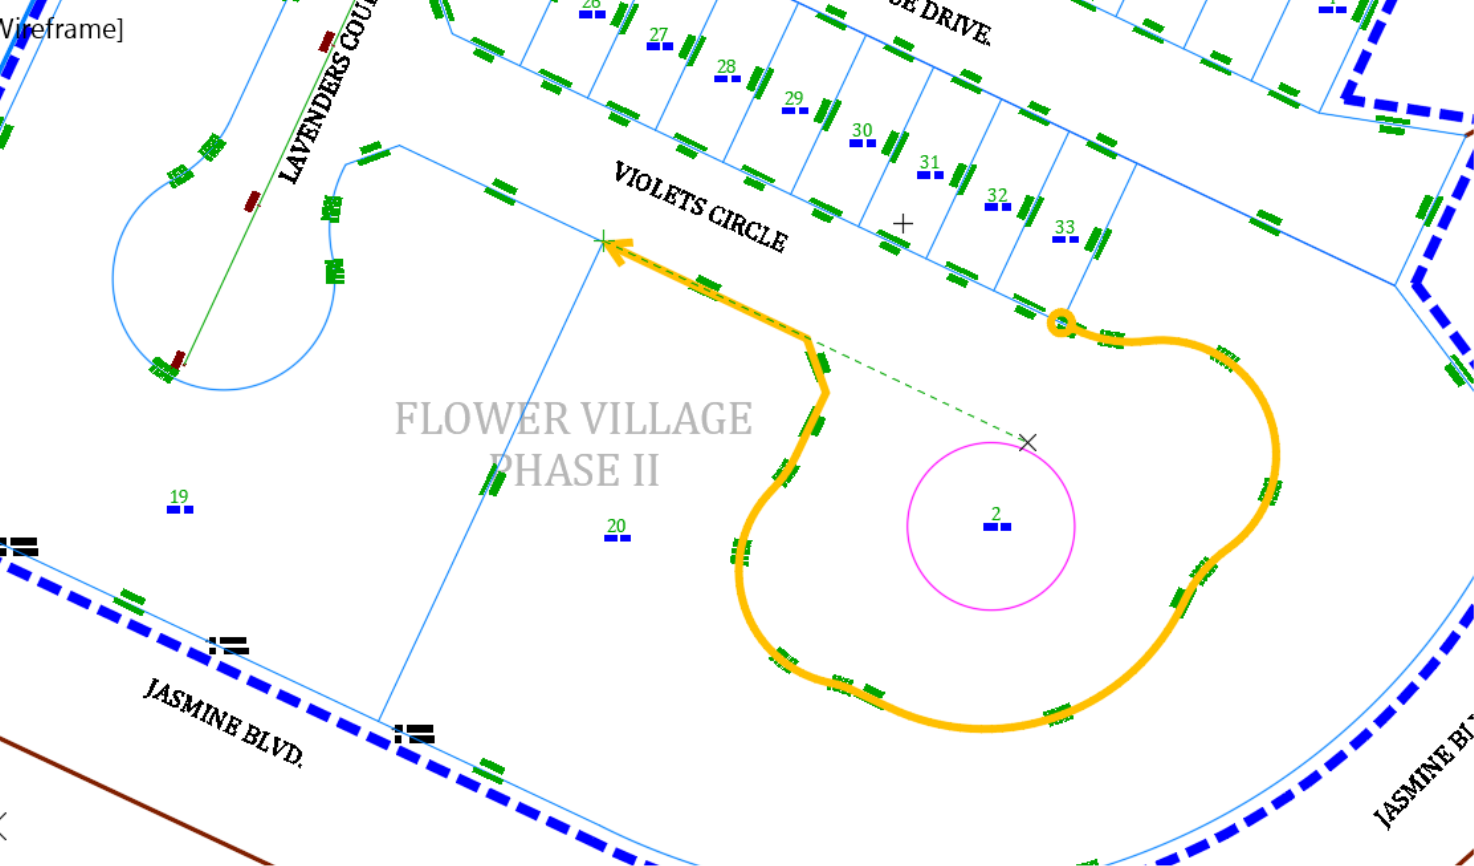
- Adjust the Swing line to be perpendicular to Violets Circle. Then bring your cursor slightly close to the southern right-of-way line.

- Now, either activate the mid-point object snap from Osnap settings or type Mid at the command line and press enter. This will position the swing line exactly at the middle of the south right-of-way line.
- To specify the second point, either activate the Perpendicular from the oSnap settings or simply type PER at the command line. Then move the cursor closer to the south property line.
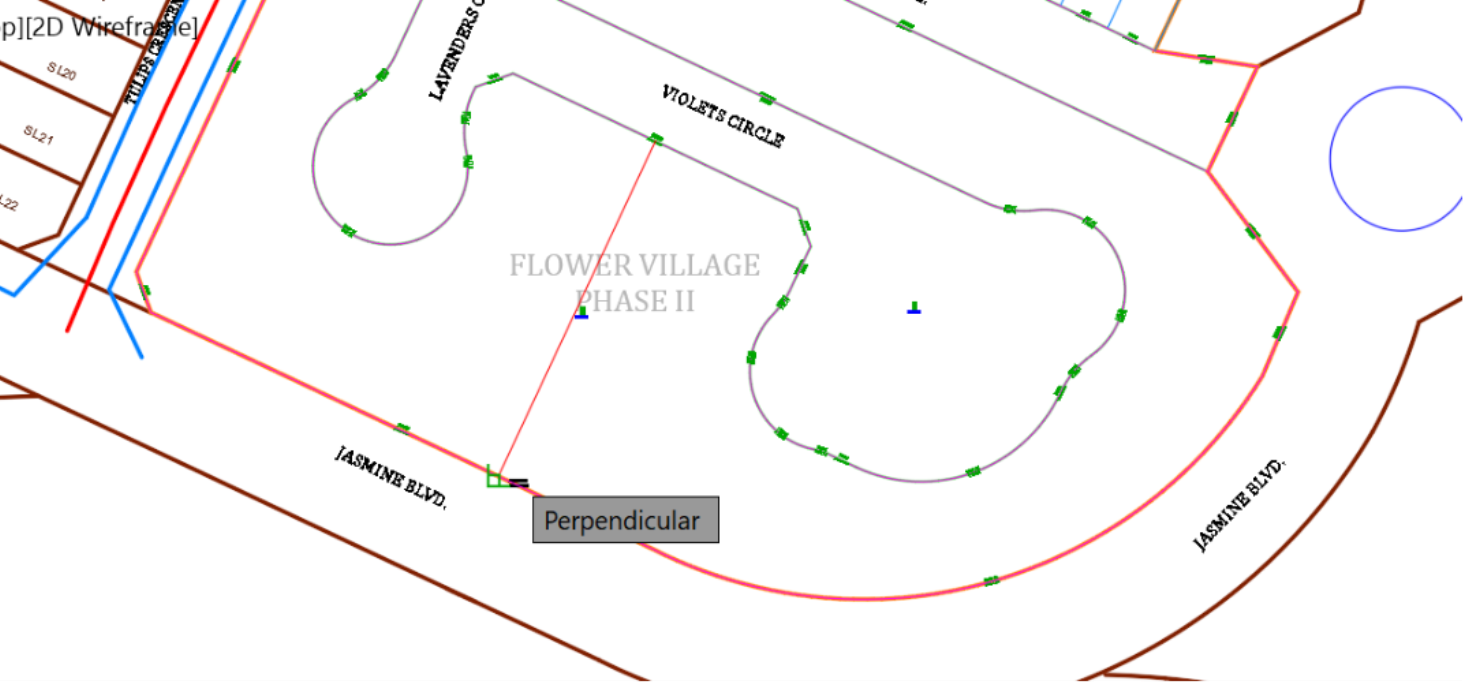
- When the perpendicular snap sign appears, click on the line. The new segment line is created.
- Press escape to exit the command.
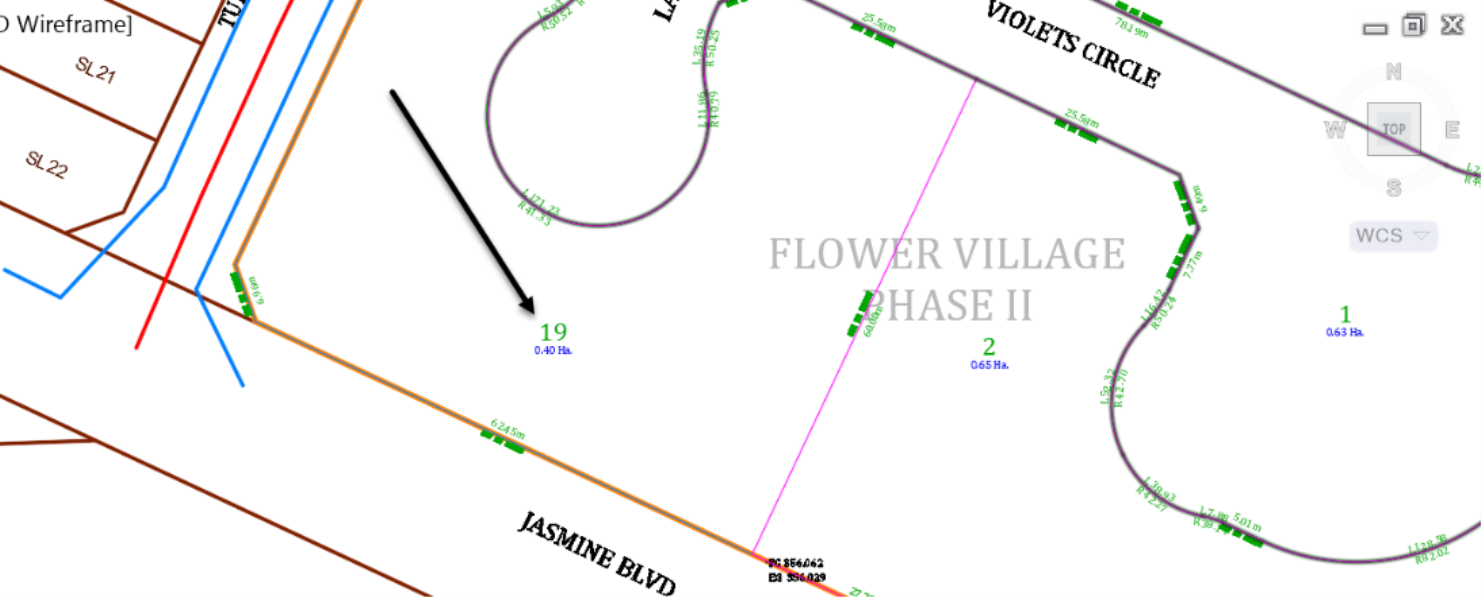
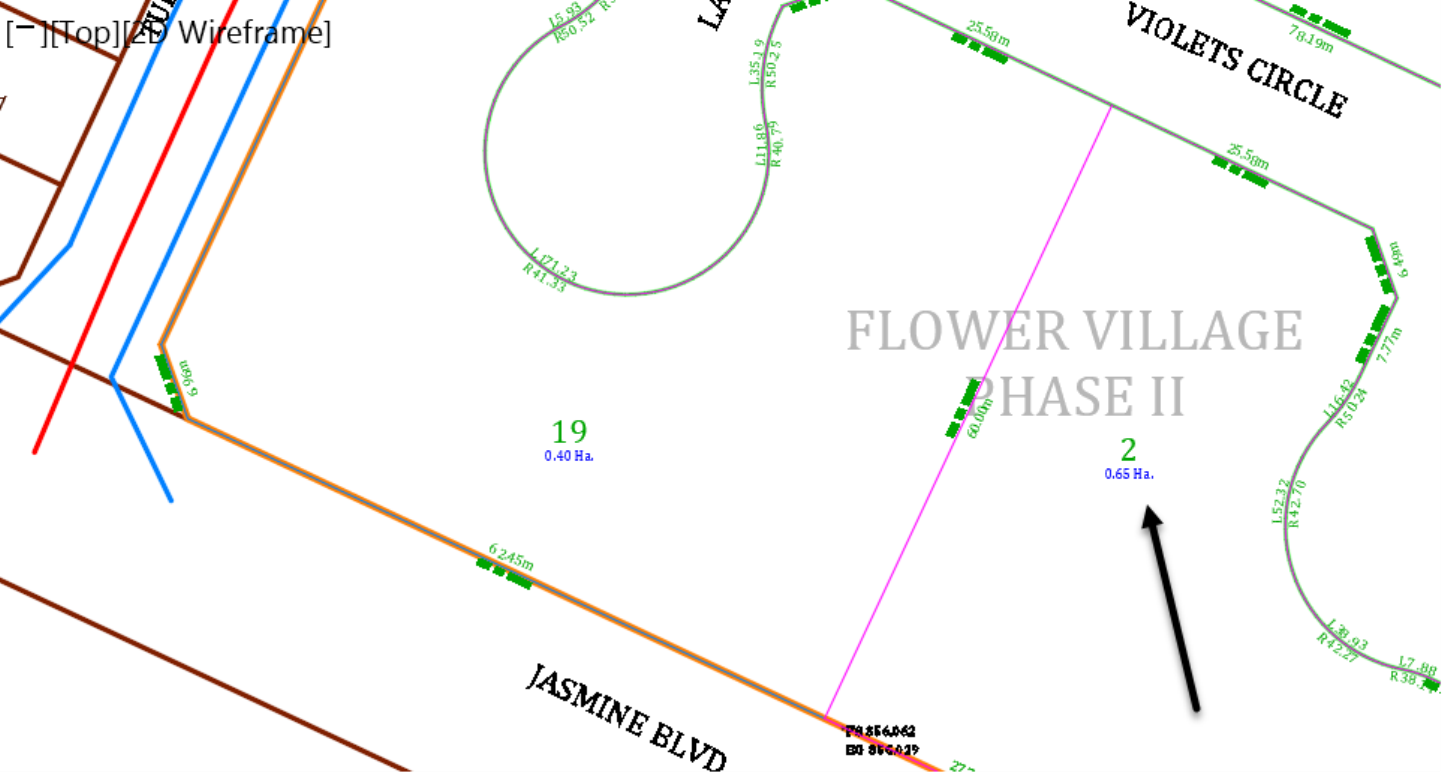
- If you zoom closer, you will notice that another parcel is added.
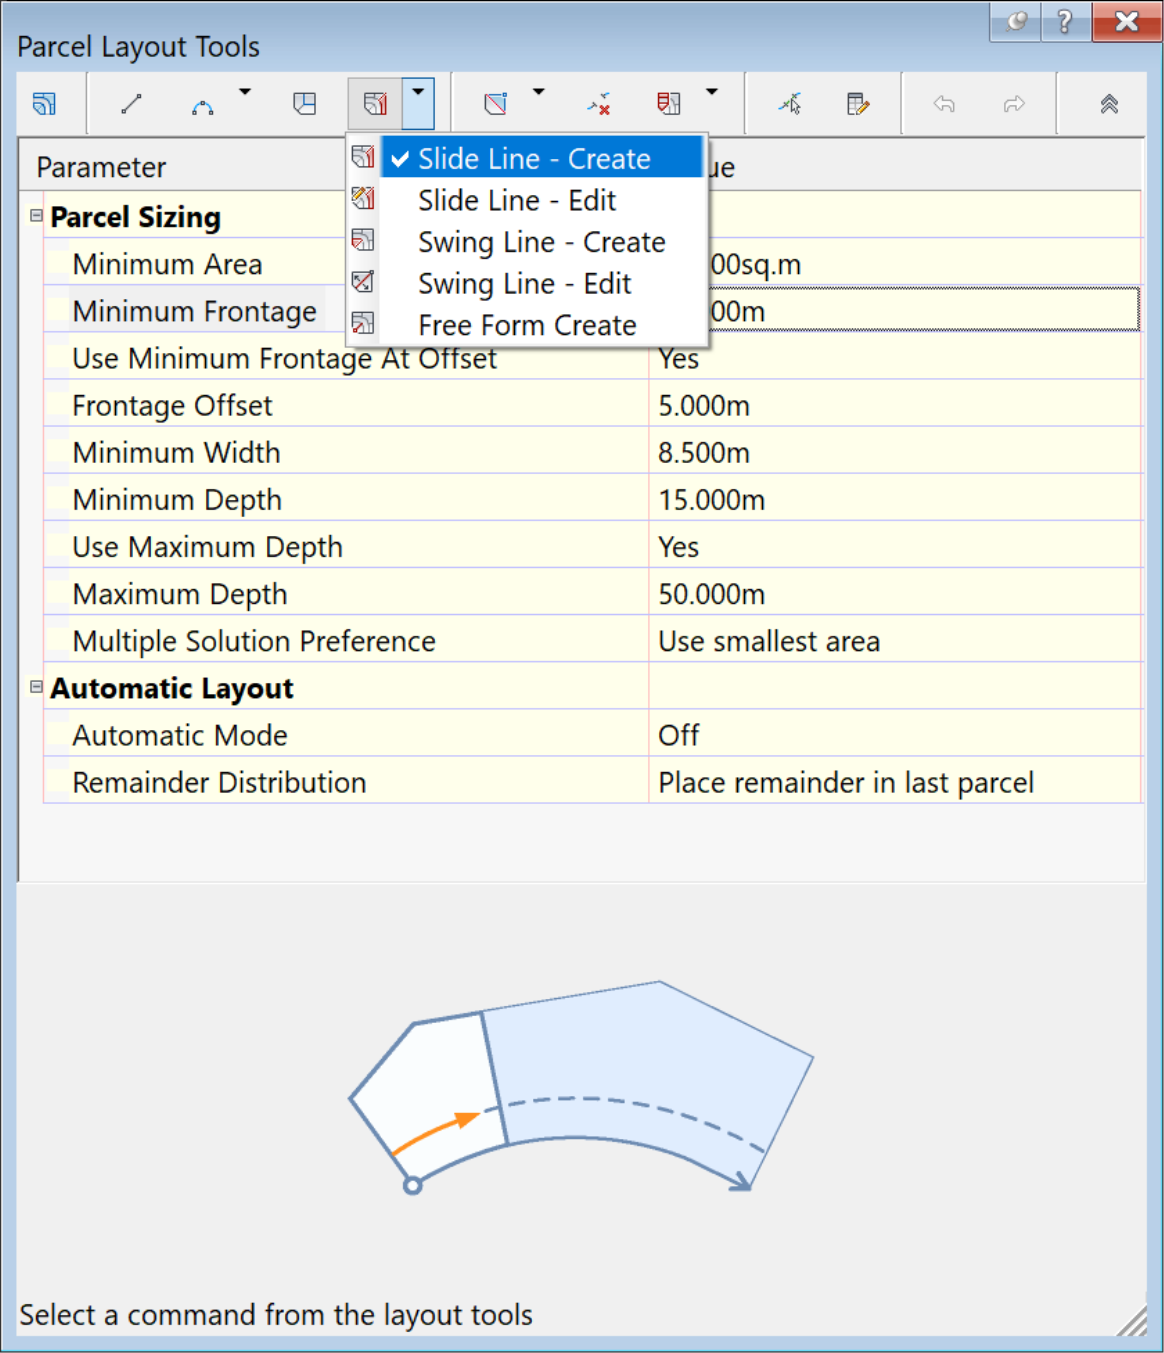
- Now re-open, the Parcel Layout Tools. We have our last settings unchanged and ready to be utilized again. Let's make a minor adjustment and change the Minimum Depth to 15m or 45ft, instead of 20m or 70ft as previously set.
- Next, launch the Slide Line – Create command.
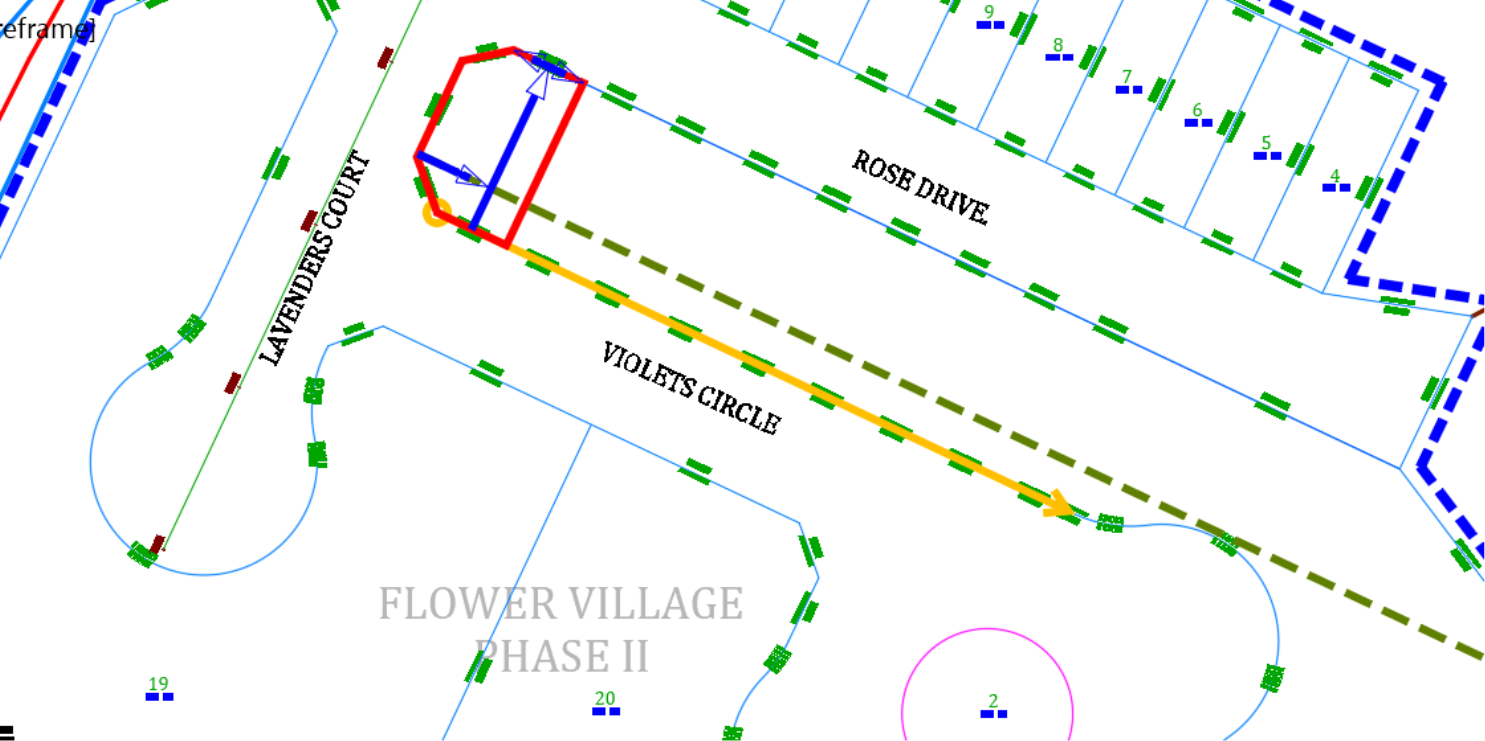
- For parcel to subdivide, click on parcel Lot 2.
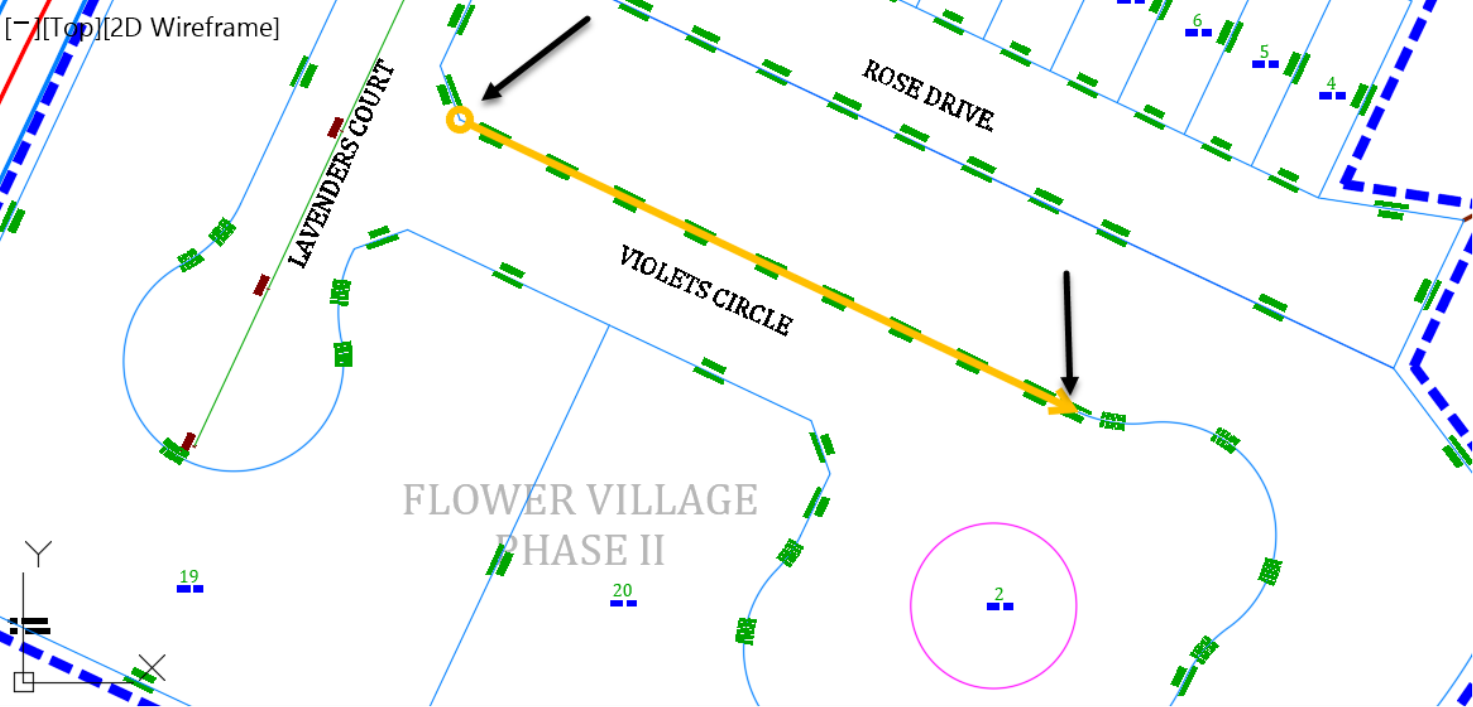
- For the start point, click on the northwest corner of Violets Circle.
- Next, run the frontage line along the Violets Circle right-of-way, from the top left corner to the start of the cul-de-sac.
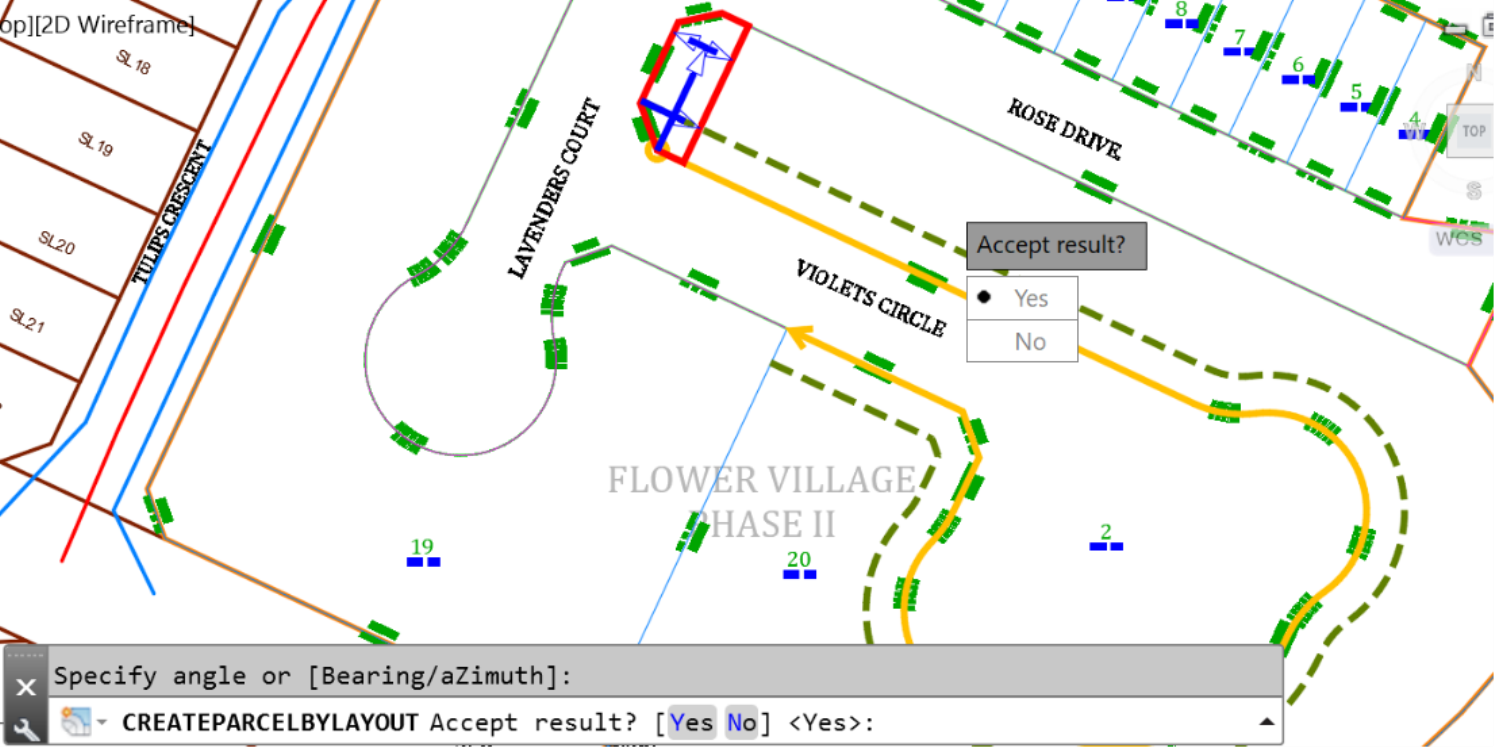
- Press enter to accept a 90-degree default angle.
- When prompted to accept the result, keep pressing Enter to accept.

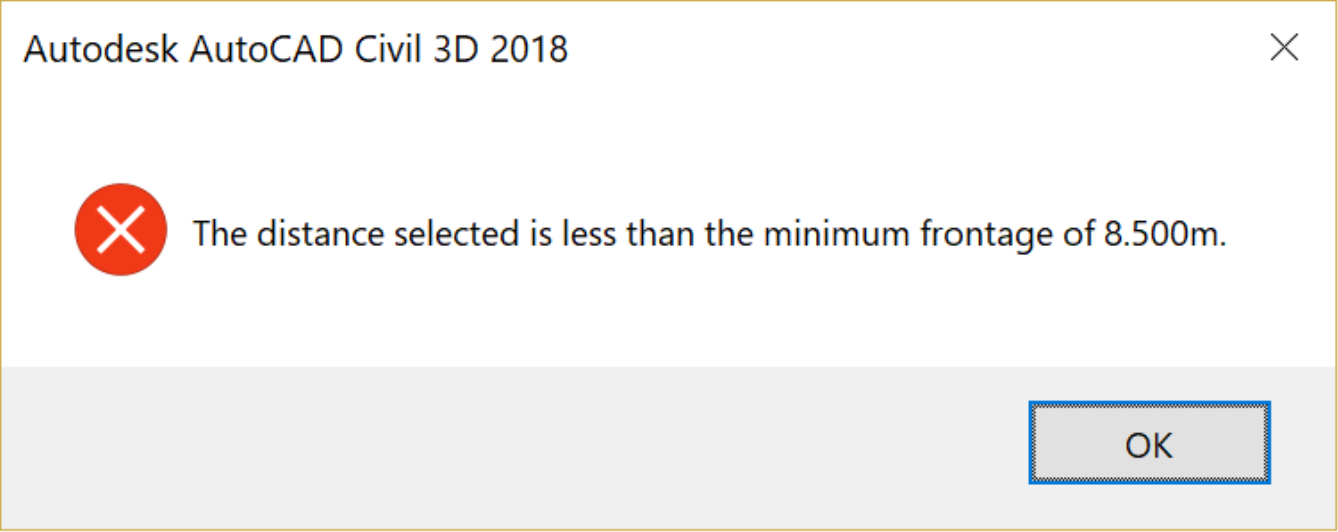
- When you have less than 8.5m or 25ft of frontage, you will receive a warning. If that happens, click OK to end the parcel creation and exit the current command.
- Now, we need to subdivide the cul-de-sac area. We want to create a few high-end single-family units. So, we will make the lot a little wider and bigger overall. To do this, we need to adjust our parameters. Return to the parcel creation tools or reopen it, if it's closed. Now, change the minimum width to 20m or 65ft, and the depth to 15m or 50ft. Then, run the slide line – create command
- Accept the previous settings for parcel creation.
- When prompted to select the parcel to be subdivided, select the big parcel around the cul-de-sac.
- A new parcel is created. When you are prompted for angle, press Enter to accept perpendicular lot segments.
- Then,
- click at the start of the cul-de-sac, where we ended the previous lots before changing the parameters,
-
next, click at the end of the parcel to be subdivided.
- Press enter to accept the default 90-degree angle
- Keep pressing Enter all the way, until the last parcel is created.
