-
Get It
$19.99
$19.99Civil 3D Essentials Book and Practice Files
Civil 3D Pipe Parts List: A step by step tutorial guide
Introduction to Civil 3D Pipe Parts List
Firstly, what is a Civil 3D Pipe Parts List? Well, let's find out in this online training course. Certainly, this step by step tutorial is a part of the Civil 3D essentials book and how-to manuals.
Working with Civil 3D Pipe Parts List
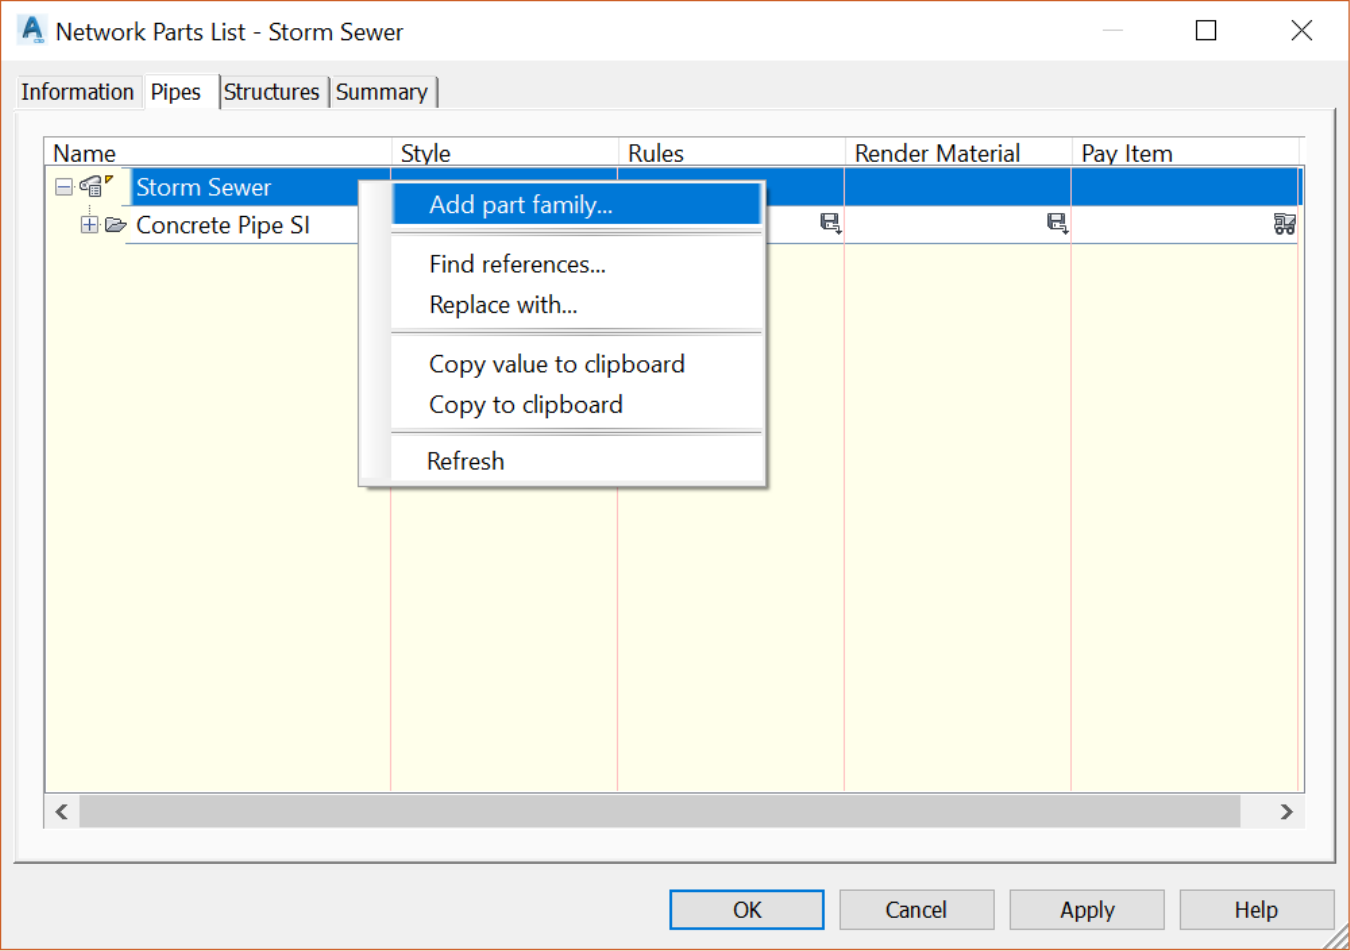
The final “table setup item” is to set the Parts List for the network. For example, we need to decide the different pipe or manhole materials, shapes and diameters that we will use in the project.
To specify a Part List,
- Switch to the Settings tab of the prospector.
- Browse to the Pipe Network section.
- Select Storm Sewer, right-click and choose Edit. Here, we can create, delete or modify existing part lists.

- Activate the Pipes tab. Collapse the Concrete Pipe list. In this project, we will be using HDPE pipes. So right-click on Storm Sewer and Add part family.
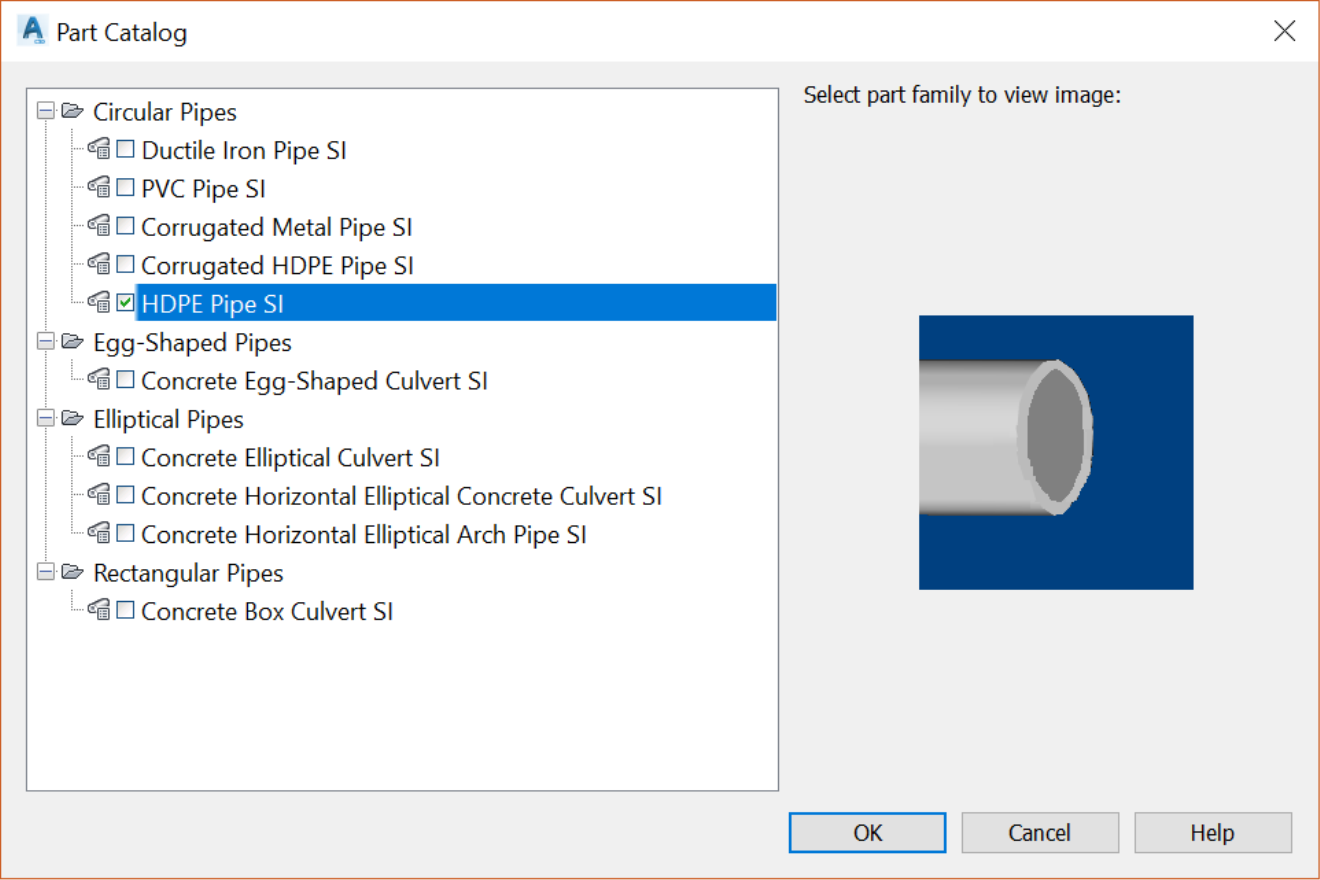
- In the Part Catalog, check HDPE Pipe and click OK.
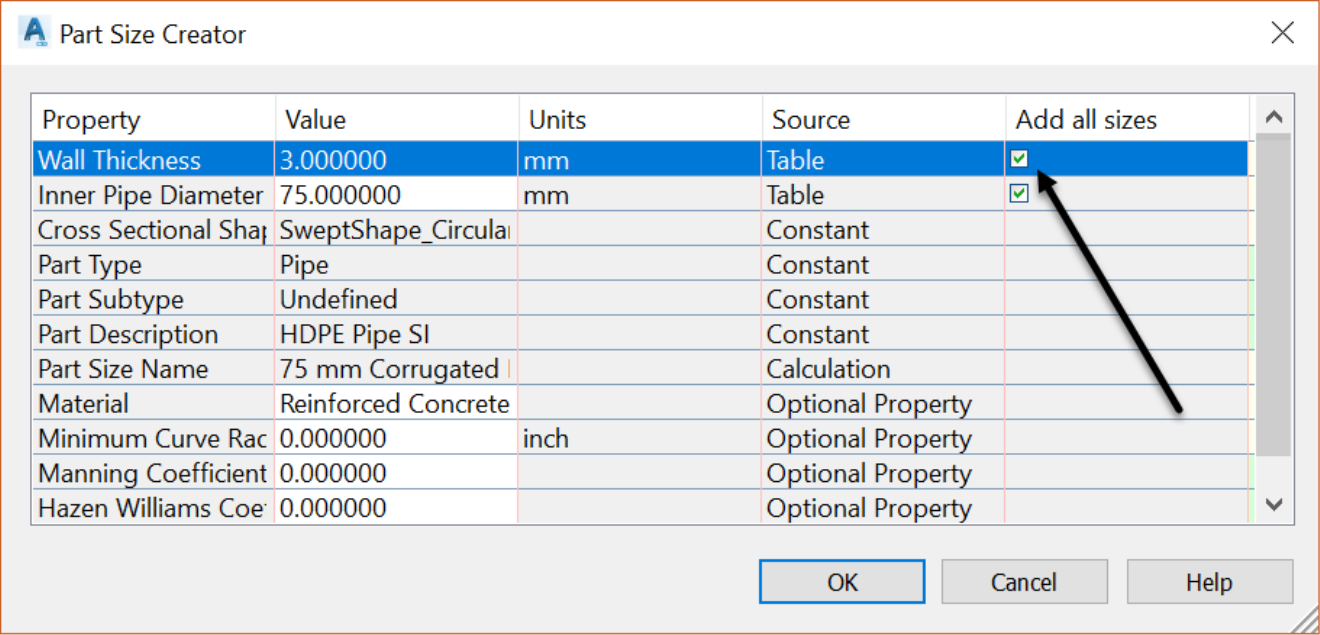
- Now, select the new family we have just added and right-click and add part size.

- To simplify things, even though we will not use all of them, let's go ahead and add all sizes.
- We can do similar operations on the Structures tab by adding different sort of structures and sizes. For now, click on OK and close the window.