-
Get It
$19.99
$19.99Civil 3D Essentials Book and Practice Files
Civil 3D Profile Label Styles: A step by step tutorial guide
Introduction to Civil 3D Profile Label Styles
Firstly, what is a Civil 3D Profile Label Styles? Well, let's find out in this online training course. Certainly, this step by step tutorial is a part of the Civil 3D essentials book and how-to manuals.
Working with Civil 3D Profile Label Styles?
When creating profiles, we have the option to create label styles for the profiles. If for some reason we have not attached labels to the profile, we can still add them later if needed.
Since we already added ours, let's remove them and show how to create them had they not been added at the profile creation stage.
- To remove the profile labels, right-click on the profile line and select Edit Labels.

- Click on the X sign as many times as necessary to delete all the labels present.

- When you are done, the Profile Labels window should look completely blank.

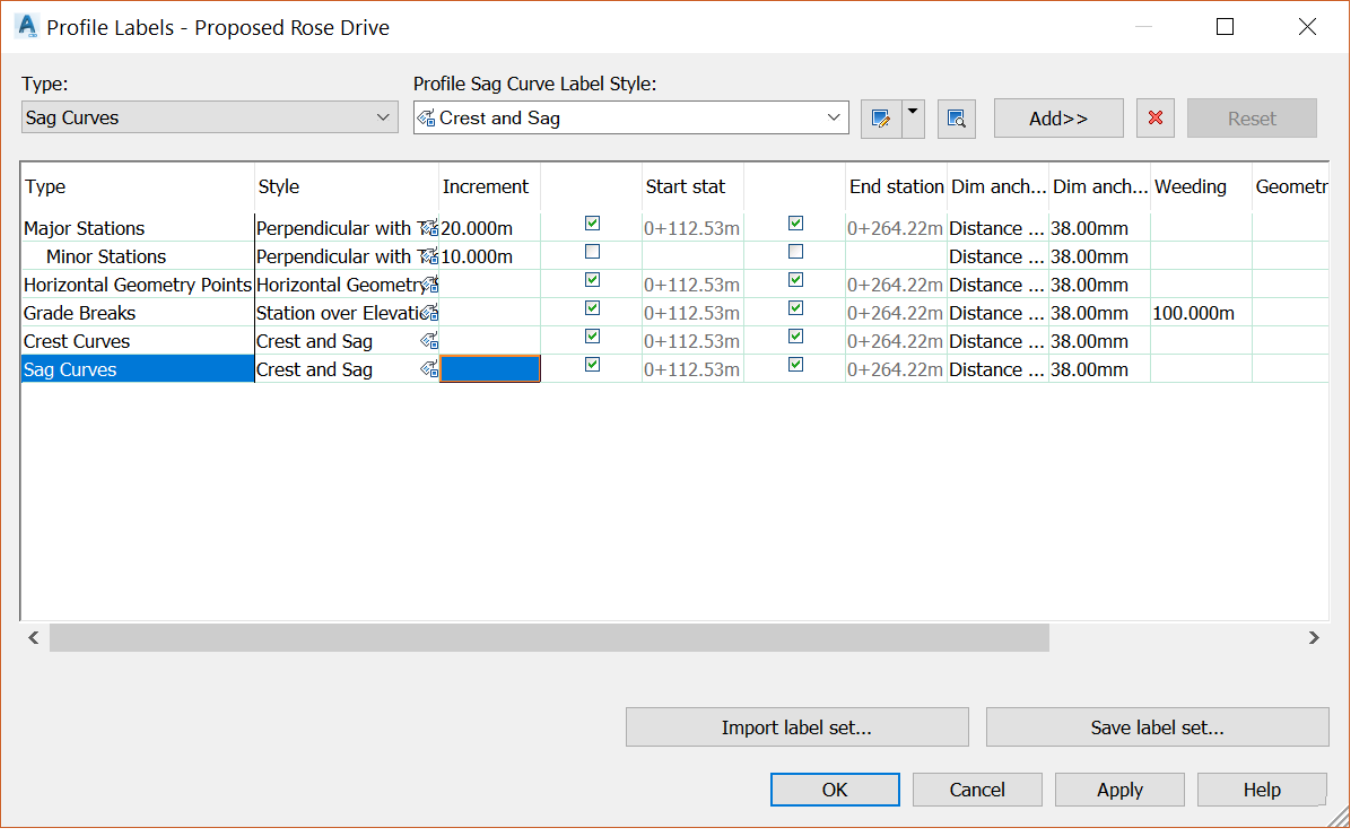
- Now, in the Type drop-down box, we can specify the type of label to add to the label set. Once we pick a type of label, we can later define the properties for the label style. These properties vary depending on the type of label. We may have properties like stations, geometry points, lines, grade breaks, and vertical curves.

- Let's go ahead and setaMajor Station at every 20m or 50ft increment, minor stations at every 10m or 25ft. Let's also add labels at horizontal geometry points, grade breaks and curves.
- If you are happy with your label set setup, you can even save it and use it on future profiles. To do that, simply click on Save Label Set.

-
Give it a name and click OK.

- Click OK again to exit the Profile Labels window.
- When you are done, you should have a profile view and profile labels that look as shown.
