-
Get It
$19.99
$19.99Civil 3D Essentials Book and Practice Files
Civil 3D Site: A step by step tutorial guide
Introduction to Civil 3D Site
Firstly, what is a Civil 3D Site? Well, let's find out in this online training course. Certainly, this step by step tutorial is a part of the Civil 3D essentials book and how-to manuals.
Working with a Civil 3D Site?
- Start by opening the 06.01-Parcels dwg file in Lesson 06 practice folder.
- Next, we need to create a Site. Before going any further, we need to talk a little bit about Sites as there is quite a bit of misconception on Sites. Some users, even certain long-term ones, use the term Site literally. It is considered a place where we can categorize construction sites, jobs, or phases of a bigger project. While you may be able to use them for that, they are created for an entirely different concept. In Civil 3D, Sites are used to manage objects with a common topology. GIS professionals are more versed in the notion of topology. In a Site, entities such as parcels, alignments, gradings, and feature lines can share a topology. The Oxford dictionary defines a topology in mathematics as: "The study of geometrical properties and spatial relations unaffected by the continuous change of shape or size of figures". This is a fancy definition to say that objects in topology, or a site, in this case, interact with each other. Examples of sites include soil maps, watersheds, or subdivisions. Sites can geographically overlay each other.
- Case in point, in a subdivision with roads and lots, we can include parcels and right-of-way alignments in the same Site. The right-of-way parcels are then automatically created using the alignments. However, parcels would never be affected by an alignment if they don't belong to the same site, even if they overlap. The most common cause of topology in Civil 3D is grading with feature lines. When you are creating a grading, say for a pond, your top of pond and grading group need to be on the same site. That will allow you to create a bottom of the pond from the top feature lines. In summary, feature lines need to share a topology to interact with each other for grading purposes. Thus, they can share an elevation at crossing points. That means they need to be in the same site. Now that this has been cleared up, we can start creating the parcels.
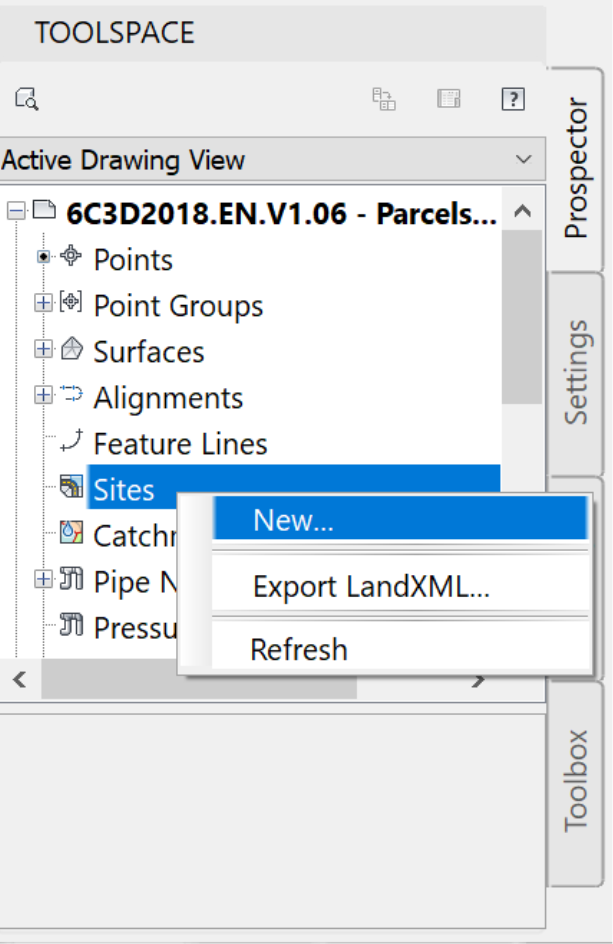
- Let's create a Site. To create one, in the prospector, right-click on Sites, then New.
- In the new dialog box, assign a name and a description, for instance, Proposed Flowers Subdivision parcels and grading.
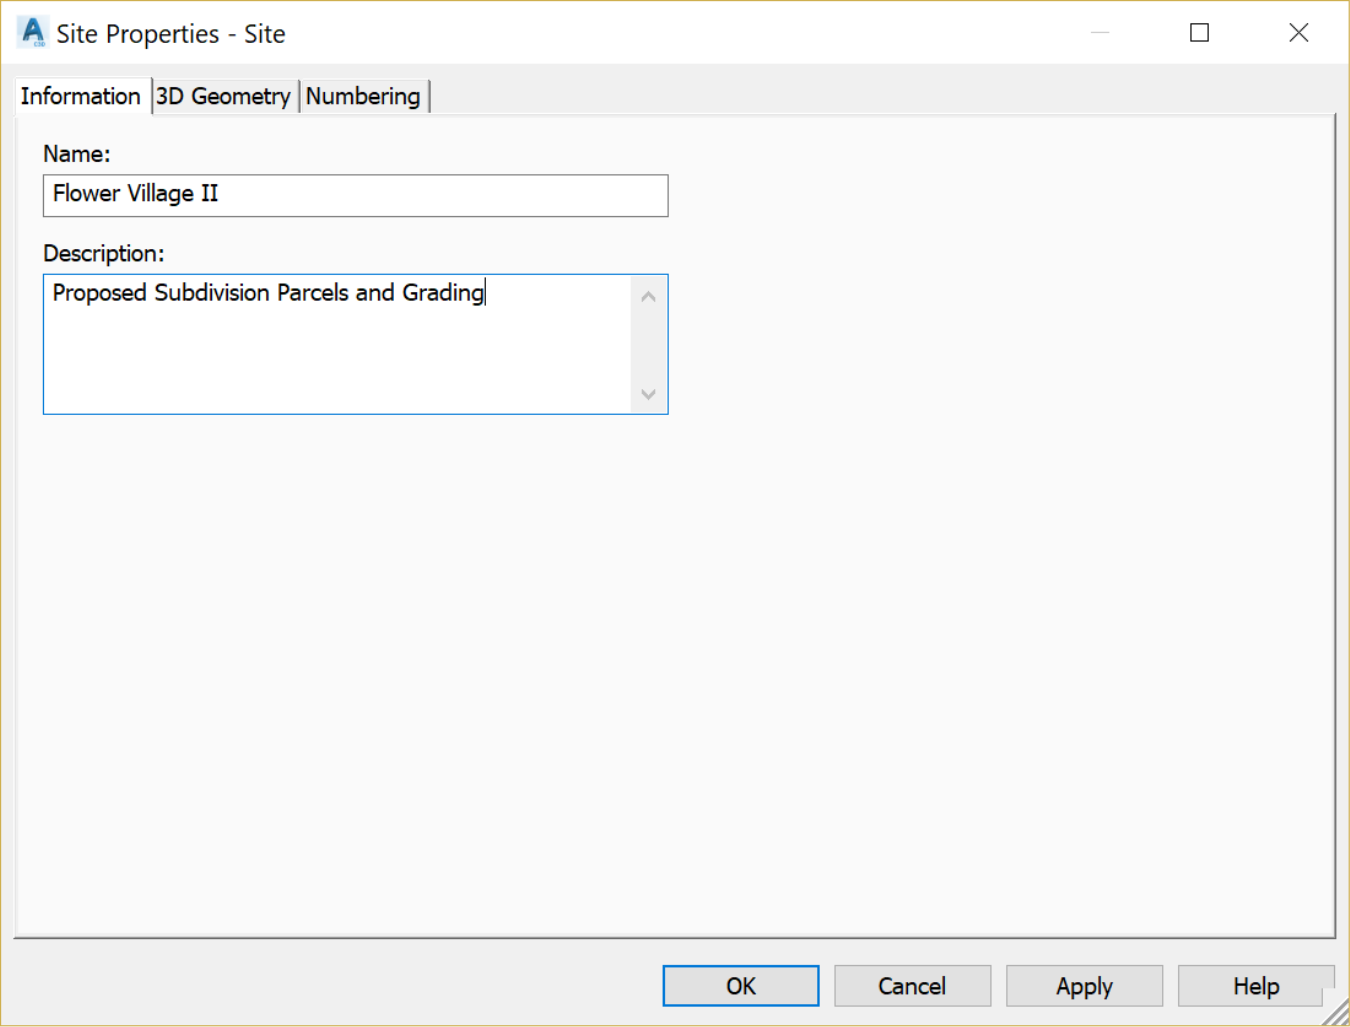
- Click OK