-
Get It
$19.99
$19.99Civil 3D Essentials Book and Practice Files
User Tutorial Guide: All about Defining Civil 3D Surface by Point Groups
Introduction to Civil 3D Surface by Point Groups
Firstly, what is a Civil 3D Surface by Point Groups? Well, let's find out in this online training course. Certainly, this step by step tutorial is a part of the Civil 3D essentials book and how-to manuals.
Defining Civil 3D Surface by Point Groups?
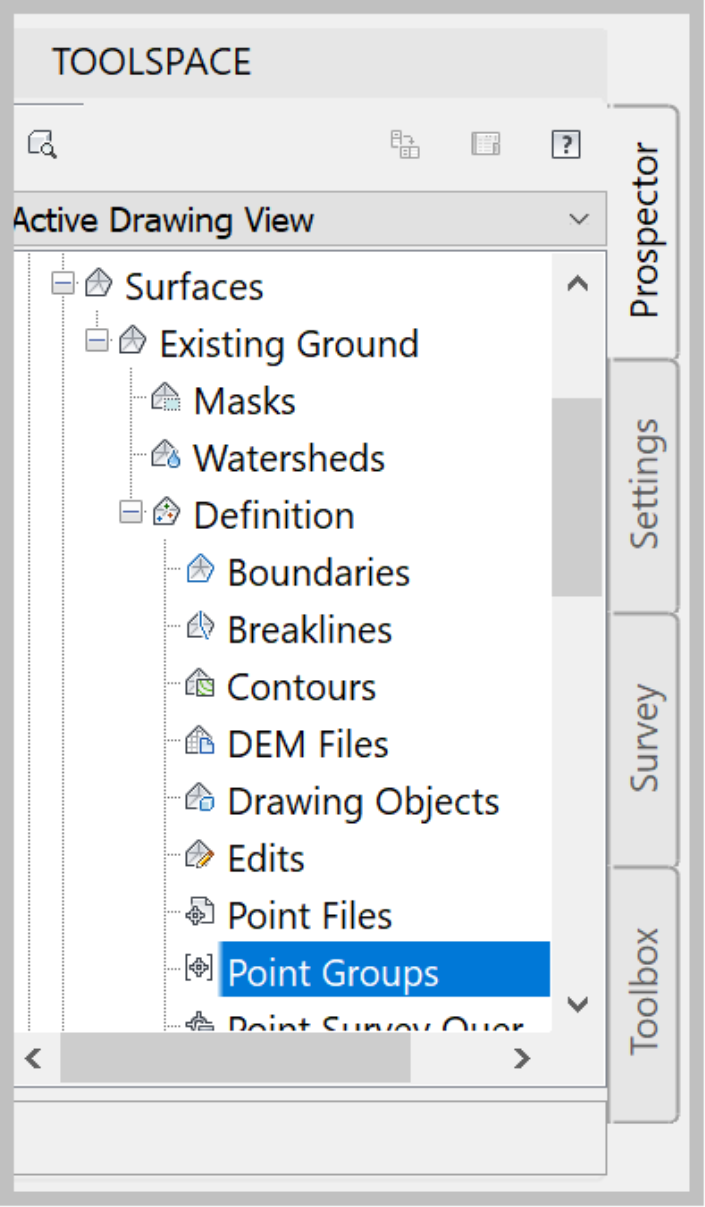
- Firstly, open the Surface Definition section by clicking the "+” sign to the left of the surface.

- Secondly, scroll to the Point Group section.
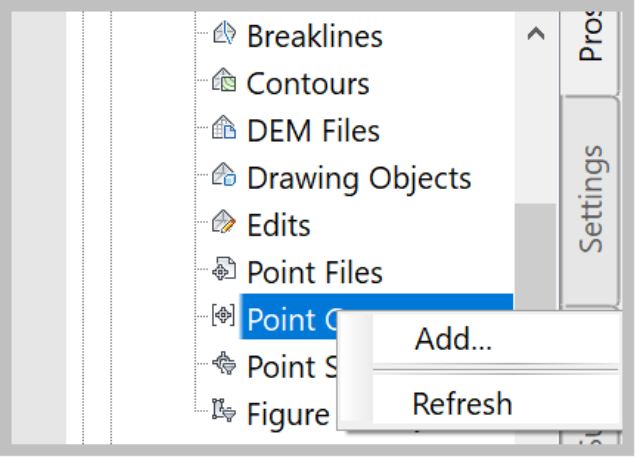
- Thirdly, right-click and select Add.
- Next, since we are creating a Surface by Point Groups for the existing ground, we are going to select the Existing Ground point group that we have created before.
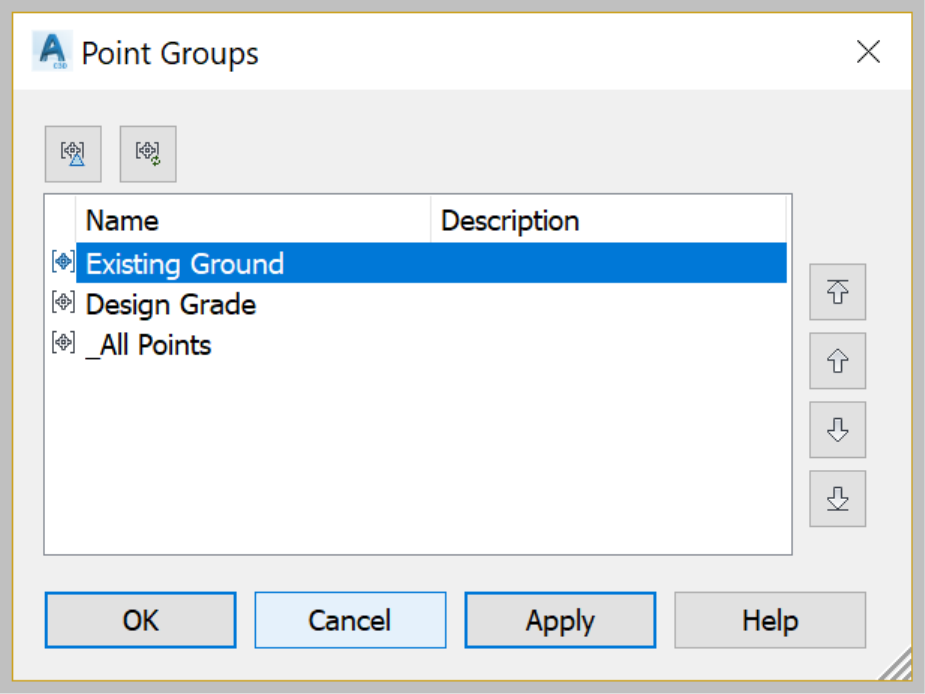
- Click on OK.
- The surface is now defined, using the existing ground point group.
- Now, we can quickly check a few statistics on the Surface by Point Groups. Just to make sure nothing abnormal happened during the process.
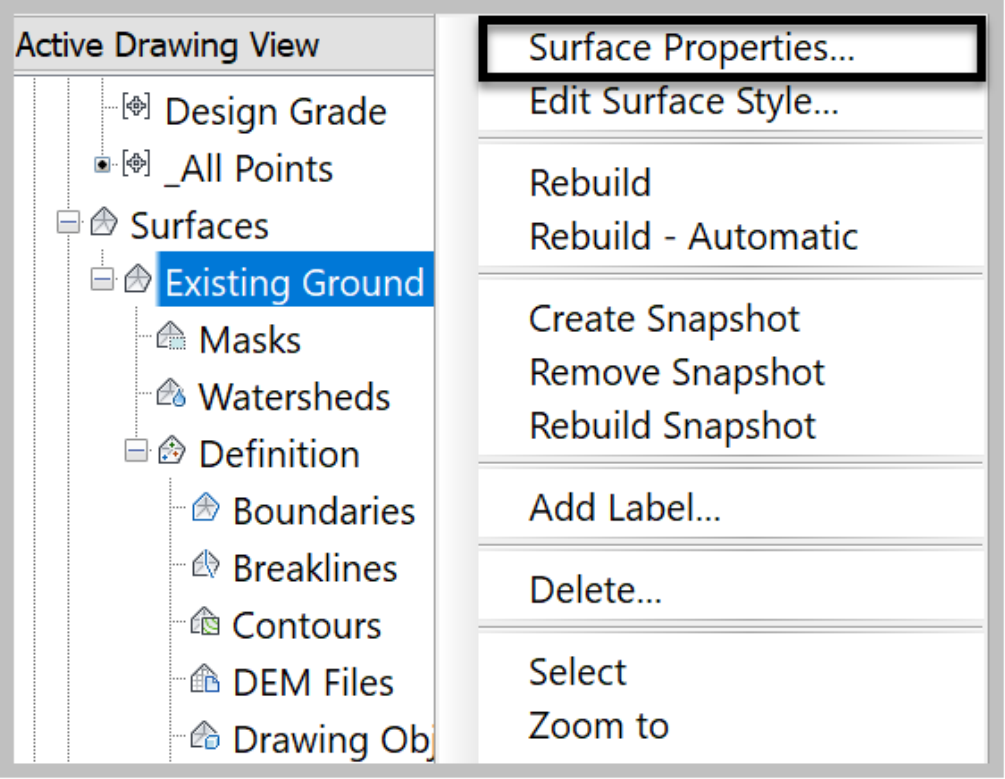
- To do that, select the surface in the prospector, right-click and select Surface Properties
- Activate the Statistics tab and expand the General section.
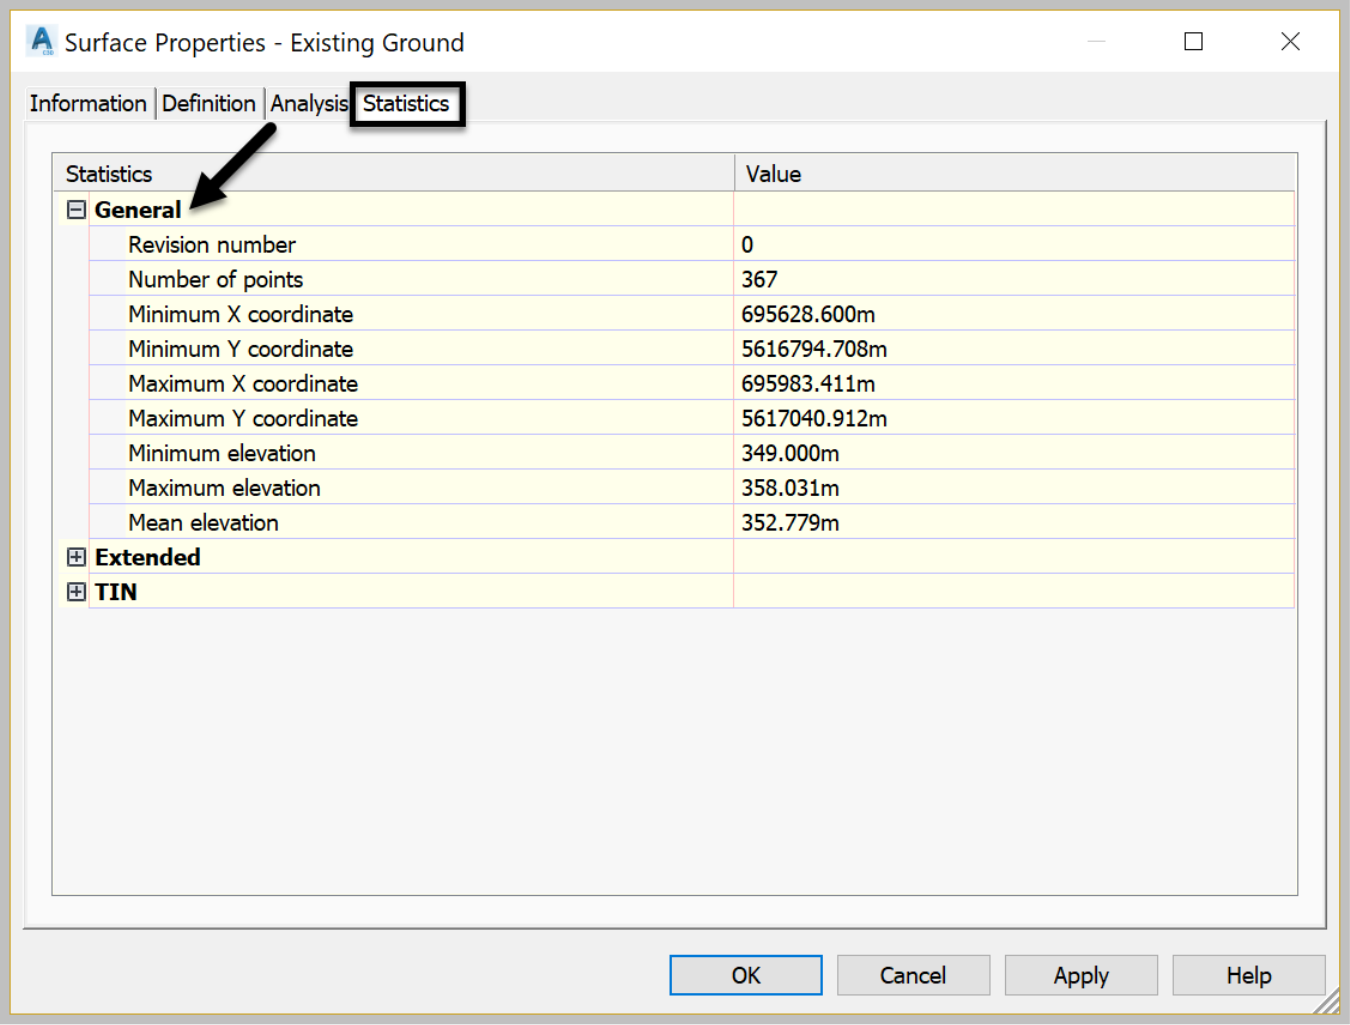
- For now, looking at the elevations, we are happy with the preliminary results. The elevations seem to be within the range of the survey data, the coordinates are reasonable, and the number of points is as expected.
- Click on OK to close the statistics windows and return to the drawing.
We have now seen one of the most commonly used methods to define a surface, Point Groups.
We will explore more options as we progress through this course.