-
Get It
$19.99
$19.99Civil 3D Essentials Book and Practice Files
User Tutorial Guide: All about Civil 3D Surface from Contours
Introduction to Civil 3D Surface from Contours
Firstly, what is a Civil 3D Surface from Contours? Well, let's find out in this online training course. Certainly, this step by step tutorial is a part of the Civil 3D essentials book and how-to manuals.
How to define a Civil 3D Surface from Contours?
Another option to define a surface is by contour data. Contours are available from government repositories, design software packages, photogrammetry, and other sources. If they are not created from a reliable field surveyed source, the data must be utilized with caution. Typically, using such data is a cost-effective way to perform a preliminary design or analysis. But, the final design should always rely on verifiable field-collected data, by a licensed surveyor.
Let's assume that we obtained the contour s data before the topographical survey. We are going to create a preliminary existing ground surface, just to learn how to create a surface from contours.
- Using the previous steps, create a surface and name it Prelim-EG. This will represent the existing surface created from preliminary contours data.
- At the Create Surface step, assign the Name, Style and Render Material.

- Click OK.
- Now let's turn on the contour layer to bring in the contours data.
- Bring up the layer management window by clicking on the layer manager button on the ribbon or by typing layer on the command line.
- Scroll down to the V-TOPO-CONT layer and turn it on.

- Then, close the Layer Properties Manager by clicking the X sign
 , at the top left. The contour information is now displayed.
 - Next, select one of the contours.
- Right-Click anywhere in the Drawing Area and click Select Similar.
- All contours are now selected. The Select Similar command is a very useful tool to select objects sharing the same properties (type, layers, colours, and so forth)
- Now that we have selected the contours, what we want to do is to use them to define a surface.
- To do that, go to the Prospector, scroll in the window until you find the Prelim-EG Surface.
- Open the surface definition tree and Click on the line that says Contours.
- Right-click and select Add.

- Fill out the next window with meaningful information in the Description box.
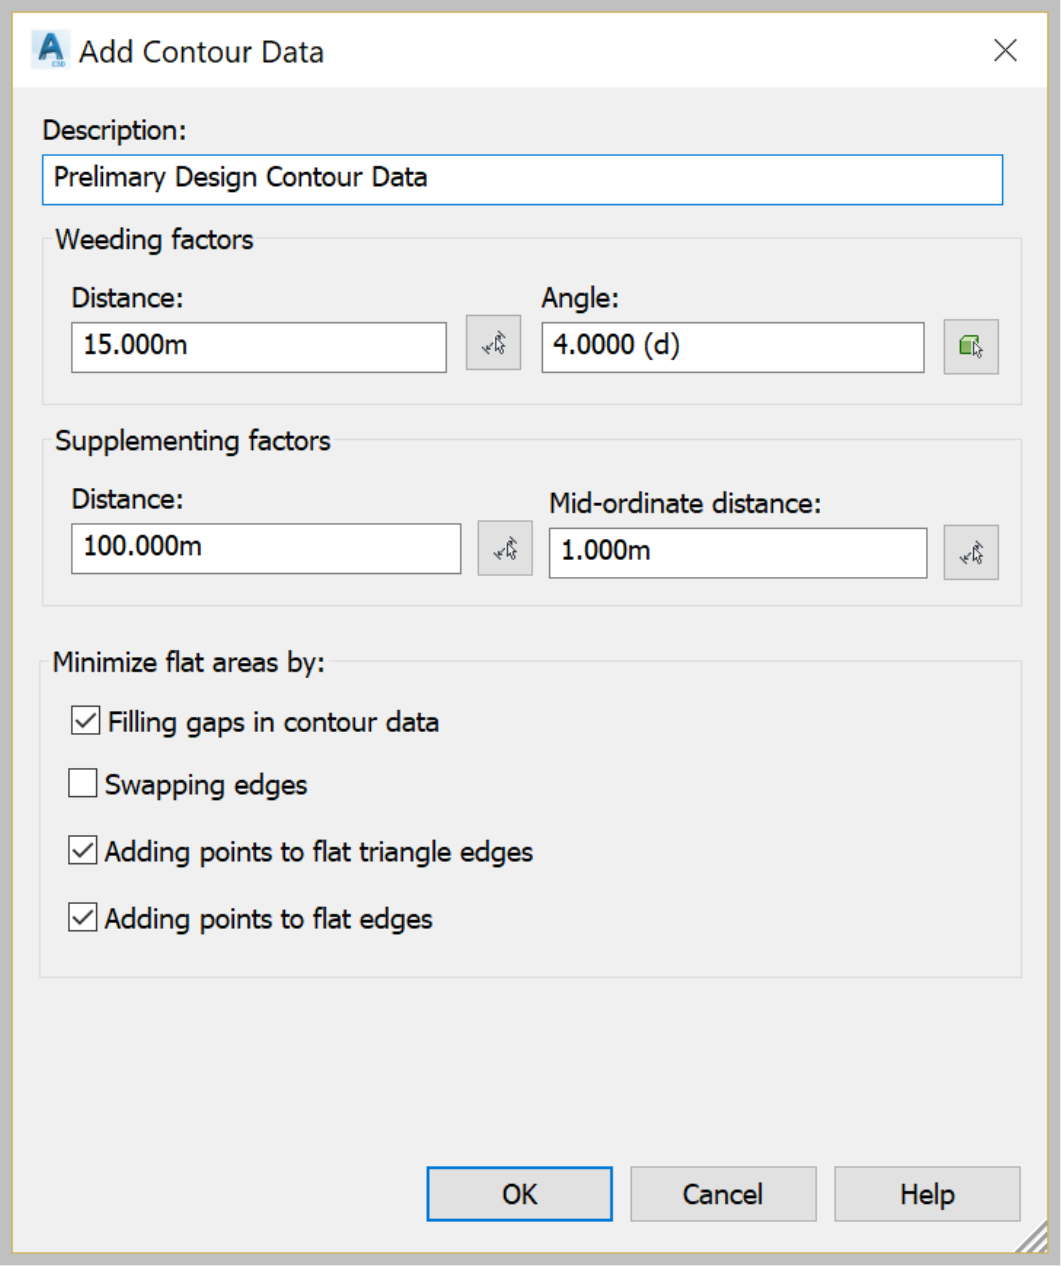
- When we create a surface, it's not always going to be perfect. Maybe we don’t have enough data, or the quality is simply not good enough. Thus, inaccuracies exist. Civil 3D represents these inaccuracies with flat areas. We can fix them by adding more data. For the time being, let's accept the default option in the Minimize Flat Areas By section and click on OK.

- Next, go back to the Layer Properties Manager windows and freeze the V-TOPO-CONT layer, since we don't need it anymore.
- The newly created Prelim-EG surface appears on the screen and is very close to the surveyed topo contours.
- Once the surface is created, we don’t need to show the contour lines anymore. Therefore, we need to go back to the layer manager and turn off the V-TOPO-CONT layer.