-
Get It
$19.99
$19.99Civil 3D Essentials Book and Practice Files
Civil 3D volumes, quantities and materials: A step by step tutorial guide
Introduction to Civil 3D Civil 3D volumes, quantities and materials
Firstly, what are Civil 3D volumes, quantities, and materials? Well, let's find out in this online training course. Certainly, this step by step tutorial is a part of the Civil 3D essentials book and how-to manuals.
Working with Civil 3D volumes, quantities and material lists
When a design is complete, we need to estimate material quantities for construction cost estimation.
The quantity of each of the components and their management on-site will impact the bottom line of the project. So, it’s in the designer’s best interest to provide an accurate quantity estimation. In addition, the operation, maintenance, and management of materials can also add a cost. For example, identifying cut and fill material locations along a road would enable better earthworks cost management. For instance, we can identify borrow and storage locations. Civil 3D provides tools to both estimate quantities and locate them, including asphalt, concrete, gravel base, subbase, earthworks, and more. This is done by using surfaces or subassembly structures.
- Open the 12.01-Volumes dwg file in the Lesson 12 practice folder.
- Activate the Analyze tab and run the Compute Material command.

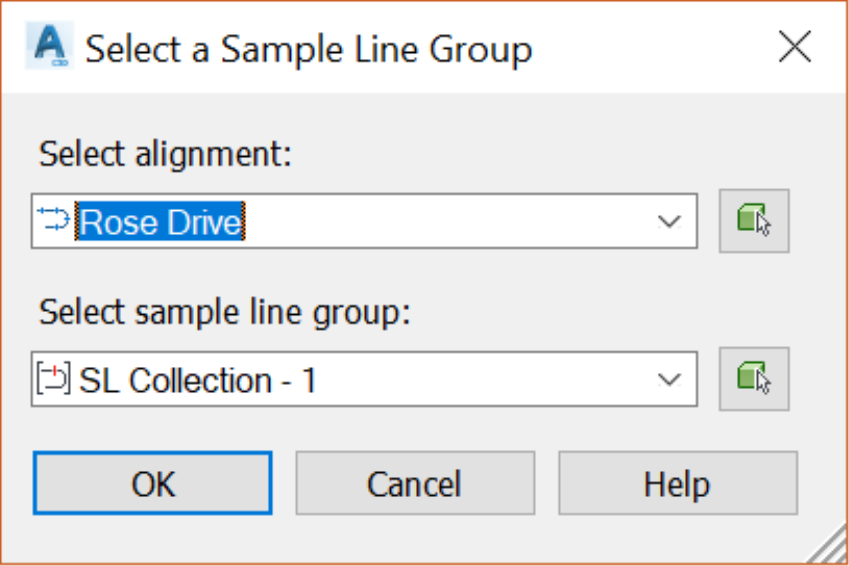
- In the Select Sample Line Group window, select the Rose Drive alignment and the associated sample line group, then click on OK.
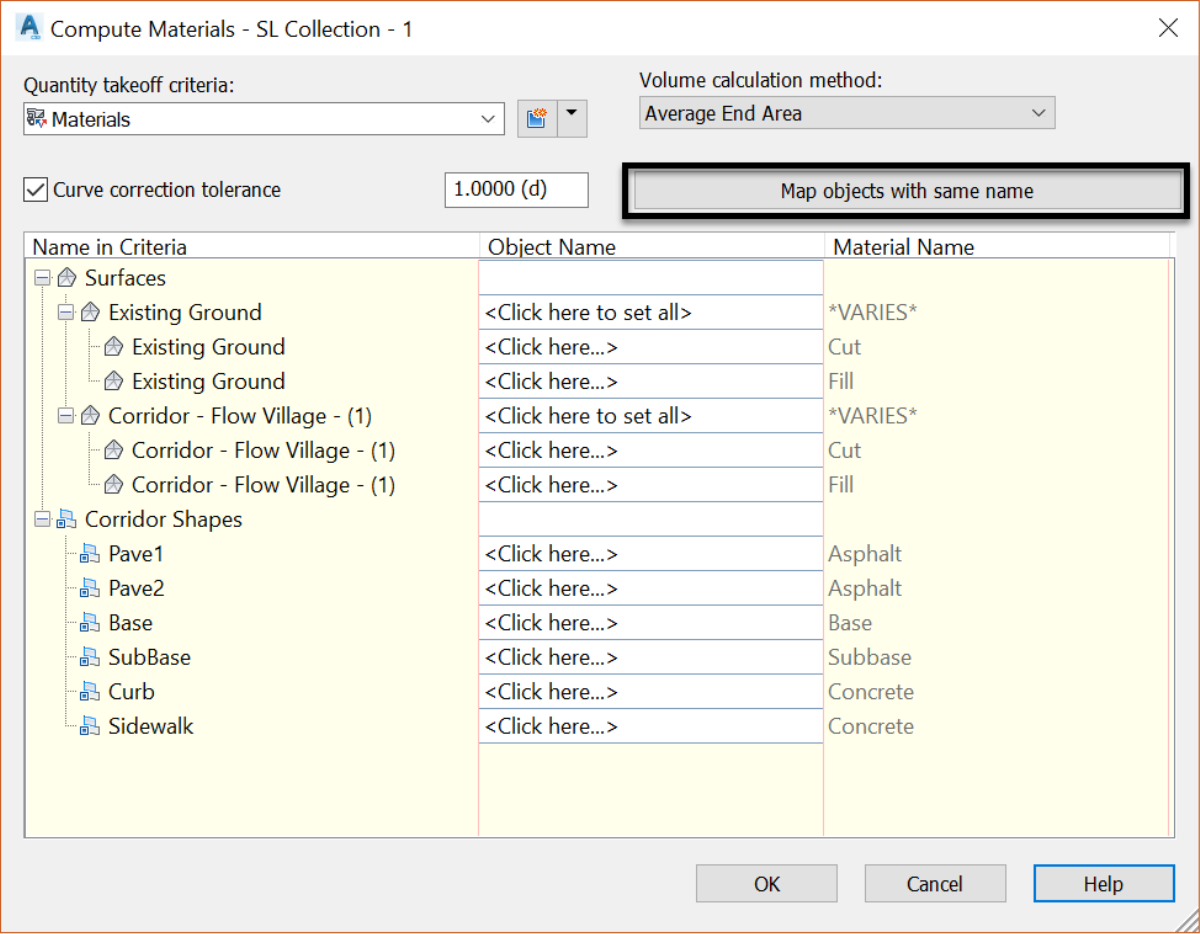
- In the Compute Material window, we are provided with a default material list called Cut and Fill, courtesy of our default template. However, let’s copy and modify it to suit our needs.

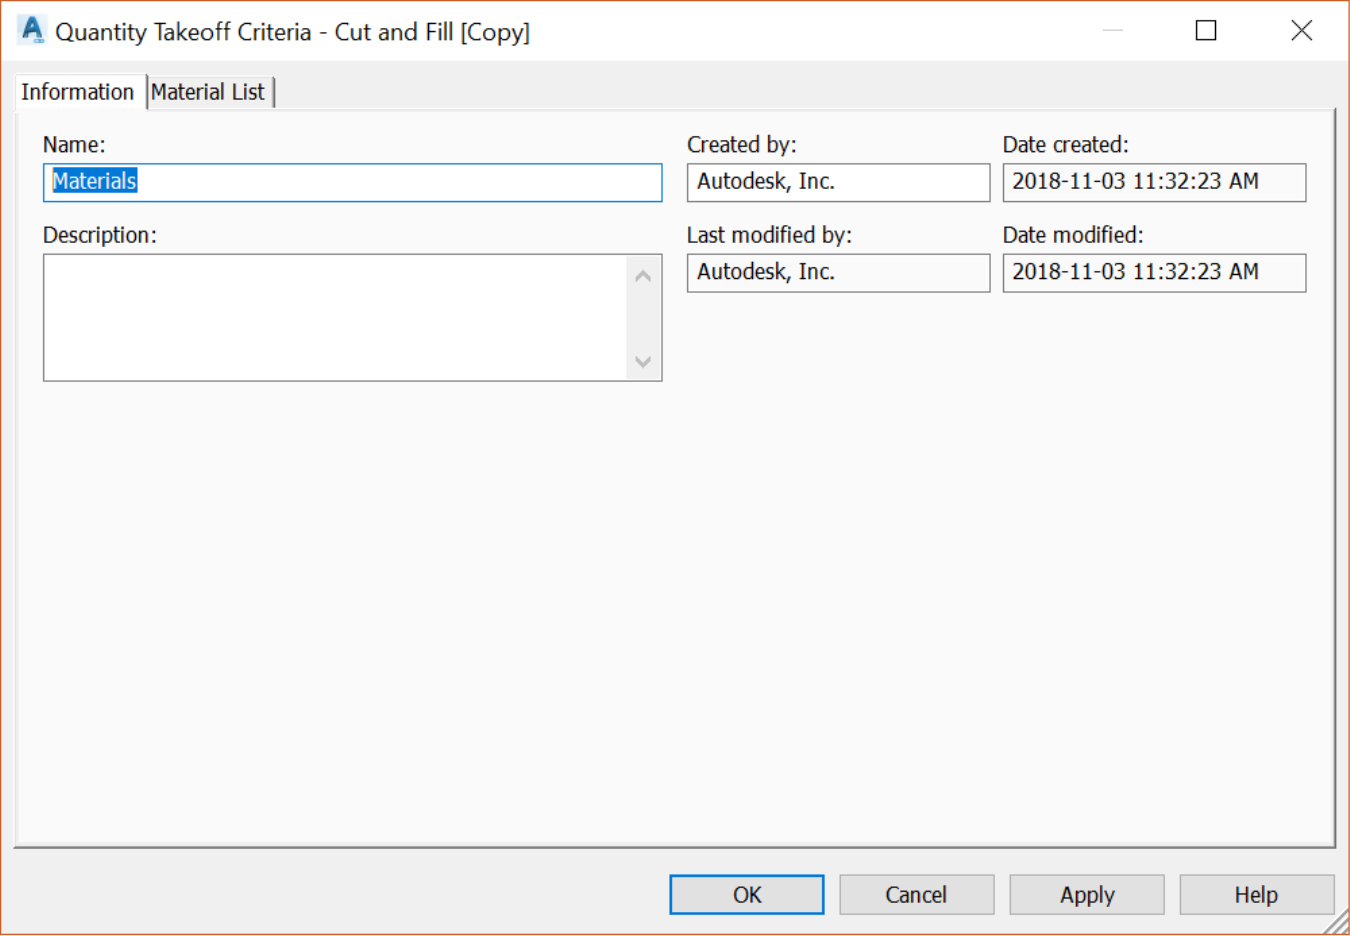
- First, let's change the name, as we are not only interested in Cut and Fill material. We would also like to estimate other materials. So, in the Quantity Takeoff Criteria window, switch to the Information tab and change the Name simply to Materials.
- Now switch to the Material List tab. Remove the materials already on the list. We need to learn how to create them by ourselves. Select each line item and click on the delete icon to remove it.
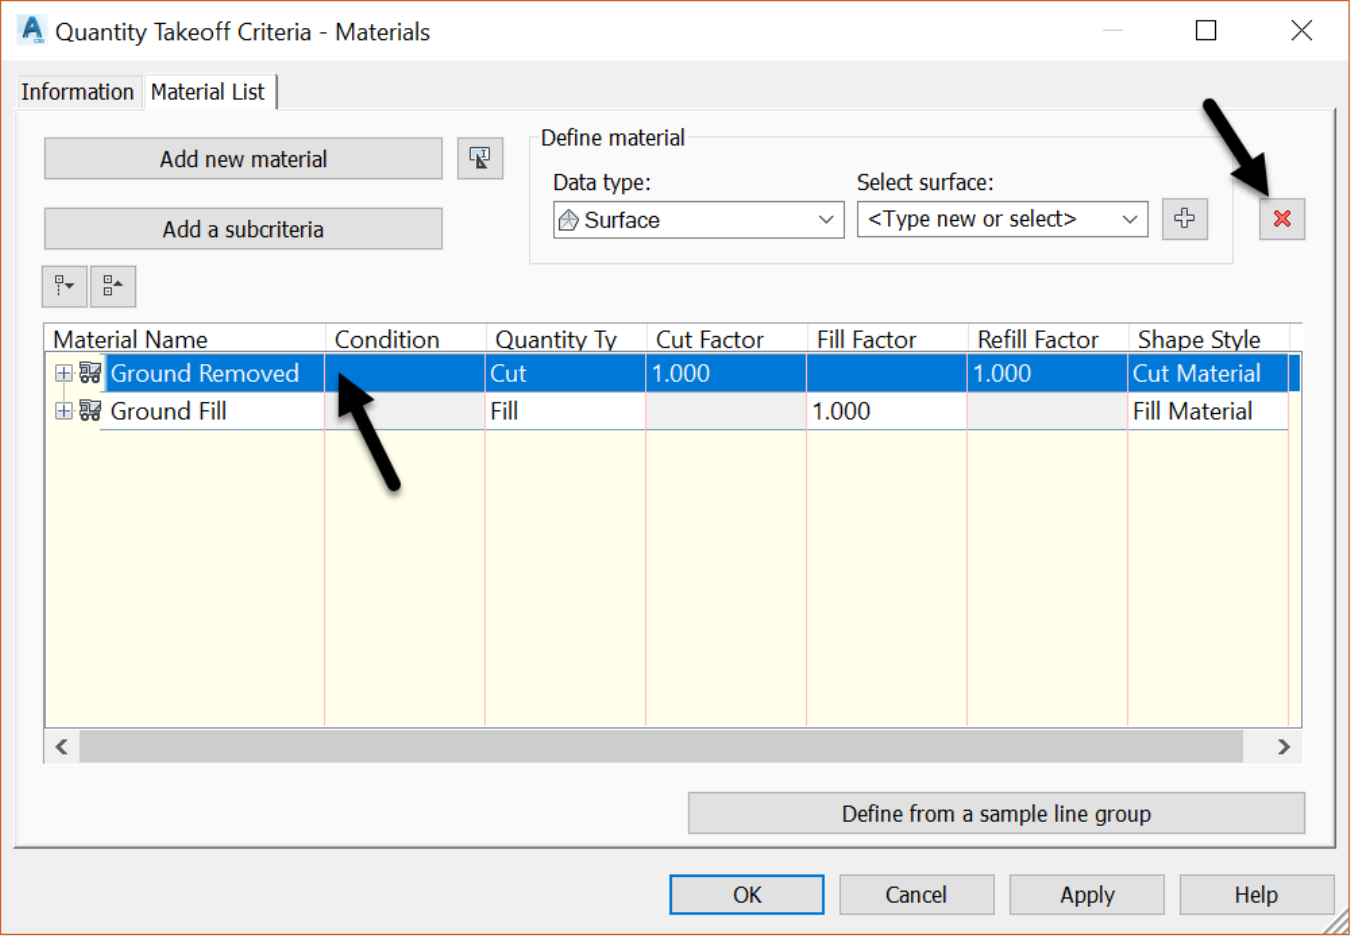
- Now, the list of materials must be completely empty.

- Next, let's start creating our list. Click on Add new material.

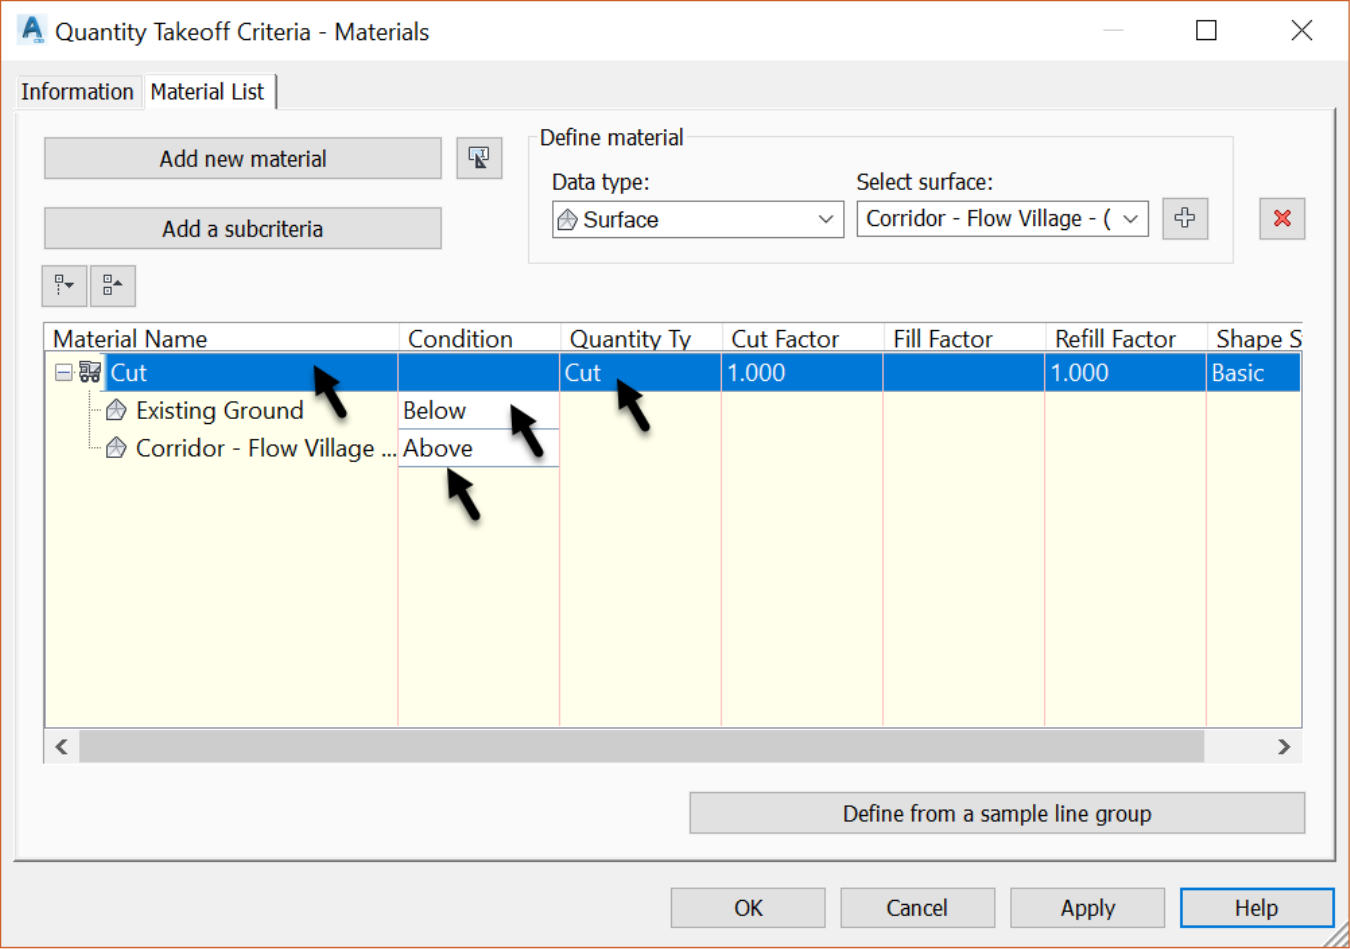
- Then choose Surface in the Data Type drop-down and choose the Existing Ground in the Select a surface drop-down menu. Next, click on the “+” icon to add the surface to the material we have just created. Repeat this process by choosing, this time, the Corridor Flower Village Surface.

-
Now, we need to define the material by specifying the Condition that defines it. The condition is the criteria on which to base the calculation. Among the choices of condition, we have the following options:
- Above: This means that an area above this surface is included in the calculation.
- Below: means that the area below this surface is included in the material definition.
-
Let’s use the condition definitions to create a Cut material. We have a Cut material whenever a material needs to be removed, meaning the proposed surface is below the existing surface. So, the condition is that the material is below the Existing surface and above the Propose Surface. Using the definition of Conditions, we can define the Cut material.
- We first need to add new material and call it Cut.
- Then, we will add the two surfaces, proposed and existing.
-
Next, we need to change conditions to put:
- the existing ground as Below; and
- proposed surface as Above.
- Lastly, we need to change the Quantity Type to Cut.
- Use the previous steps to add the definition for the fill material. We have fill when the proposed surface is higher than the existing ground and dirt must be hauled in to fill the additional void. Using the definition of Conditions, we can define the fill material.
- First, add new material and call it Fill.
- Then, add the same two surfaces, proposed and existing.
- Next, we need to change conditions to the contrary of the cut material, and
- lastly, we need to change the Quantity Type to Fill.

- Now that we finished the earthworks materials, we need to define the structure type materials. That will include asphalt, concretes, and others. Let's start with the asphalt. We have two lifts of asphalts, pave 1 and pave 2. We can estimate the materials separately or use the include option to combine them.

- Use the previous steps to add the following list of materials, in addition to the Cut and Fill, that we already did:
- Asphalt, which will have two lifts, pave 1 and pave 2
- The granular base
- The subbase material
- And the concrete composed of curb and sidewalk materials.
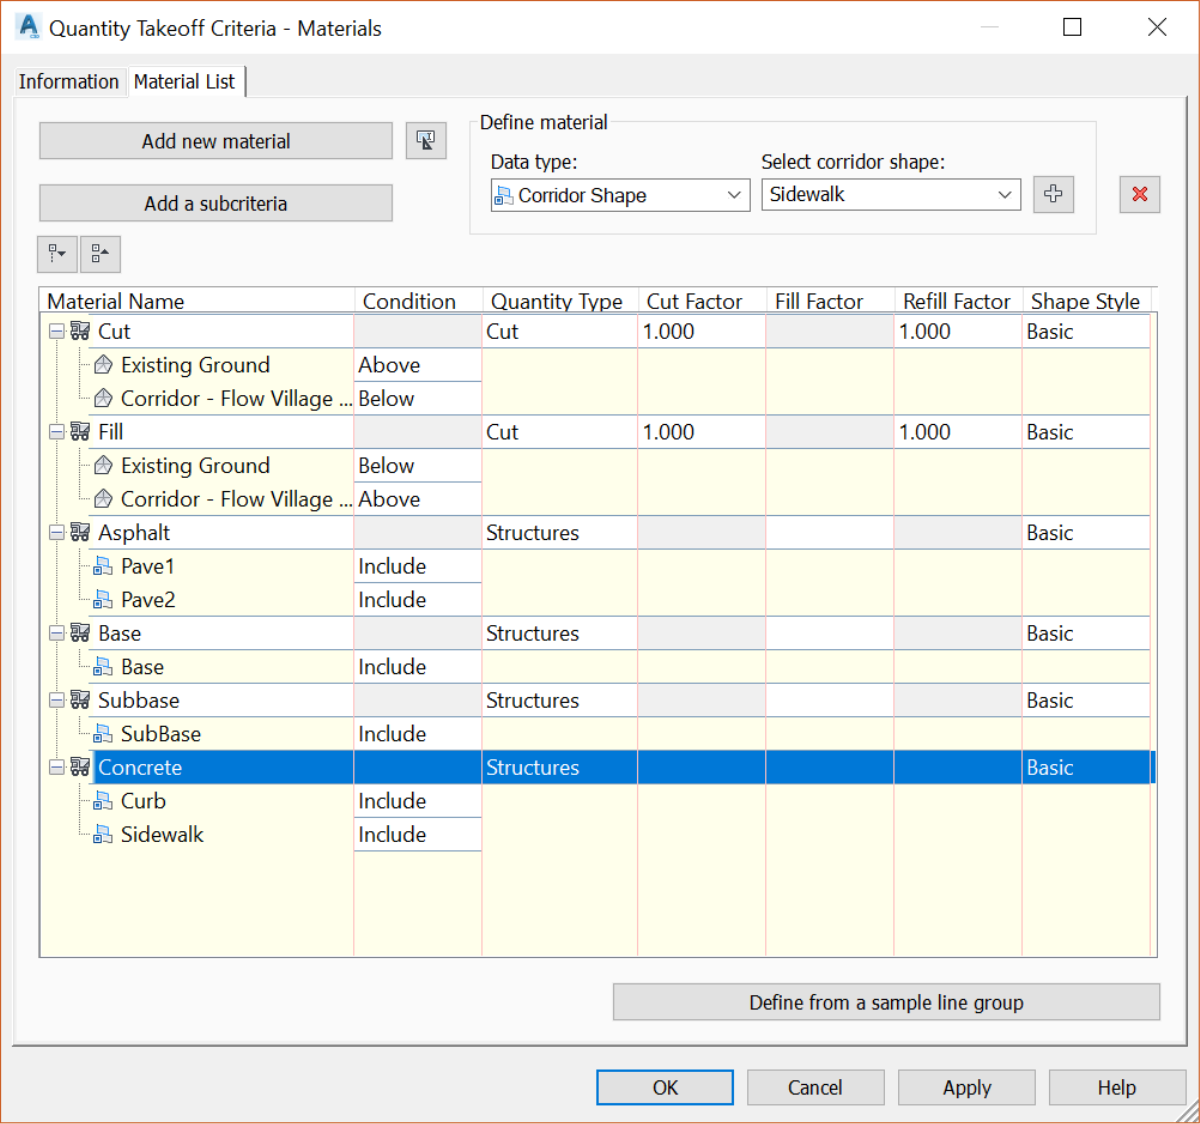
- Click OK to closethe Quantity take Off Criteria window.
- Next, on the Compute Materials page, we need to Map Objects with name, to match the criteria and the drawing’s surface or corridor shape names.