-
Get It
$19.99
$19.99Civil 3D Essentials Book and Practice Files
Tutorial: Civil 3D Label Styles
Introduction to Civil 3D Label Styles
What are the Civil 3D Label Styles? Let's find out in this online training course and tutorial, a part of the Civil 3D essentials book and how-to manuals.
3.4.2 Creating Label Styles
Label styles are annotations that allow us to display an object’s information. For example, for a survey point, one may be interested in displaying the coordinates, elevation, description, and much more.
To practice this, let's create a style that will display the elevation, description, and coordinates of a point.
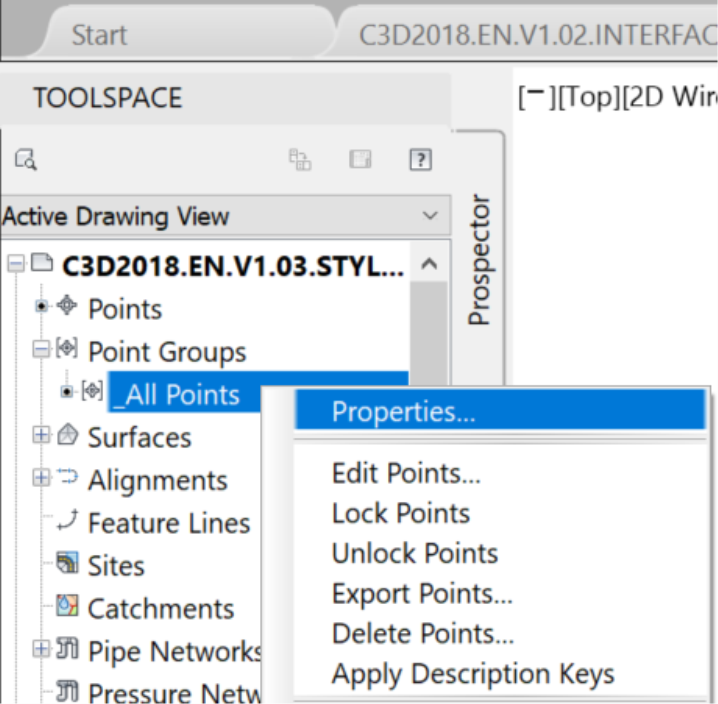
To create a point label style, do the following:
- Open the Properties window of the point group to which you want to apply a point style.
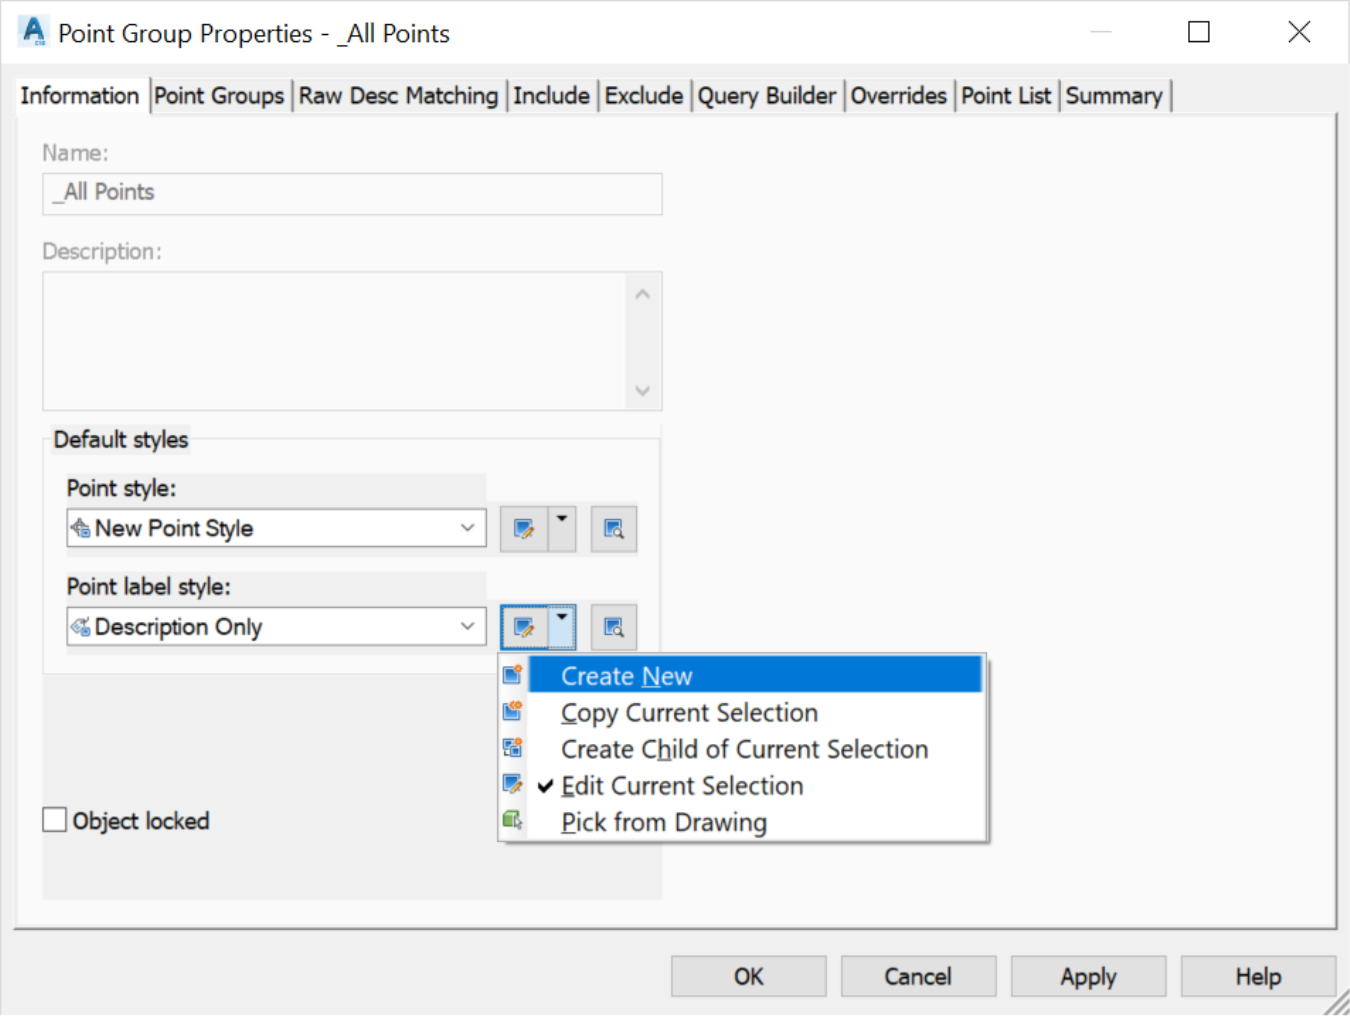
- In the window, this time in the Point Label Style section, create a label style that will display elevation, description, and coordinates.
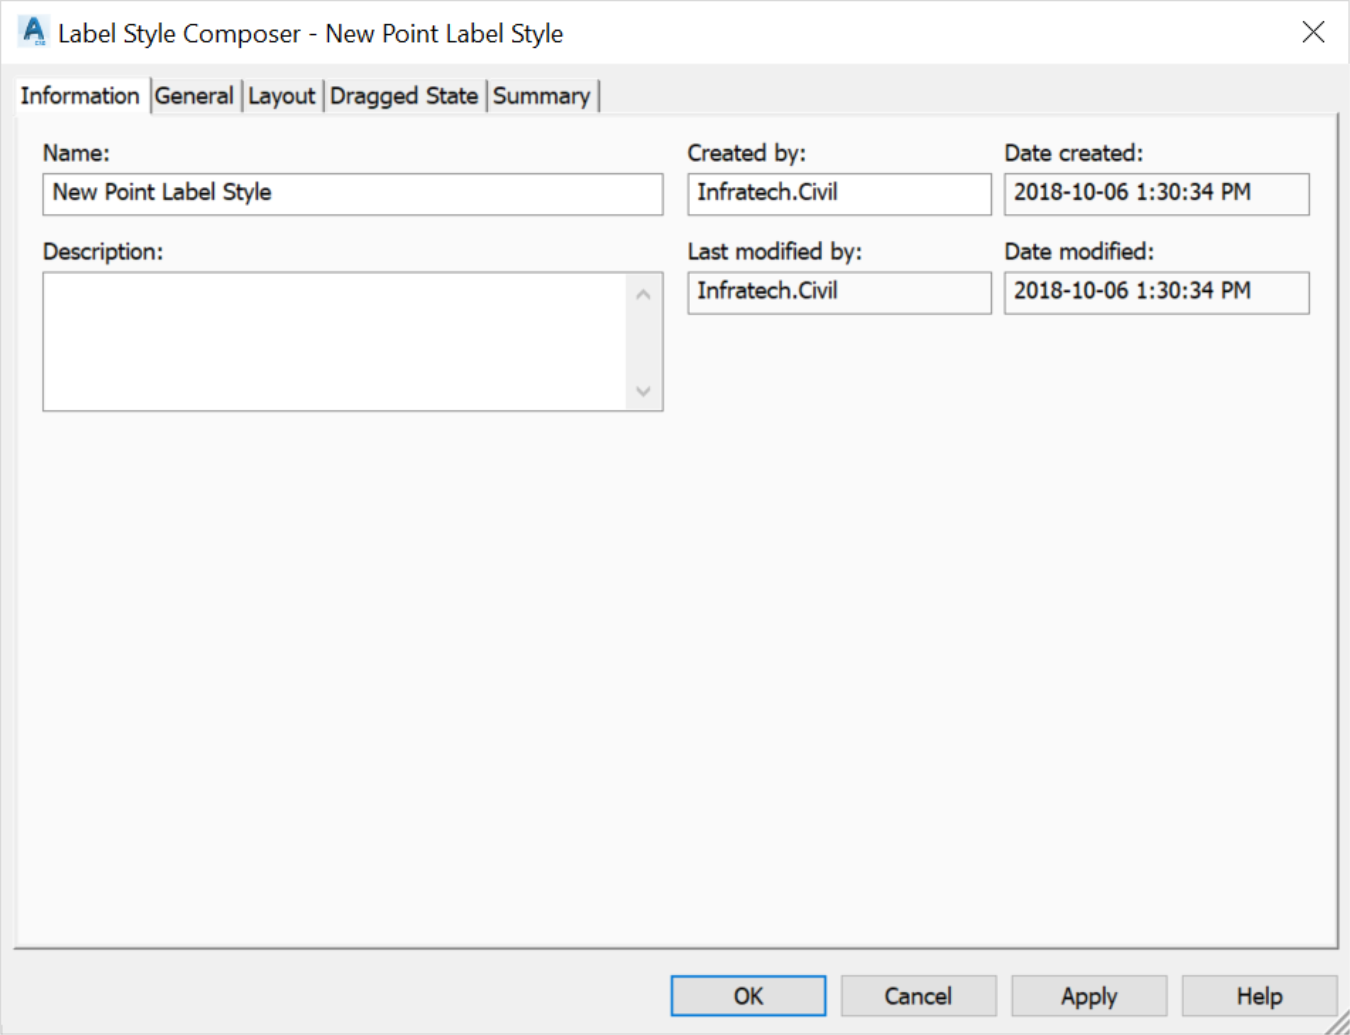
- The Label Style Composerwindow will appear with the following tabs:
- The Information tab, which controls general information such as style name, creation date, and authors.
- The General tab, for some basic label information.
- The Layout tab, which defines the content of the label's text.
- The Dragged State tab, which defines the style of the label when dragged from its original location.
- The Summary tab, which gives a general overview of the different parameters of the Style.
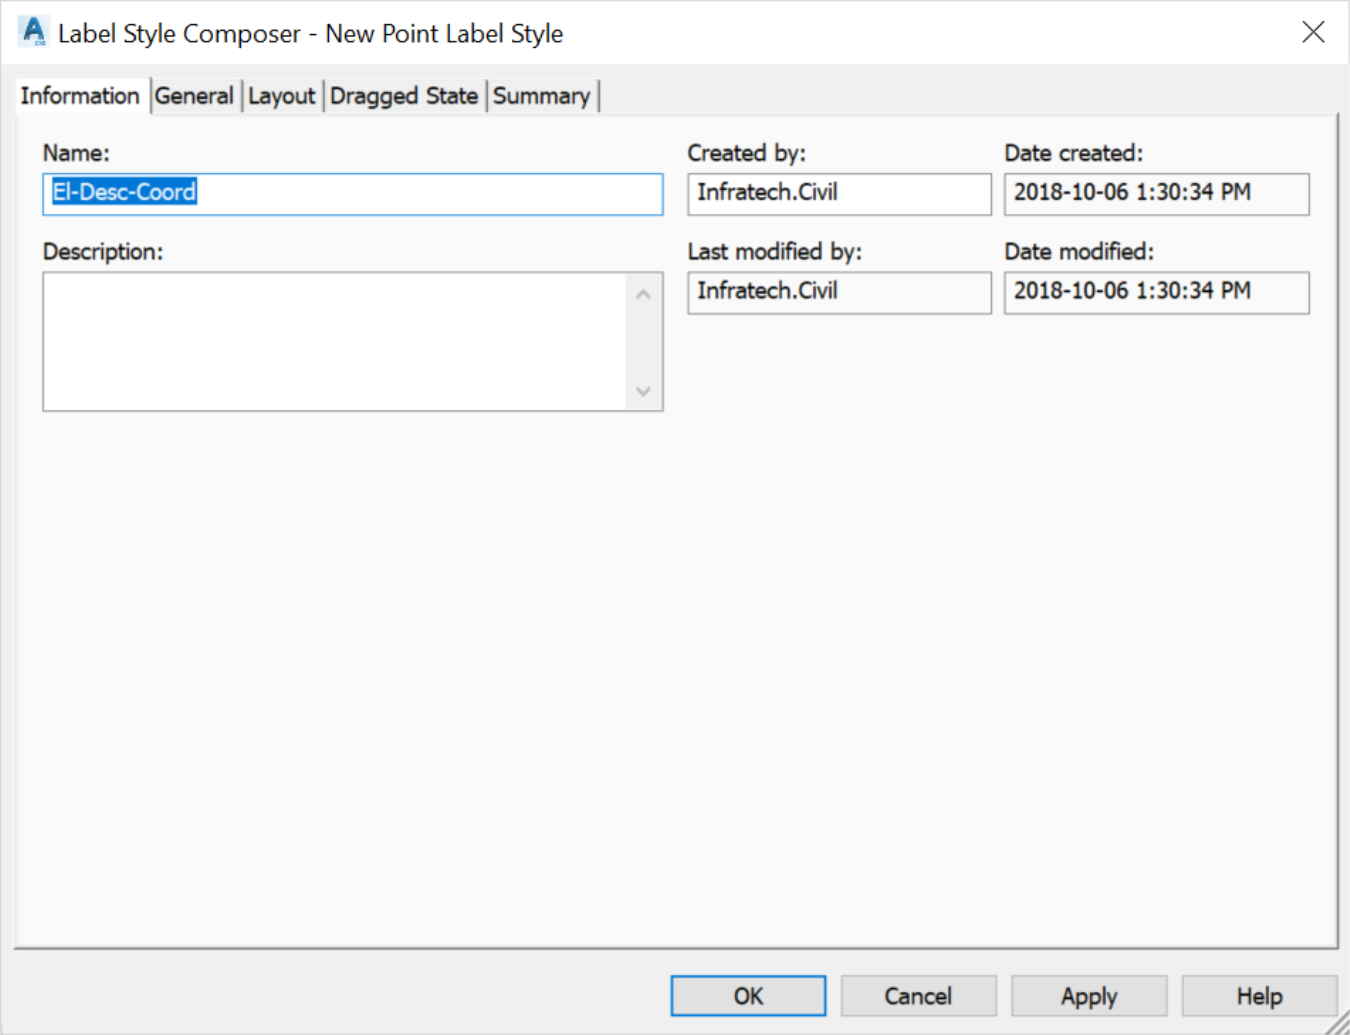
- On the Information tab, name the new style. In general, try to give the style a name that clearly indicates its purpose. For example, we are going to call it EL-DESC-COORD to indicate that this label style will show the point's elevation, description, andcoordinates.
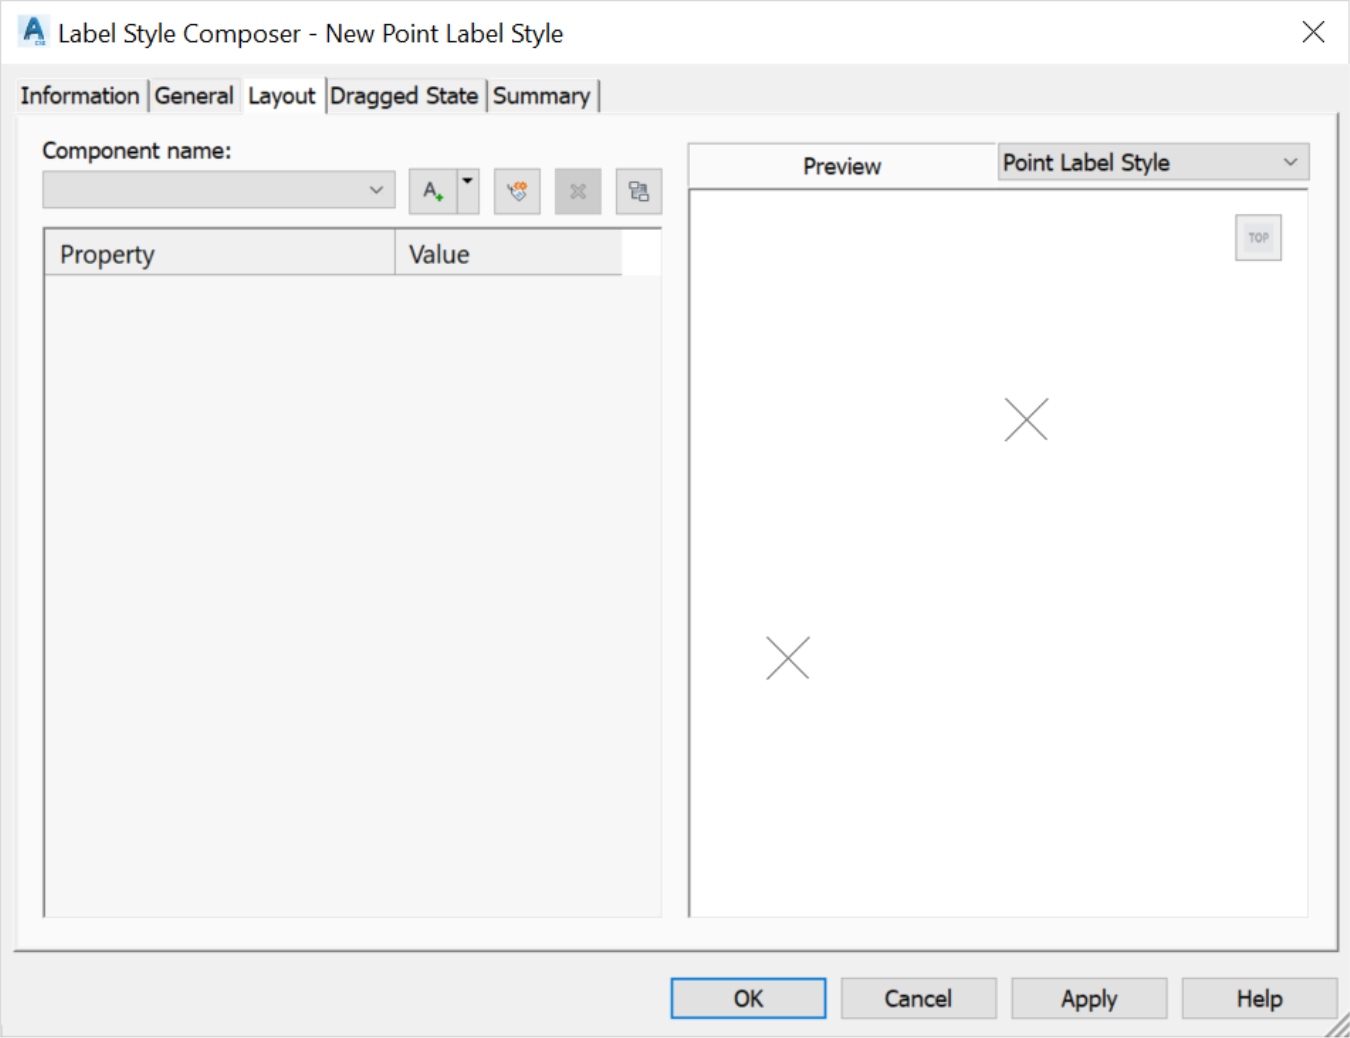
- On the Layout tab, delete the existing data (point number, altitude, and description). We will learn how to recreate them.

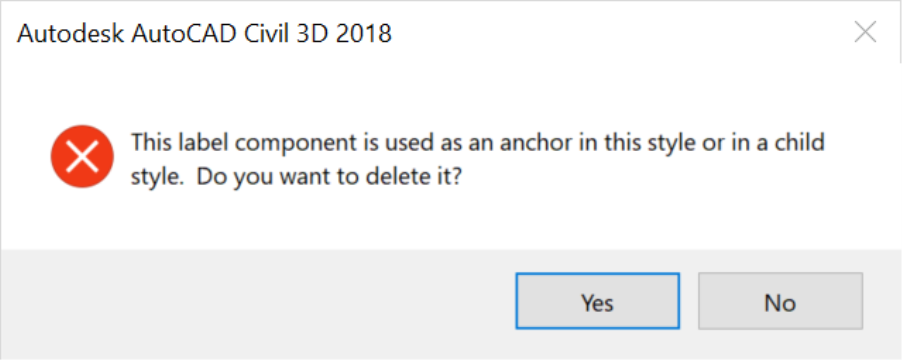
- Ifa label component you are trying to delete is used by another label, you will receive a warning. For now, ignore potential warnings and, click Yes to delete the label components.
- Finally, we must have an empty Layout window, withno any data:
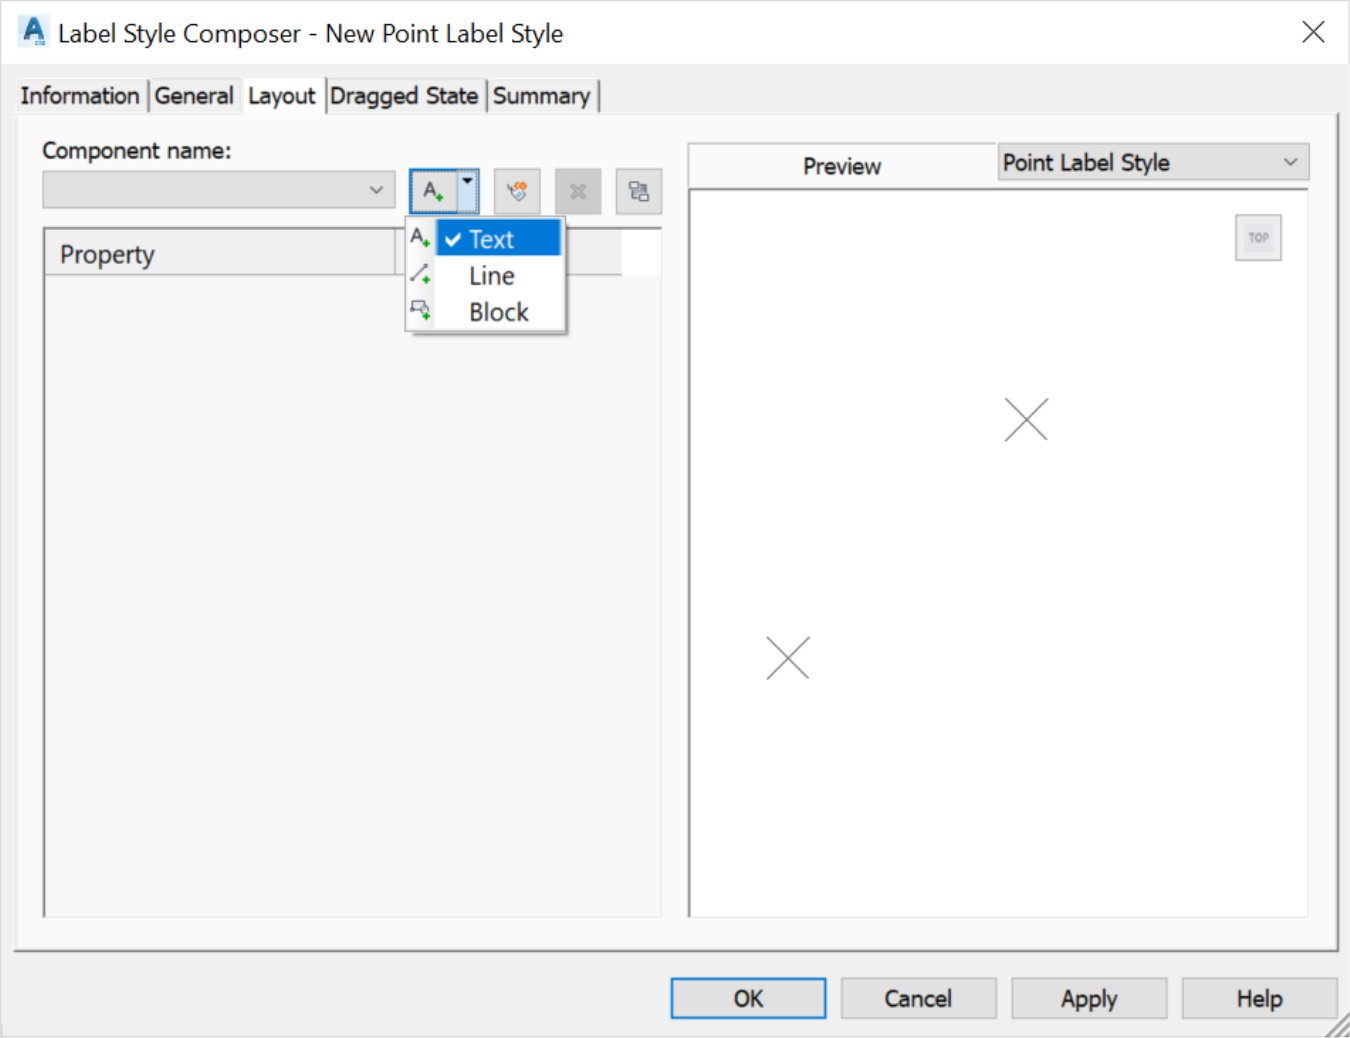
- Next, we will recreate a style from scratch. To do so, select a text component.
- Fill in the necessary data such as the name of the new style, text sizes, colours, and so forth.
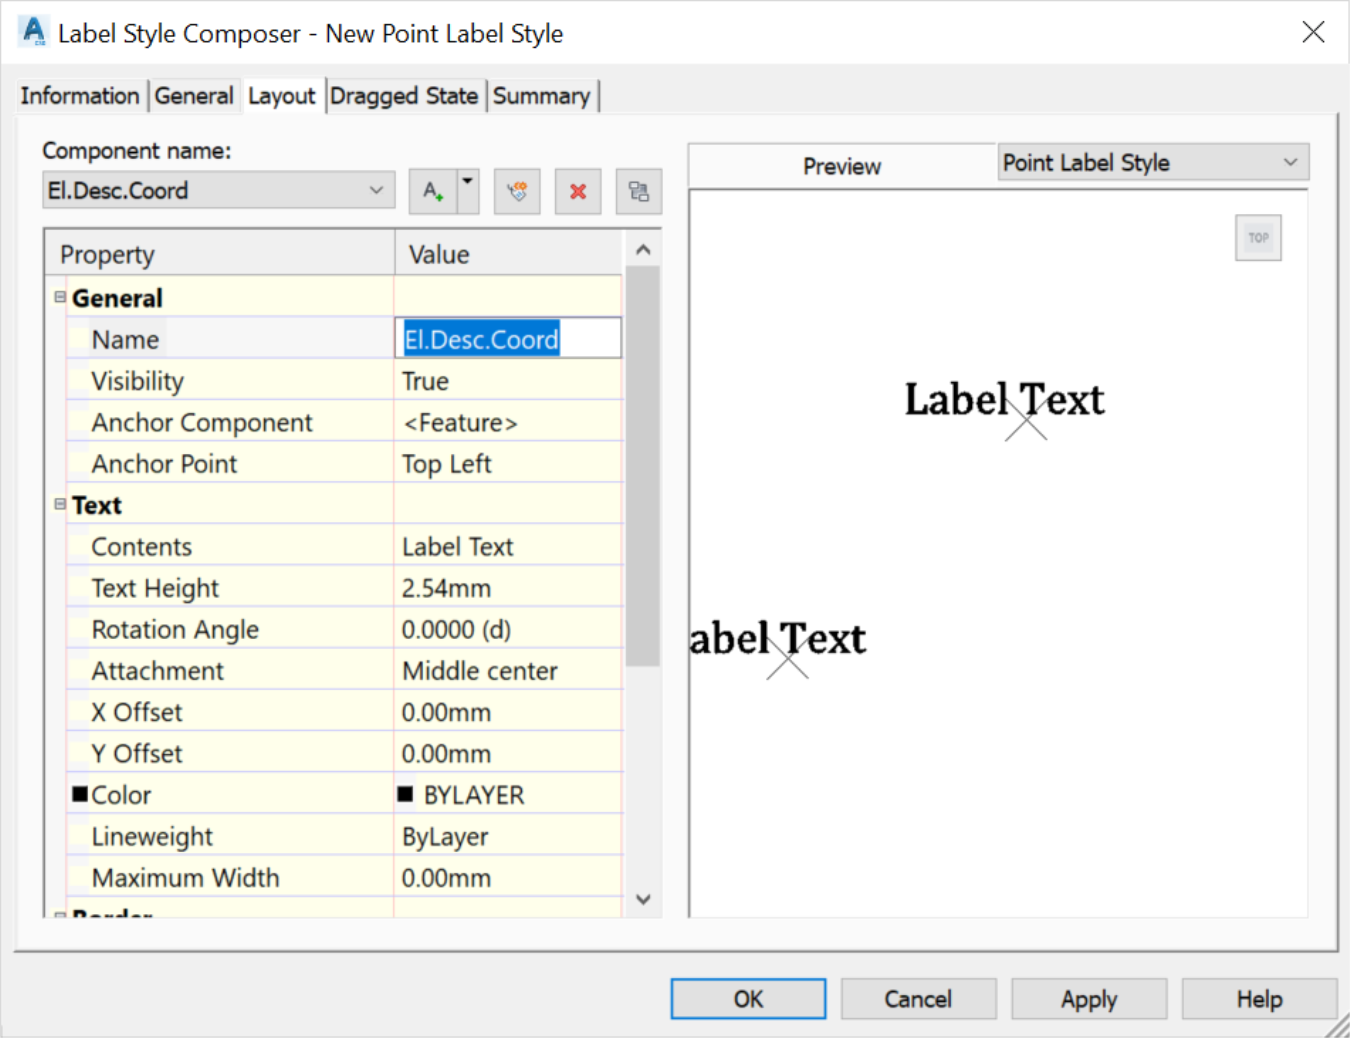
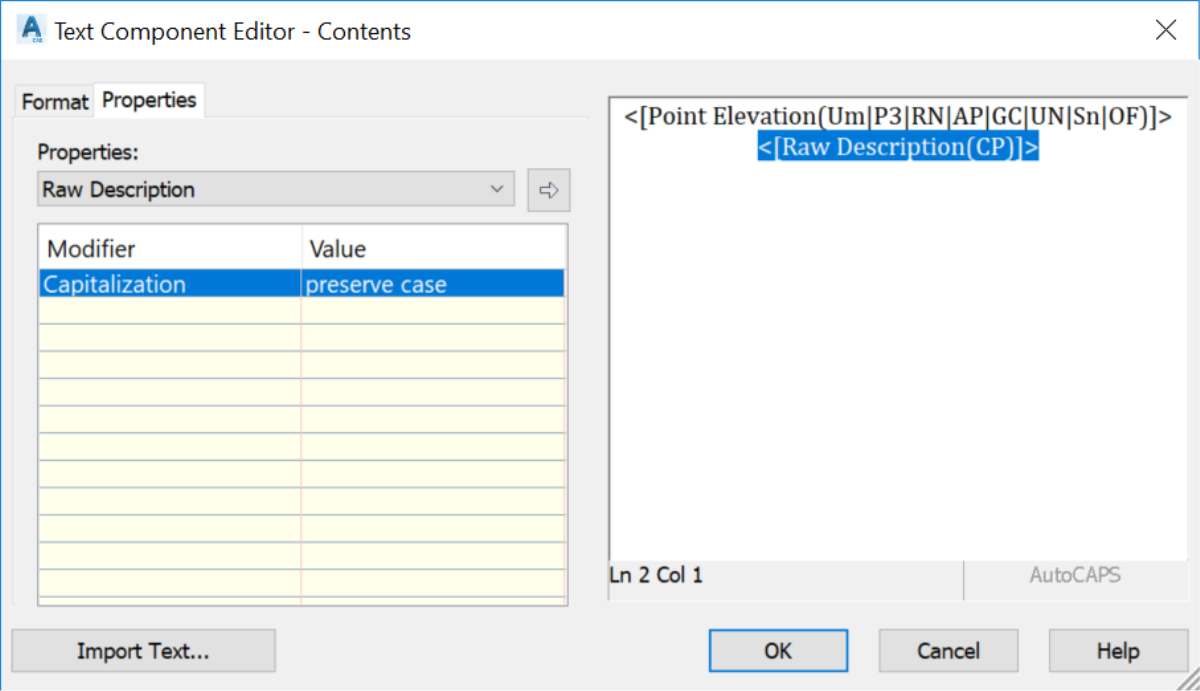
- To determine the content of the label, meaning the information that the label will convey to the readers, click on the icon with three small dots on the contents line.
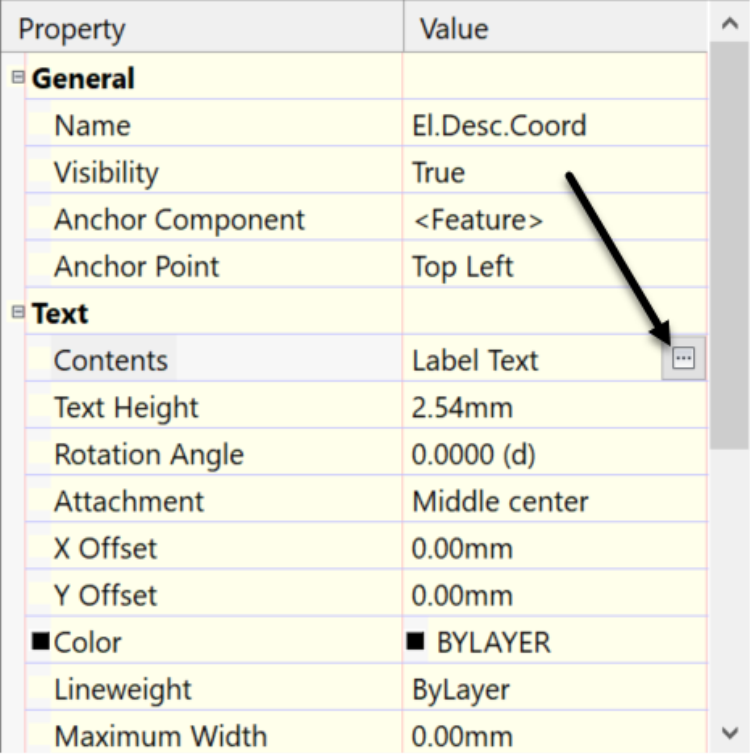
- Next, we will add the following parameters: Elevation, Description, and Coordinates. Before we define our label, we need to delete the existing text, or select it and simultaneously click on the horizontal arrow to replace it with the parameter in the Propertiesdrop-down box.
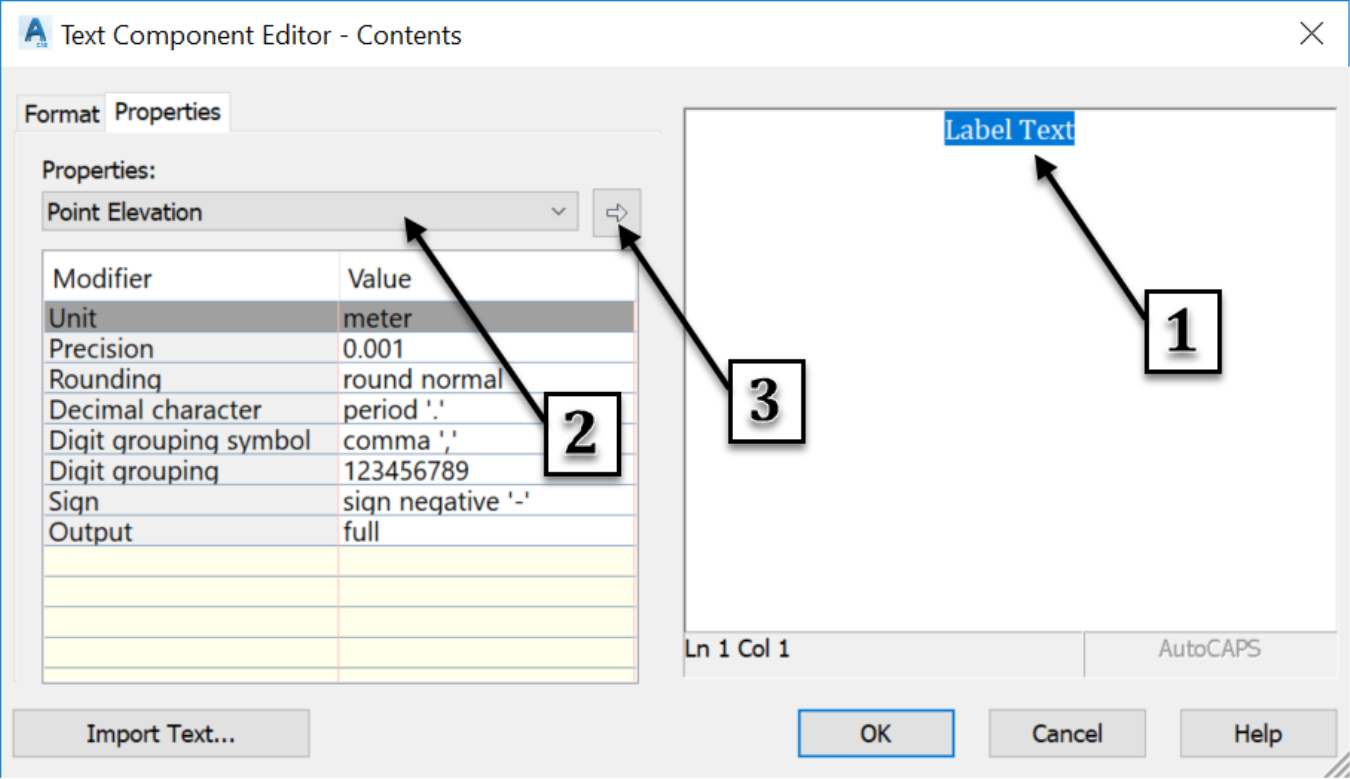
- We have now defined the elevation component of the label.
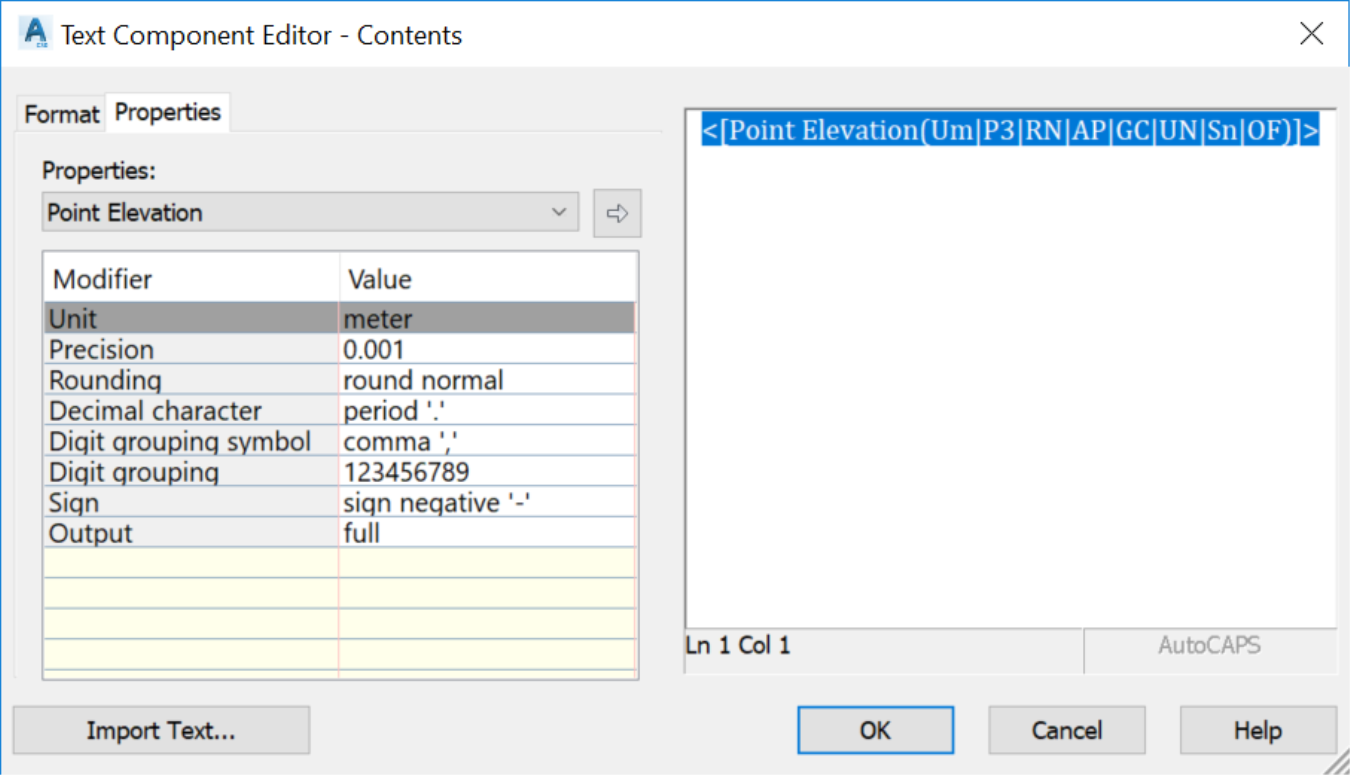
- Next, let's add the Point Description field of the style definition. Go to the next line after the Point Elevation component, then select Raw Description in the properties drop-down box and click the arrow to the right to add the description component of the label.
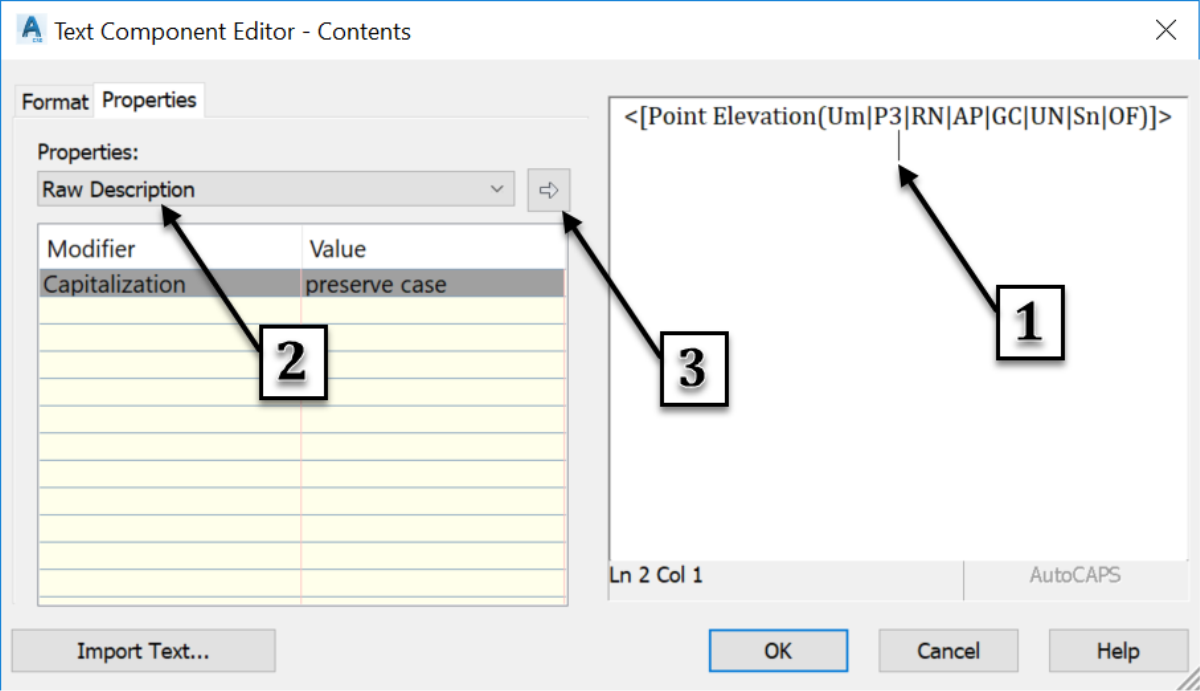
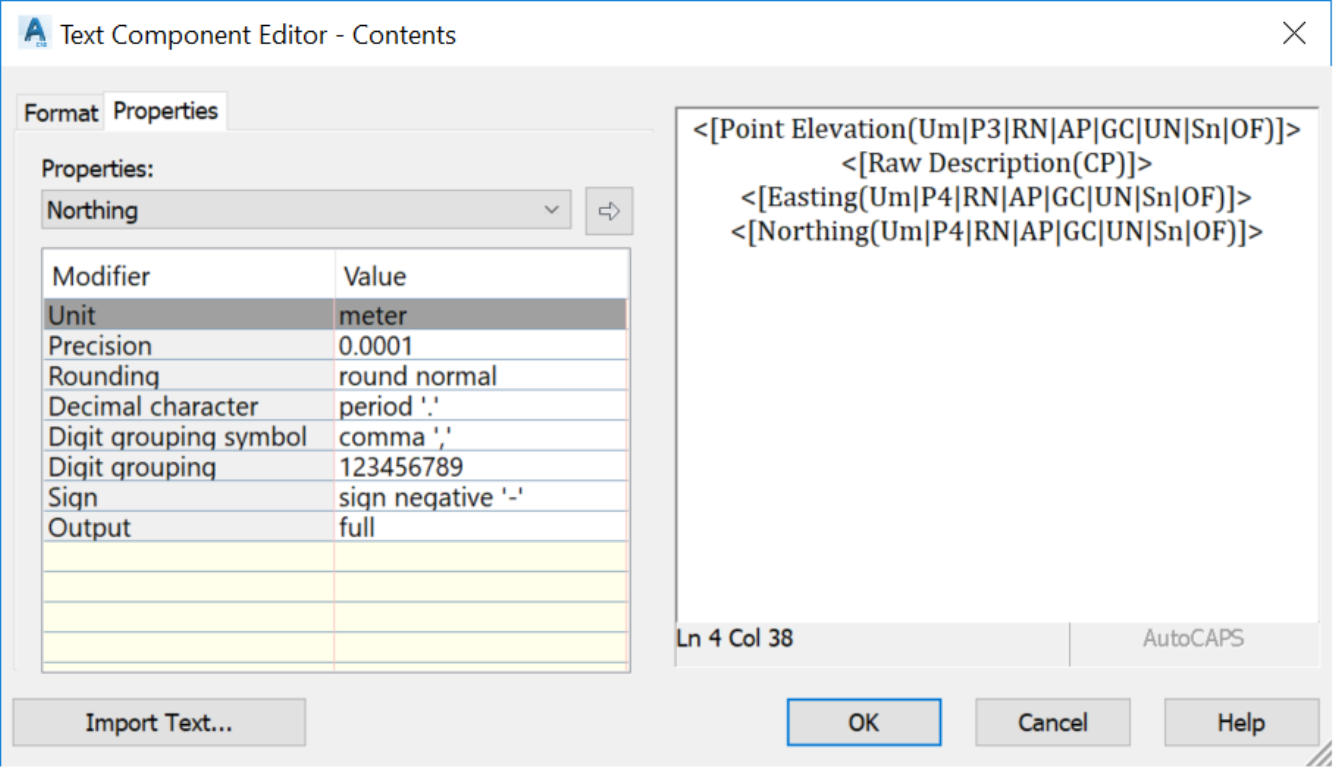
- The last component to add is the coordinate information. Follow the steps we previously used for the elevation and description to make that happen. First, select Easting in the drop-downProperties box and click on the arrow to the right. Then, select Northing and click the arrow to the right to add the two coordinate elements to the definition of the label.
- the Format tab. On here, we can change the text style, justification, font, colours, and so forth.

- Now, click OK three times to close all the windows we had to open to get here.
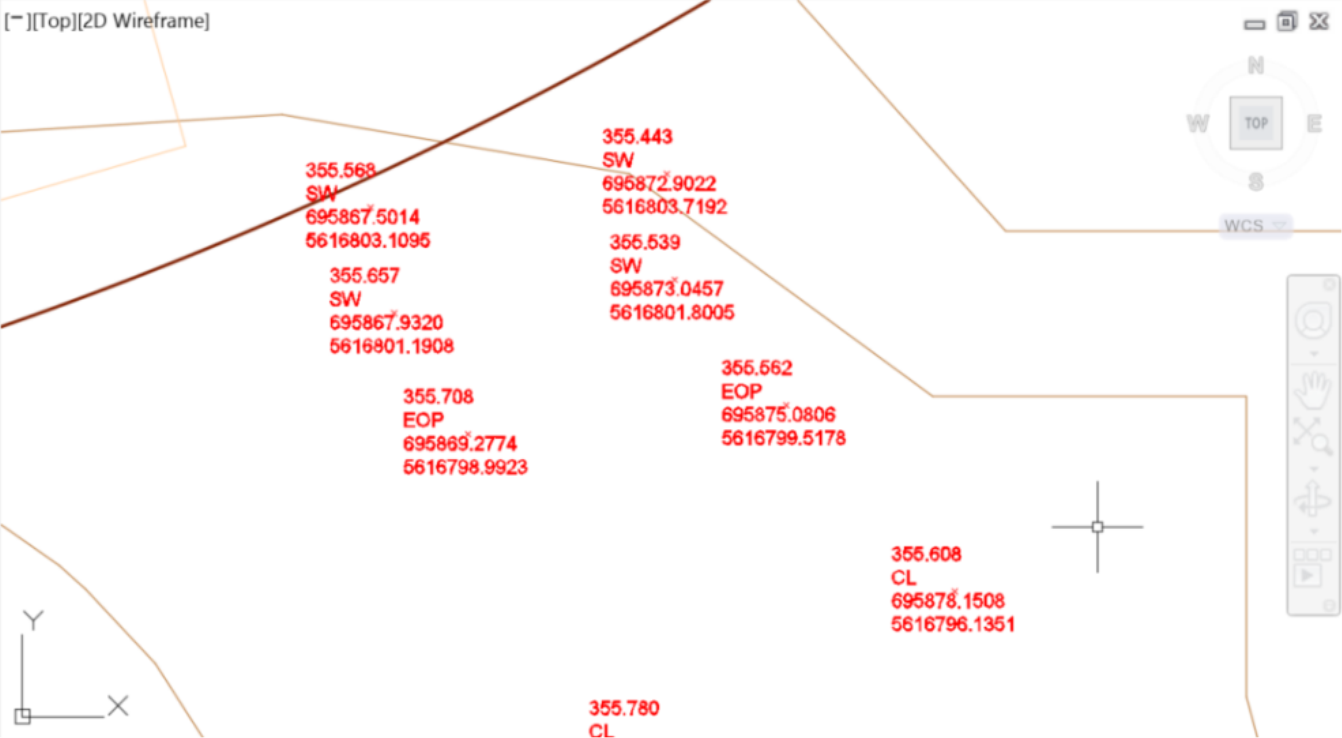
- Finally, all points in the drawing should appear in accordance with our elevation, description, and coordinates label style.
Topic: Civil 3D Label Styles | Training: Civil 3D Essentials | Software: AutoDesk Civil 3D
Civil 3D course OFFER
Refer a friend and both of you get access to our Civil 3D Courses at a discounted price.
Related Civil 3D Course and Books

