-
Get It
$19.99
$19.99Civil 3D Essentials Book and Practice Files
User Tutorial Guide: All about Editing a Civil 3D Surface
Introduction to Editing a Civil 3D Surface
Firstly, what is editing a Civil 3D Civil 3D Surface? Well, let's find out in this online training course. Certainly, this step by step tutorial is a part of the Civil 3D essentials book and how-to manuals.
About editing a Civil 3D Surface?
We can also define a surface by Editing a Civil 3D Surface existing data and adding them to the new surface definition, as Edit operations on the surface. Among those Edit operations are Paste, Raise/Lower, add or delete points, add or delete lines, and more.
Let's see how to use a couple of these Editing a Civil 3D Surface operations. We will create an entirely new surface, a stripped surface.
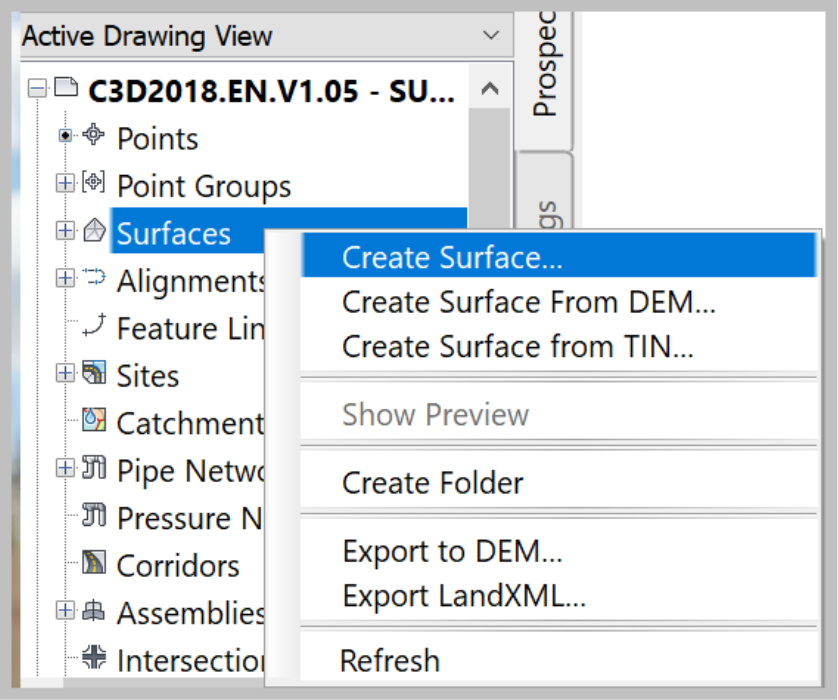
To create a stripped surface:
- From the Ribbon or the Prospector, create a new surface:
- In the Create Surface window, name the new surface EG-STRIP.
- Provide an explicit description such as Topsoil Stripping
- Keep the default style and Render Material
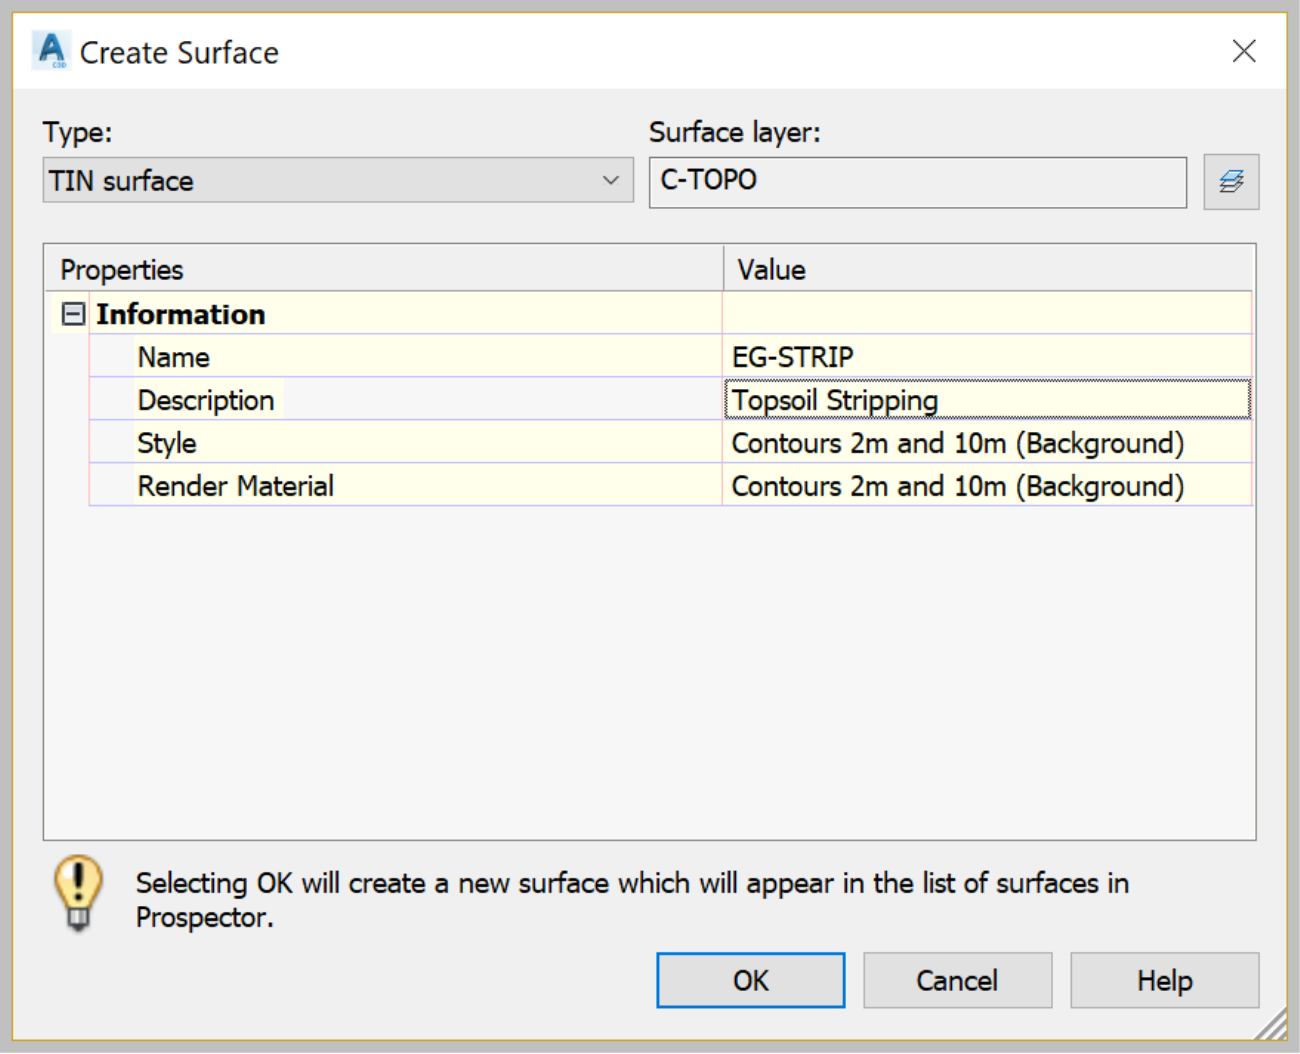
- Click on OK.
- All we have done so far is create a name and style for the stripping surface. We still need to define it. Then, perform the Editing a Civil 3D Surface operations. To do that, first, we need to Paste the Existing Ground surface. Remember, the stripping surface is basically the Existing Surface that is shaved a given depth to remove the topsoil.
- Now, expand the EG-STRIPDefinition
- Then, right-Click on the Edits section to add the Editing the Civil 3D Surface.
- And, select Paste Surface

- When prompted, select the Existing Ground surface and click OK.
- The EG-Strip surface is now defined. However, at this stage, the existing and stripped surfaces are basically the same. That is because we have only copied and pasted the existing surface into the stripped surface.
- The next step is to shave the topsoil, say a depth of 15cm or 6in. To do that, from the surface definition, Edits section, right-click and select Raise/Lower.
- For elevation type -0.15m (-0.5ft) on the command line. In the Raise/Lower command, a negative value means lowering, and a positive value means raising the surface.
- The strip surface is now defined and fully functional, by Editing a Civil 3D Surface. We will later see how to use it.