-
Buy Now
$79.00 / year
$79.00 / yearCivil 3D Essentials
The Full Civil 3D professional Training -
Get It Now
$19.99
$19.99Civil 3D Essentials Book and Practice Files
The complete Civil 3D student and beginner's manual.
Civil 3D Tutorial
Quick Access Toolbar
Next item on our perusal of the Civil 3D interface is the Quick Access toolbar, a typical windows application feature. We have it in most office programs.
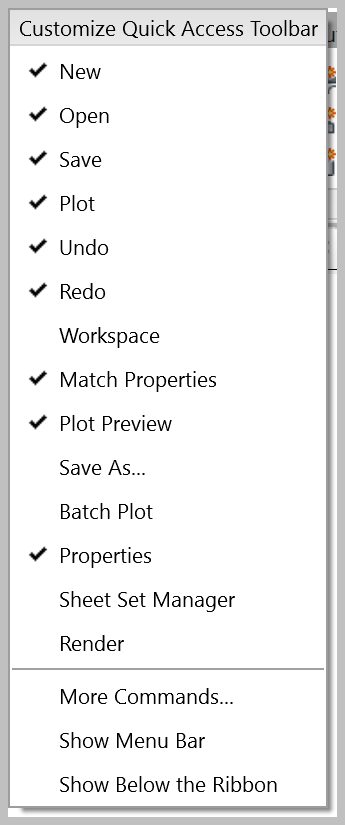
The Quick Access Toolbar gives us an option to stack a set of frequently used commands, that we want to have at our disposal at all times. By default, it shows common commands such as New, Open, Print, Undo, and Redo.

If we click on the arrow to the right, we can see a list of additional commands that we can add to the quick access toolbar.

Let's add a frequently used command like Match Properties and remove one that is not really used that often, like Work Space Switching, since we can also access it through the status bar, in the bottom right corner.
The new Quick Access Toolbar responds to our request and adjusts accordingly.

One thing that we like to do is to relocate the Quick Access Toolbar below the ribbon, to have more real-estate, and display as many commands as we need. We will see in a second why that is important.
For the time being, let's keep adding commands to our Quick Access Toolbar. To add a command from the Ribbon, right-click on it and select Add to Quick Access Toolbar.
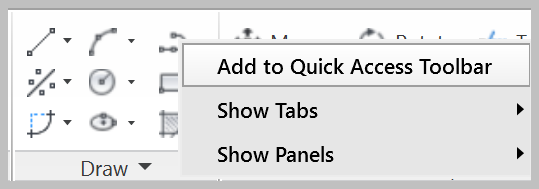
Let's add the frequently used ones such as drafting commands (line, polyline, rectangle, circle, and hatch), modification commands such as (move, rotate, trim and extend, copy, mirror, fillet, scale and offset), layer management commands (turn on and off, layer isolate and un-isolate, thaw and unthaw, make current and match layer). We typically also add a few design commands that we frequently use. It would be a good idea to organize them by groups, to make it easier to locate them.

After adding all these commands, you will notice that not all of them are displayed. That is because we just don't have the necessary real-estate to show them at the top of the Ribbon. To fix that, we will need to go to the Quick Access Bar display options and choose to display it below the Ribbon.
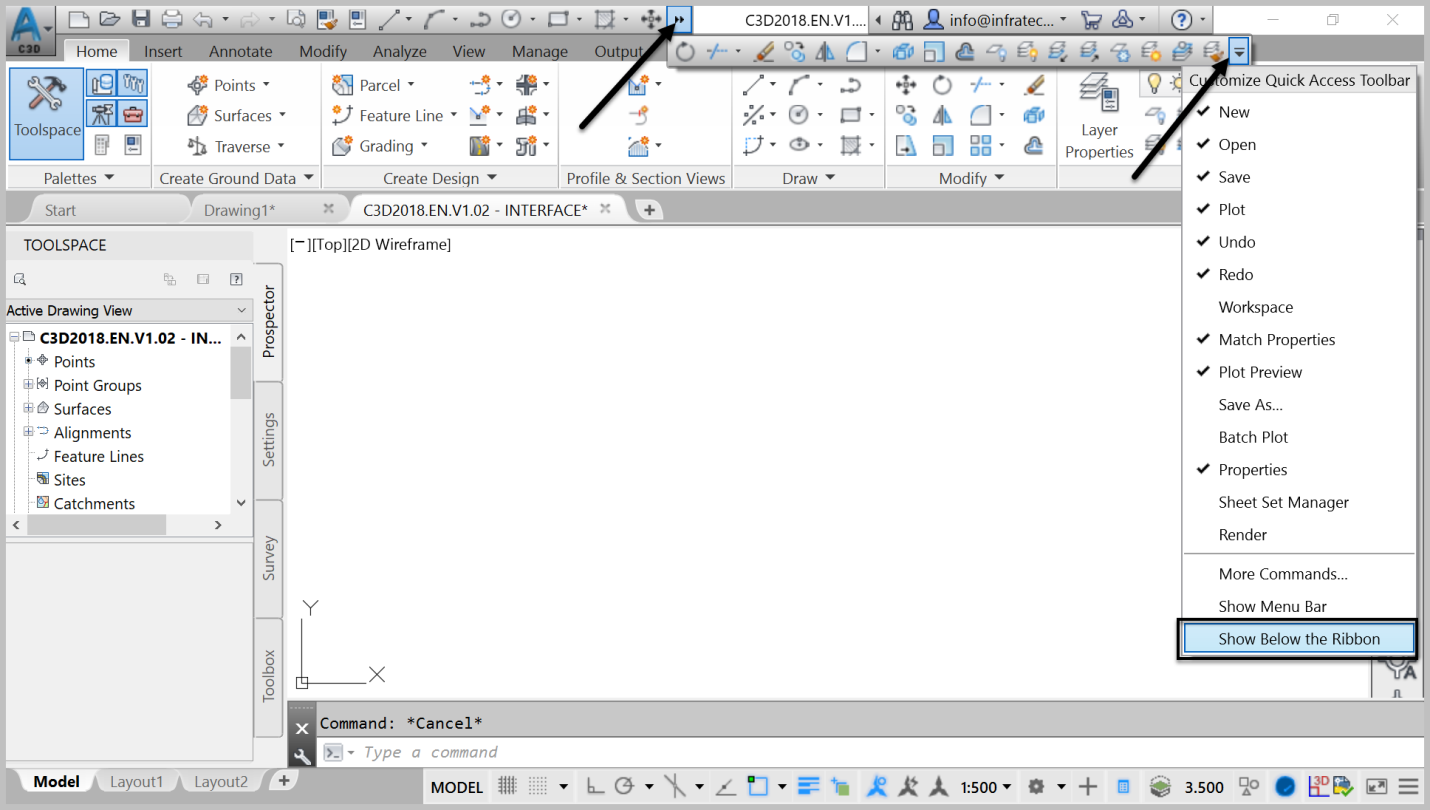
We will then have all the commands displayed and readily available, regardless of the ribbon tab we are working with. This will save us time by not having to switch back and forth between tabs to find our most used commands. In the long run, this adds up to a gain in productivity.

At the top, to the right of the quick access toolbar, we have a few tools mostly related to searching and Autodesk account management. The first textbox is for searching online for help. If we type Line, for example, it brings up a few suggestions regarding the word line.

To its right, we have the Online Search command, which takes us to the online help itself, to search on there.
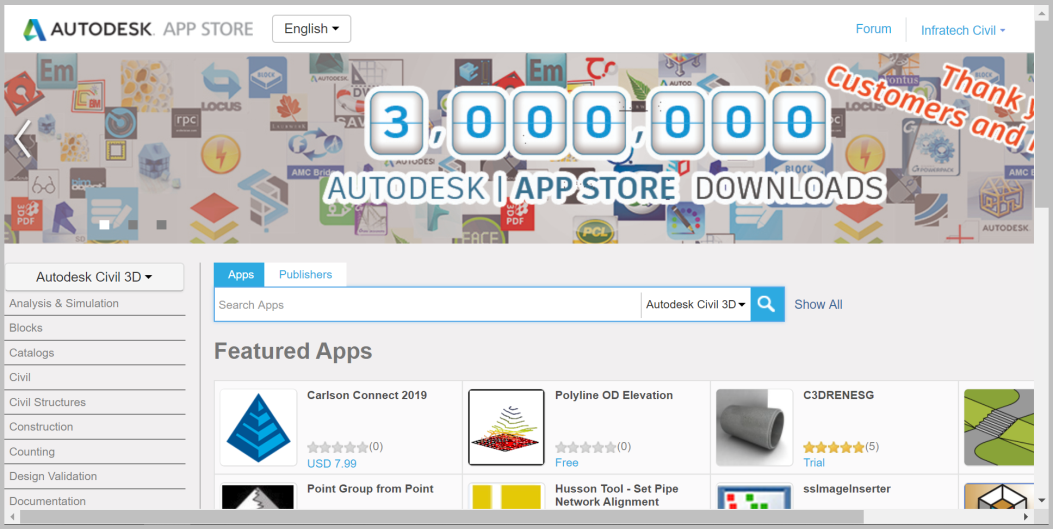
Next, you can access the Autodesk app store ![]() to browse for add-on apps, created by third-party developers. These are useful apps you can add to Civil 3D, to perform tasks that are not natively possible with out-of-the-box. AutoCAD Civil 3D is a great application, but no software does everything out-of-the-box. We always need to find some workaround for some specific tasks. Some of these apps are free while most are paid-applications.
to browse for add-on apps, created by third-party developers. These are useful apps you can add to Civil 3D, to perform tasks that are not natively possible with out-of-the-box. AutoCAD Civil 3D is a great application, but no software does everything out-of-the-box. We always need to find some workaround for some specific tasks. Some of these apps are free while most are paid-applications.
Let's close this window. Next, we have our Autodesk Account portal entry window. There, we can pretty much do all our Autodesk Account management, as we've seen in the Start Screen section of this lesson.
Full Course and Free Book


Customer Reviews
Great course
Patrick Butler
Very interesting and easy to understand. Since I already have some experience, was good to see how to design using different methods. Definitely further my knowledge even more. Can't wait to take more advanced courses. Thank you!
Very interesting and easy to understand. Since I already have some experience, was good to see how to design using different methods. Definitely further my knowledge even more. Can't wait to take more advanced courses. Thank you!
Read Less