-
Buy Now
$79.00 / year
$79.00 / yearCivil 3D Essentials
The Full Civil 3D professional Training -
Get It Now
$19.99
$19.99Civil 3D Essentials Book and Practice Files
The complete Civil 3D student and biginnner's manual.
Civil 3D Tutorial
2.3 Ribbon
The ribbon is a relatively new feature for long-time Civil 3D users. It’s a rare sight these days, but you can still encounter some users who prefer to use the good old scrolling menu bar.
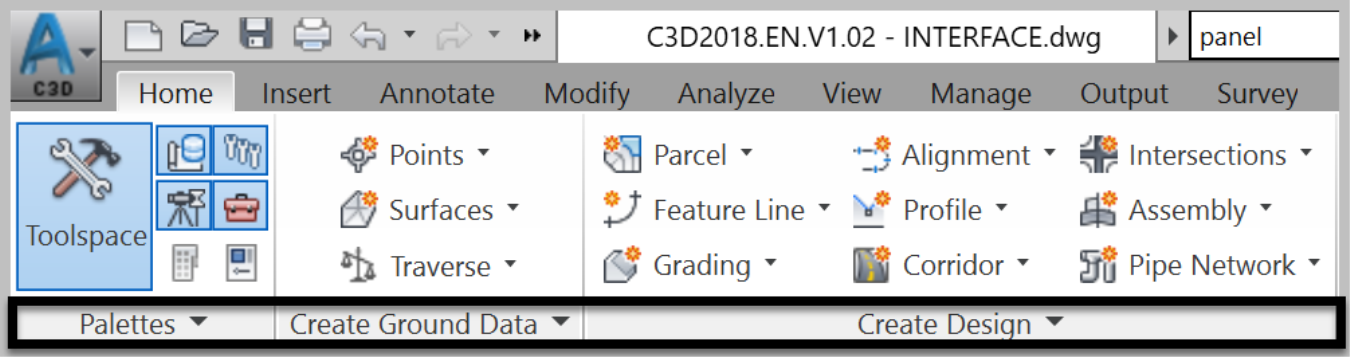
- Several items constitute the ribbon. First, at the top are the tabs. They are used to group commands with similar functions.
- For example, the Insert tab has commands that help insert new or existing data into the drawing, like blocks, survey points, aerial imagery or other external references.

- On the Viewtab, we can manage the display of the Drawing Area. We can use 2D or 3D displays, a different UCS, visualize from different angles or browse in 3D mode.
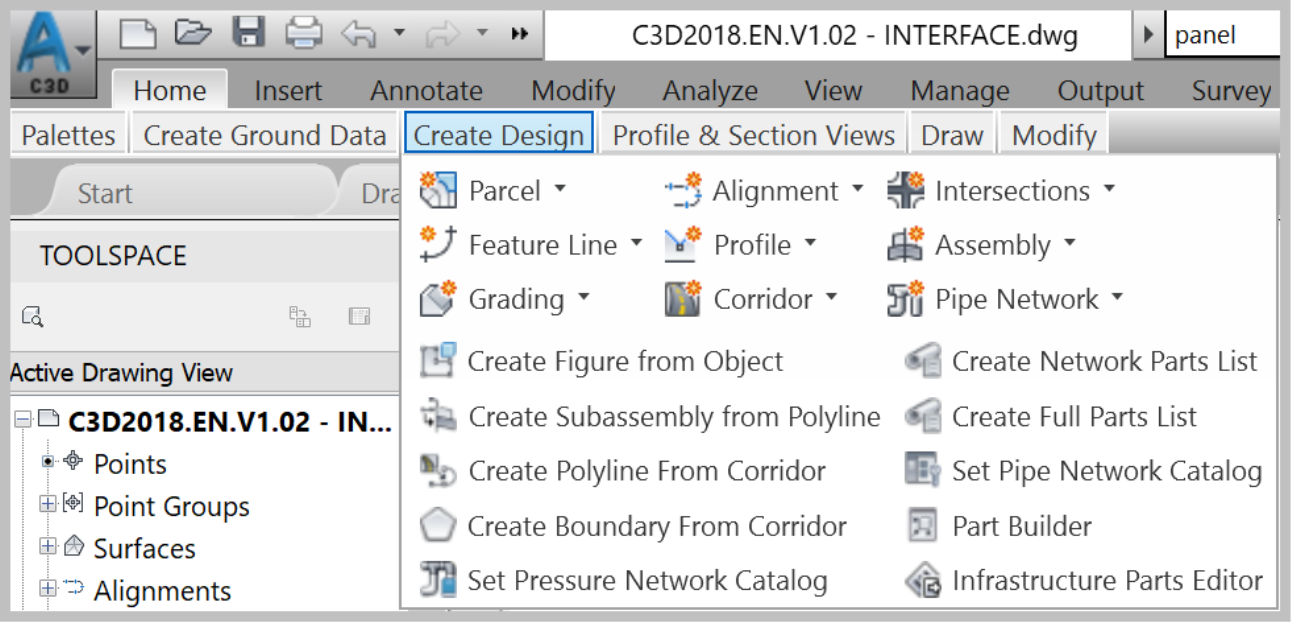
- Additionally, each tab is grouped further into panels. For example, on the Home tab, we have panels called:
- Palettes, where we canorganize the Civil 3D command palettes.
- Create Ground Data, for creating points and surfaces.
-
Create Design, for design related commands.
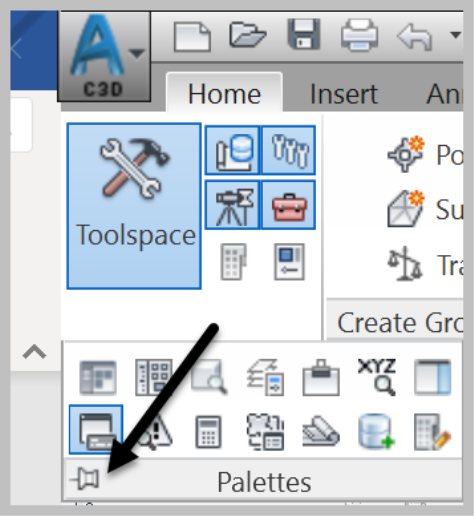
- A panel can be expanded to show more commands by clicking on the downward arrow to the right of its name.

- We can expand and pin the panel to expose additional hidden commands. Unpinning the panel will collapse it to its original state.
- The ribbon can be further organized by unloading items. To do that, right-click anywhere in the ribbon and uncheck the items to unload or check the items to display.
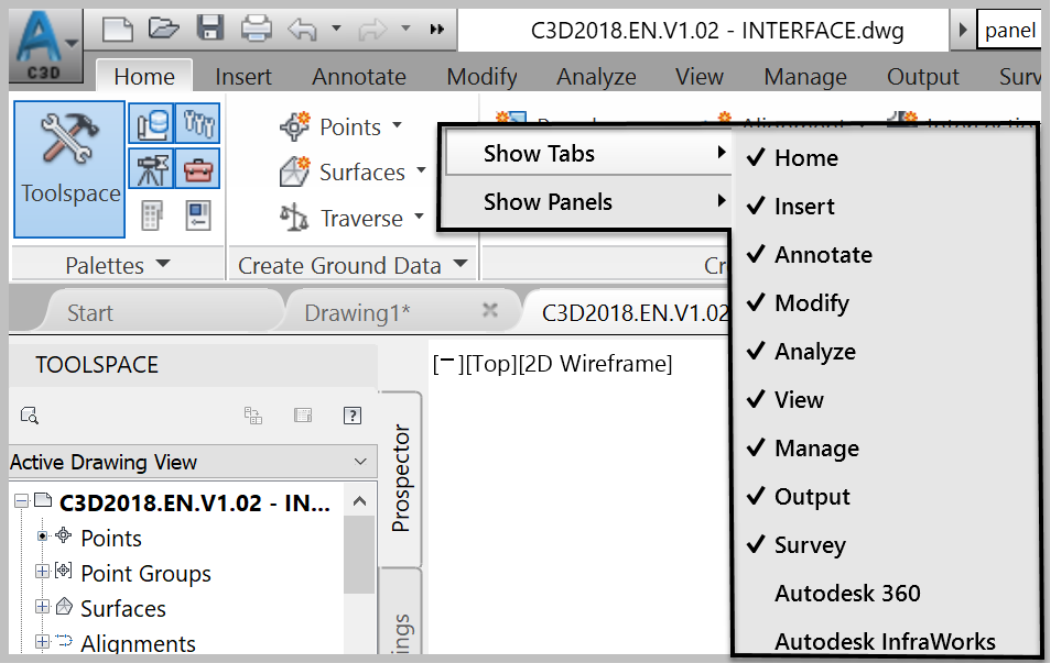
- To make the ribbon more readable, especially when working at a lower than recommended display resolution, unload unneeded panels.
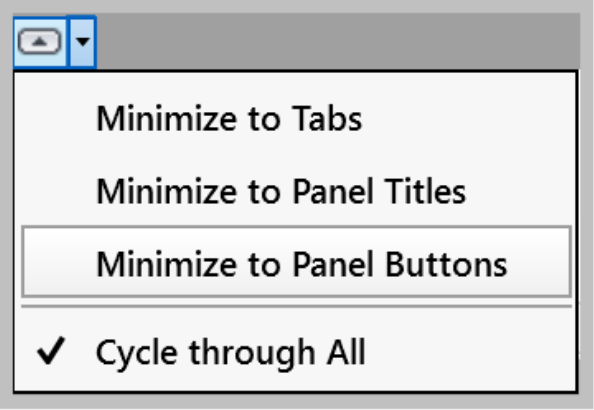
- An additional way to manage the ribbon is by collapsing it by using the Cycle Through button, the upward triangle to the right.

- A first click will collapse and make the ribbon compact. If you look closely, you will see that we still have access to all commands. They are just more compacted.

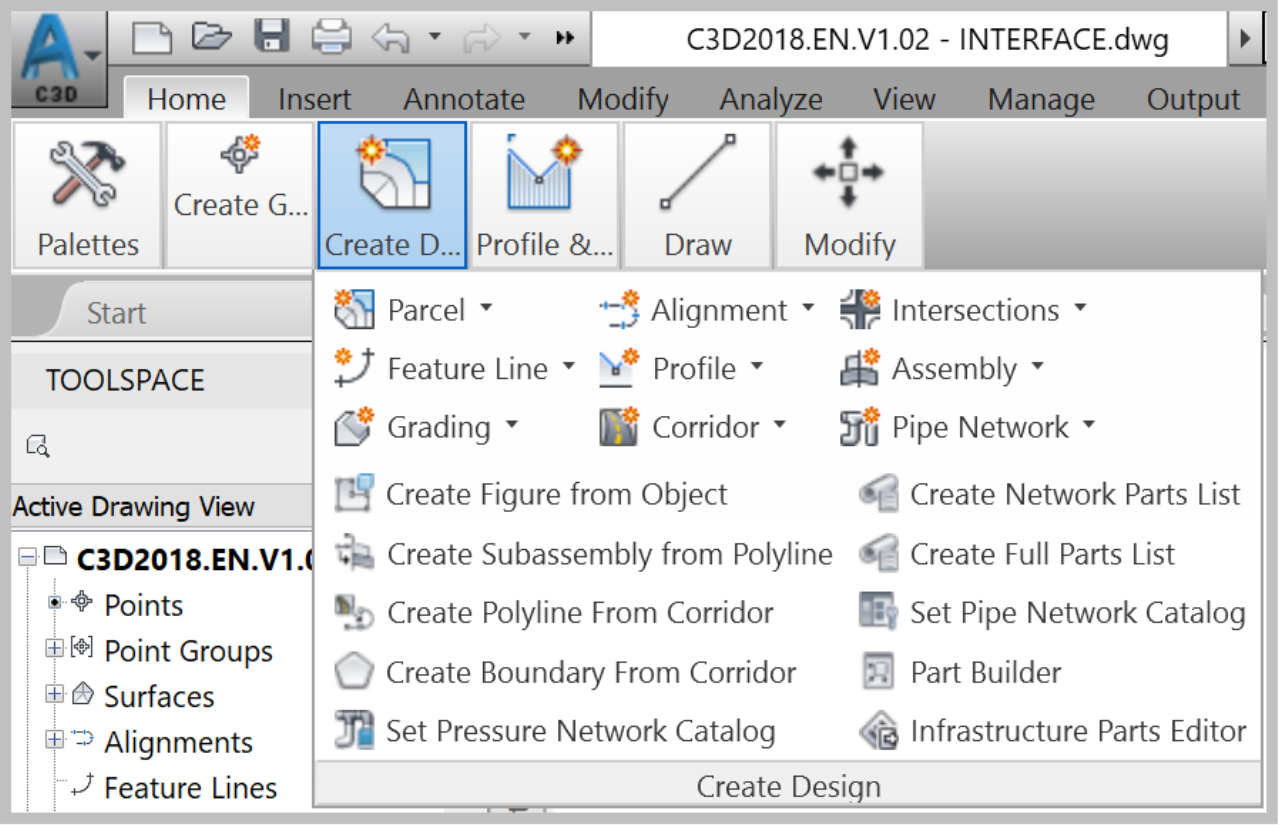
- By clicking on the Create Design panel the collapsed commands are expanded.
- Click on the cycle through arrow a second time, and the ribbon will adjust again.

- A third click will completely collapse the ribbon and minimize it to tabs only.

- Clicking on any tab will display the full ribbon.

- One last click on the Cycle Through arrow and we complete the cycle and return to the original state of the ribbon.
- Instead of going through the four cycles, we can just switch back and forth between the full display and one of three states of our choice, between Minimize to Tabs, Minimize to Panel Titles and Minimize to Panel Buttons.
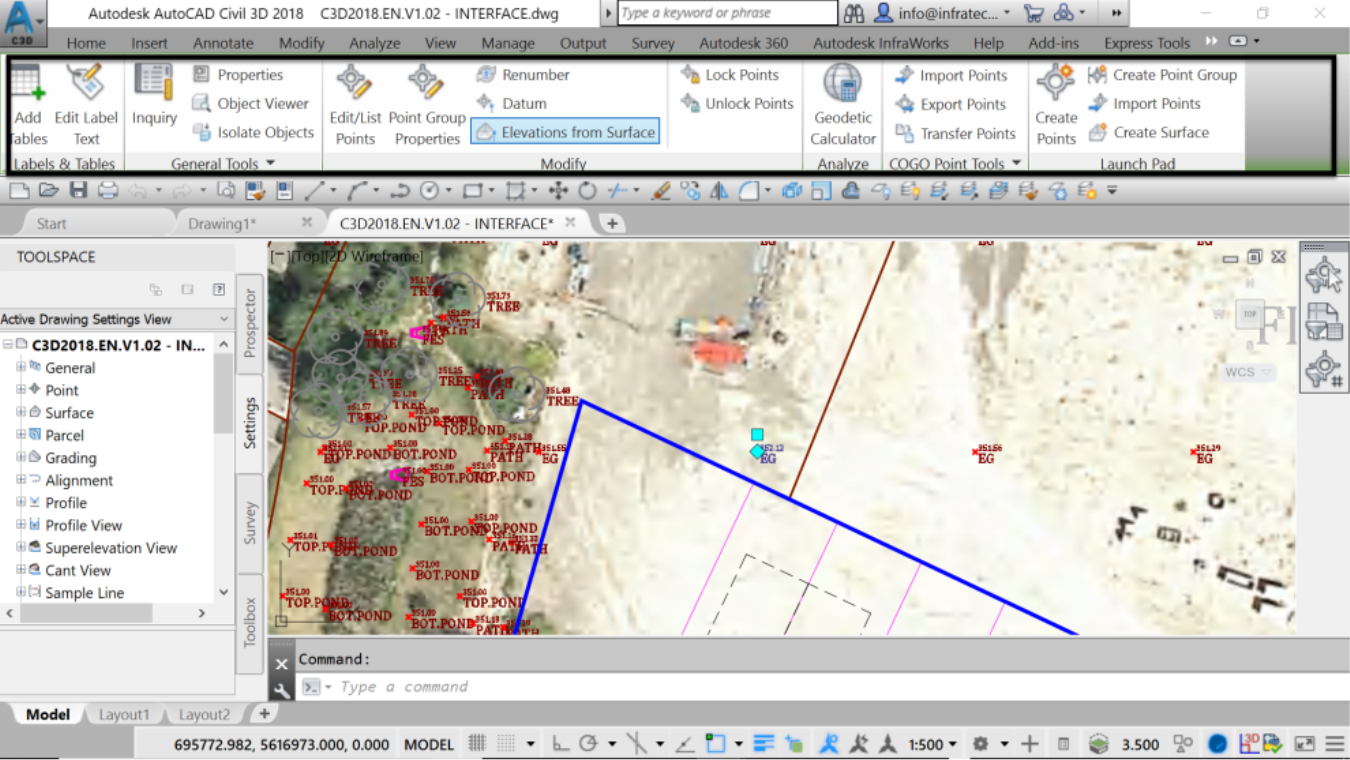
- Last but not least, one of the most significant benefits of the ribbon is its contextual responsiveness. It adapts to present you with a set of commands depending on the currently selected entity. For example, if you are working with points, the ribbon automatically changes to present you with the commands related to points.
- While working in the same interface drawing, zoom to a survey point, for example, one of the EG points to the northwest of the proposed site. Take note of the current state of the Ribbon with the Home tab activated.

- Now, click on the point. Notice how the ribbon adjusts and only shows commands related to points operations such as editing points, labels styles, importing and exporting points.
- That concludes the section on the Ribbon, up next, the Quick Access toolbar.
Full Course and Free Book


Customer Reviews
Great course
Patrick Butler
Very interesting and easy to understand. Since I already have some experience, was good to see how to design using different methods. Definitely further my knowledge even more. Can't wait to take more advanced courses. Thank you!
Very interesting and easy to understand. Since I already have some experience, was good to see how to design using different methods. Definitely further my knowledge even more. Can't wait to take more advanced courses. Thank you!
Read Less