Adobe Lightroom Classic Blacks, Whites, Highlights, Shadows
About Lightroom
Product: Adobe Lightroom Classic | Subject: Adobe Photoshop Lightroom Classic
In this exercise, we will learn about Adobe Lightroom Classic.
Blacks, Whites, Highlights, Shadows
In this section, we will continue to work with the tone subsection on the basic panel. But this time, we're going to work with highlights, shadows, whites, and blacks.
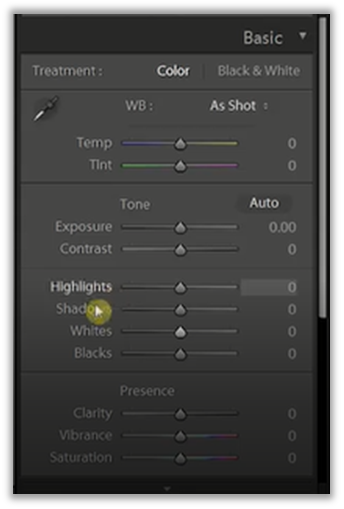
We want to work with these sliders because sometimes, when we adjust for exposure or contrast, what we do with these to appear is adjust for the entire image. With these four different slider highlights, shadows, whites, and blacks, we can have slightly more fine-tuned control over the entire image. In this example, we are working in the Australia folder, specifically this photo of the macaws.

For example, when we adjust the exposure slider, the entire image is affected. This may be not be something that we want. You will also notice how those entire color values on the histogram are moving left and right as we adjust the slider. Next, we are just going to adjust the contrast. You'll notice it applies to the entire image. While this may or may not be a good thing, perhaps we want slightly finer control over the entire process. So to get finer control over the highlights and shadows, we can use the sliders. Highlights and shadows are the light and dark areas of the image. When we increase the highlights, we're brightening up the brighter areas, and when we reduce the slider, we're darkening the brighter areas in the image.
In the same way, when we adjust the shadow slider, we're brightening up the darker areas of the image, and we're also darkening the darker areas of the image. You see that this is a very subtle effect compared to the exposure effect. You will notice how as I'm sliding back and forth. The changes in the histogram are not as dramatic as they were when we were adjusting the exposure.
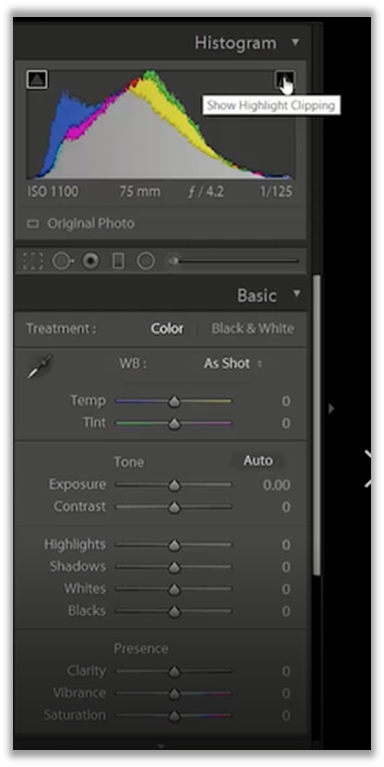
Whites and Blacks are similar to highlights and shadows. But with these two sliders, what we're trying to do is we're trying to minimize the black and white clipping. To illustrate this, I will go to the histogram, and I'm going to hover in the top left and click on where it says show shadow clipping. Then I'm going to go on to the top right and click where it says show highlight clipping to show you what I mean.
To illustrate this concept, I'm going to work with the whites and blacks slider above. As I move the white slider to the right, you'll notice the image will show red areas.

That's to show all of the areas that are being clipped. So as I move the slider to the right, you'll notice that red areas show up on the image. As I move it completely to the right, there are large patches of red. These are areas that are considered to be blown out.

You can see from the histogram, all of these values have already been clipped. That is to say; these are areas that we cannot recover any of the details from, and it's just going to show up as white.
To illustrate the shadow clipping, I'm going to use the black slider. I'm going to darken the areas. You will notice how the histogram changes and how the main image changes and shows up in blue instead of red.

All the areas that show up in blue on the image are areas where we lose all the detail because the image is very underexposed. We cannot, therefore, recover any of those details. This is what highlights clipping, and shadow clipping enables us to see. The best way to work with these sliders is to adjust the whites and blacks separately and fine-tune them with the highlights and shadows slider.
So, I hope this section has helped give you an idea of how highlights shadows, whites, and blacks work along with the clipping so that your images don't lose detail so that your images have more of an impact that you want to create for the viewer. So once again, please don't hesitate to reach out. I am here as a source of support for your continued learning.
Full Course and Free Book
-

Adobe Photoshop Lightroom Classic
Course5.0 average rating (1 review)Are you a professional an amateur or an aspiring photographer or a digital artist? Impress by creating breathtaking photos with Photoshop Lightroom Classic CC. Learn hands-on techniques from one of the best photo editors there is.
Purchase$1 / month
-

Adobe Photoshop Lightroom Classic Book
CourseAre you a professional an amateur or an aspiring photographer or a digital artist? Impress by creating breathtaking photos with Photoshop Lightroom Classic CC. Learn hands-on techniques from one of the best photo editors there is.
Free