Adobe Lightroom Classic "Quick Develop" & "Auto Tone"
About Lightroom "Quick Develop" & "Auto Tone"
Product: Adobe Lightroom Classic | Subject: Adobe Photoshop Lightroom Classic
In this exercise, we will learn about Adobe Lightroom Classic Library Module Adjustments Using "Quick Develop" & "Auto Tone".
In this section, I want to show you how you can work within the library module to adjust your photos quickly. The way you do this is to go on the right-hand panel and open up the quick develop section. If it's not already open, you can just click on the triangle, and it's going to open it up. And right away, you will notice that the quick develop section has three subsections. The first one is saved preset, and the second one is white balance, and the third one is the tone control.

Now in this section, I'm going to be talking about the tone control. You can use the Lightroom auto-tune feature, or you can adjust just a few settings by yourself. For example, you can adjust the exposure; you can adjust the clarity and adjust the vibrance. When you adjust the exposure using the buttons, it will increase or decrease it by one stop. The smaller buttons in the middle will increase or decrease it by a third of a stop. You have big changes out on the edges and then fine-tuned adjustments in the middle. The same way with clarity, adjusting one way with the two big buttons will increase the clarity putting big amounts. Then you can fine-tune your adjustment.

So the way I use this quick develop setting, at least within my workflow, is when I work with a shoot, I come back and import all the photos. I want to see what Adobe Lightroom thinks the best adjustments are quickly. I'll just have a look at what it shows me. As an example, let's work with the animals' folder and work with the dragonfly photo. The best way to work with this is to go into the loupe view. If you recall, you can click on the loop view icon in the button or use the keyboard shortcut E to get into the loupe view. Now in the loupe view, you can see the photo.

For me, the photo is alright. It's a nice macro shot of the dragonfly. But somehow, something is missing, like it doesn't quite pop out at me. You'll notice how I'm referring to my subjective experience of this image. Auto Tone is what Lightroom thinks the best adjustments should be. But because photos are an entirely subjective experience, it's up to you how you want to interpret what Lightroom thinks is the best. Now one way to apply Auto Tone is just to click on the auto-tone button or click Ctrl + U. You can see that it loads up the Auto Tone.

Now, this is Adobe Photoshop Lightroom's interpretation of the values to make this photo better. Once again, it's a subjective experience. Now, in this case, Lightroom has made this photo look better, in my opinion, because what it's done is it deepens the blues, darkens them up a bit, it's increased the clarity around the dragonfly wings. Hence, the wings pop out Against this backdrop. And so, it makes this image that much richer to me and that much more fulfilling. Auto-Tune works well in most situations. If you want to get an idea of the best settings quickly, then auto-tune may work for you.
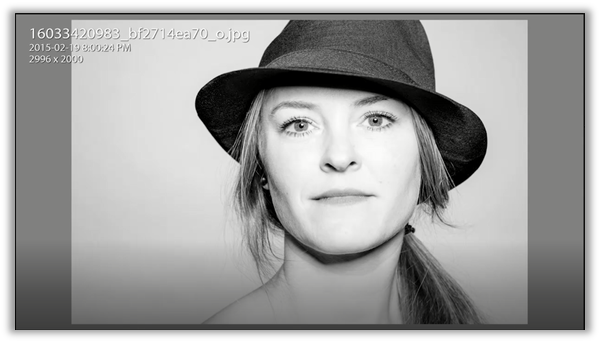
Now I want to give you an idea of how to autotune may or may not work in all situations. Let's select this photo of this young lady in the filmstrip. It's going to load it up in the loupe view.

Once again, you can click on the Auto Tone button or click Ctrl + U on the keyboard. If we do that, you'll notice that this image has brightened up a bit. It's opened up the color interface to see this young lady's image a little bit better.

In my opinion, this has also improved the photo and just gives it a little bit more punch.
Another example I want to give you is the photo down here in the filmstrip.

I kind of liked this view because she sorts of blends into the background here into the rocks. And I like the way that the light is hitting her face at this angle. And you'll also notice that the green here is not too distracting. Now, if you select to auto-tone it, you'll notice the improvement that Lightroom makes.

Now this improvement based on Auto Tone, to me, is not an improvement of the photo.
Let me show you another view of how Auto Tone does not quite work. So, this is an indoor shot.

You can see it's got a color cast. It's an okay shot. There's a little bit of improvement that can be done. But let's see what Adobe Photoshop Lightroom thinks. So, we're going to select to auto-tune it.

You'll notice that it has brightened up the areas around. It's brought a little bit more detail into the fellow's beard. But it's still got the same color cast. It's not very good.
Now in this photo, Auto Tone is not going to work very well.

So, you can see once again, it's taken in the same situation as the previous photo. But with the auto-tone selected, it does a worse job.

That's because of the way that Lightroom does its calculations. It bases it upon the image values, the light values that it analyzes within the photo. Now, this photo, it's been darkened. We see that it's made this photo worse than it originally was a shot. Once again, if you don't like what autotune does, you can make small or even big adjustments as you see fit and work with it. Now, this is just a quick way to improve your photos, and that's still working within the library module. We continue with the rest of the course. You'll notice that all of our big adjustments will be made in the develop module. But this is just a quick way if you're still within the library module to make some very quick adjustments using lightrooms, Auto Tone, and fine-tune auto-tone settings. It just gives you an idea of how those images may look like a finished and final product for yourself. I hope this section has been helpful. If you do have any questions, please don't hesitate to reach out.
"Before" And "After" - Checking Your Adjustments
In this section, I want to talk to you about the before and after views, you can access when working with your images. I want to point this out because I've mentioned the before and after views in other lectures. But I wanted to spend some time creating a tutorial about the before and after views because it'll help you a lot, knowing what they are and how you can use them. As an example, for this section, I've gone ahead and created a collection of six photos that I've made adjustments to. I'm just going to quickly scroll through them to show you what their after view looks like.


For me, the before and after views are important because sometimes, you know, you get really caught up in your creative process, and you're moving sliders back and forth; you don't know the kind of look that you want to work with. One way to go back and check your work is to keep your eye out on the navigator view. Then check out the history of what you've done. As you scroll up and down through the History panel, you will see that the navigator views updates. Now, this is okay for some things. But what if you want to see in a bigger view of the changes that you've made. I talked about using the backslash key to go to the before view and the after view in other sections. Now, this is a good way to check it out. Sometimes, you want to see those images side by side, and that's where accessing the toolbar at the bottom and the before and after views makes a lot of sense. If you click on the YY icon, and you will cycle through all the views. This is one view where we have the before on top and the after on the bottom. It'll tell you right which one is before and which one is after.

If you click on it again, it'll cycle through another view. This time, this is the entire image, but you will notice half of it is cut horizontally, the top half is the before, and the bottom half is the after.

Clicking on it one more time will cycle through, but this time, it will put those images in the left-hand and right-hand view. The left side has the entire before view of the image. The right-hand side has the entire after image.

I will click on it one more time, and you will notice that it's before and after on the left-right split. But this time, it's the entire image that split up half as before and half as after.

These are really good ways for you to see the kind of effect that your photos have.
You can use any of the above photos that I have adjusted to the before and after views. Cycling through these before and after views will give you a different idea of how you want to present these images and whether your work on these images makes sense.
So once again, to quickly recap, if you use the backslash key, you can have the entire before view the entire after view. If you click on the icon down, you can cycle through the before and after views. There are four different views that you have access to. Another way, of course, to get to the before and after views are to use the drop-down key and choose which view you like to have. Finally, the way to access the before and after view is to use the Y key on your keyboard. So, if you press it, it'll go to the current view, which is the after view and the before view. Now the Y key only jumps to the left and right split before and after. It doesn't cycle through the rest of the views.
So once again, just to quickly recap, there are two keyboard shortcut keys. There's the Y view. This is the before and after of the left and right split. And if I push it again, it disappears. There is the backslash key, which shows you the before and the after. And then, of course, you can cycle through using the icon at the bottom to choose one before and after views you want to have. This is a really handy way to see how your images and how your artistic process moves along or whether you want to keep the adjustments you've made to the images. I hope this section has been helpful about how you can use the keyboard shortcuts to quickly switch between the before and after views so that you can have an idea of the kind of adjustments that you're making to the image and whether or not it's going toward the goal that you had in mind for the photo.
Full Course and Free Book
-

Adobe Photoshop Lightroom Classic
Course5.0 average rating (1 review)Are you a professional an amateur or an aspiring photographer or a digital artist? Impress by creating breathtaking photos with Photoshop Lightroom Classic CC. Learn hands-on techniques from one of the best photo editors there is.
Purchase$1 / month
-

Adobe Photoshop Lightroom Classic Book
CourseAre you a professional an amateur or an aspiring photographer or a digital artist? Impress by creating breathtaking photos with Photoshop Lightroom Classic CC. Learn hands-on techniques from one of the best photo editors there is.
Free