Adobe Lightroom Classic Sharpening Images
About Lightroom Sharpening Images
Product: Adobe Lightroom Classic | Subject: Adobe Photoshop Lightroom Classic
In this exercise, we will learn about Adobe Lightroom Classic and Sharpening Images.
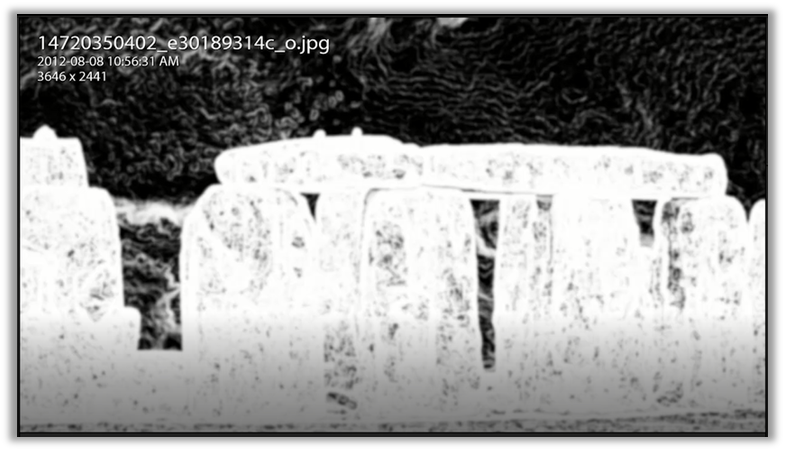
In this section, I want to share how you can use Adobe Photoshop Lightroom to sharpen your images. In this example, we are using Stonehenge's image, and you can find this image in your images folder.

Sharpening to me is kind of a subtle effect. It's really about bringing the viewers' attention, bringing the viewer's eye to the definition around the edges. I chose Stonehenge for this reason because Stonehenge Well, it's really about the stones, right. We want to ensure that the image that we capture has an impact on the viewer. When you go to this site in Salisbury in England and look at the stones, they are majestic. That's sort of the emotion that I want to create with this image. Now, you'll notice that I've gone ahead, and I've done a little bit of sharpening, and that's because I want to illustrate the concept. Now what I'm going to do is I'm going to show you the before view and the after view. This is the before view.

And here's the after view.

Now, I don't know if you could see, but there was just a subtle shift here in detail in the stones' definition. I'm going to zoom in; I'm going to show you what that looks like. So, this is the after view. And you can see the lines here sort of jump out at you.

Now, this is the before view. And you will notice that the lines kind of blending into the background and sort of don't jump out.

Now I'm going to reset all the changes that I made to the after-view image. To reset the changes, I will:
- Click on the History panel,
- Next, I'm going to right click on the image and choose settings
- Then I will select reset.

You'll notice within the History panel; the image has been reset to its original. Now that we're ready to work with the sharpening, I want to bring your attention to the right-hand panel. You will notice that sharpening is actually in the details section. So I'm going to go ahead and open that and show it to you.

The sharpening section has two subsections. The first subsection is the sharpening itself and then followed by noise reduction. These two go together because the more you sharpen your images, you might find that more noise is introduced. So, as you sharpen your images to create the edge definitions, you will find that somehow you will have to work with and reduce the noise that shows up due to your sharpening. I want to point out a few things: first is the exclamation mark near the sharpening section. If you hover over it, it will tell you that sharpening is best seen on the highest zoom levels so that you can work with and see all of the detail that the sharpening process brings forth.

That's just a warning that Lightroom gives you. If we click on the exclamation mark, we zoom in to the image to work with the lines and the edges we want to work with. Another view to have, especially if you want to work with sharpening, is to open the triangle up, and you'll notice that Lightroom has another view.

Now you can adjust the area within the view by clicking on the star-likes icon and scrolling through the image to find an area that you want to work with, and then selecting it. I find that this could be a little bit distracting. Most of the time, I have the triangle closed and work with the zoom level in the main image. For now, what are we going to do? You'll notice that there's the amount, there's the radius, there's detail, and masking in the sharpening areas. Now working with the amount slider, we're going to intensify the edge definition we want to create. So I'm just going to go ahead and slide it to the right. And I want you to keep your eye out on the image. And you will notice how much sharper and how much more detailed those lines are becoming and how they sort of pop out at you as the edges become more and more defined. So I'm going to take it to the right. And you'll notice the edges themselves are extremely defined.

One quick thing that I want to point out here is that you'll notice a little bit of noise introduced as you change the line definition's intensity. Sometimes that may be a good thing, and that's kind of the effect that we're going for, but most of the time, it's not, and this is where we'll have to work with the noise reduction. But that's for another section. In this case, what we're going to do is we're just going to adjust the slider to something that makes sense for you.
One quick tip that I want to point out is that when you're working with these sliders, I recommend holding down the Alt key and working with the sliders that way. When you do that, Lightroom shows you the adjustments in grayscale, and this is much easier on your eyes. It is also much easier to see the kind of changes happening, especially in the grayscale. So as I move the intensity slider back and forth, you will notice how much of the change is happening, and you'll notice how easy it is to see the changes show up when it is in grayscale. I think I kind of like this amount of sharpening, so I'm going to leave it there.

And you will notice once again that the lines are pretty defined. Once you've added a little bit of sharpening to your image, you will notice that the other three sliders become available. The radius slider adjusts the size of the details that the sharpening is applied to. Once again, I will hold down the Alt key, and I will move the slider to the left or right. By default, it's at one. If you have photos that have fine details, you might want to try working with a lower radius. And if there are photos with larger details, you might want to increase your radius. Now since this is Stonehenge, there are probably big chunks of detail that we want to adjust. So we're just going to move the slider to the right; right now, I'm holding the Alt key. When I do that, it will say reset sharpening, but we're not going to worry about that. We're just going to slide the slider. And as I slowly move the slider to the right, you'll notice the image changing. These are the sizes of the details the sharpening is being applied to. These are very hard lines that you can see in the image. I'm going to let go of it. And you'll notice that all of these areas have very sharp edges and sharp lines and very crisp definitions.

As I continue to work with this, I'm getting a better idea of the impact that I want the image to have on my viewer.
The next slider is the detail slider. This slider is about how much we want to emphasize the edge. The default value is 25. I' will show you how this affects the image. So I'm going to hold down the Alt key and move my slider slightly to the right. You'll notice the image changing a little bit. More and more detail shows up within the stones themselves and reflects that in the grayscale image. I'm going to leave it like that, and you can see there's a whole bunch more detail that opened up.

I want to quickly point out that as I've adjusted the sliders, the radius, and the details, I've also introduced a little bit of noise in the sky and clouds. This is not something that I want because it will draw the viewers' attention away from the image's main focus up into the sky where I don't want it. This is where masking comes in. I find that masking is cool because you can tell Lightroom what areas you want to work with. Once again, when you hold down the Alt key and work in grayscale, you can better idea how masking will be applied to the image. I'm holding down the Alt key, and I'm slowly moving the slider to the right. When I do this at the lowest setting, the image is white, which means the sharpening will be applied evenly across the image. As I move it slowly to the right, certain areas become darker. Those areas that become darker are the areas that the sharpening won't be applied to was very good around here because I didn't want the sharpening applied to the sky. So, I'm just going to leave it around at 33 settings and let go.

Now that I've adjusted the masking, what you'll notice is that the image used to have noise in the sky up in the clouds is no longer there because I've masked out where I wanted the sharpening to be applied to. Once again, that sharpening was applied to the stones to the rocks and away from the sky. Anything in white is where the sharpening will be applied, and anything darker is where the sharpening will not be applied.
That's all sharpening is. We're doing with sharpening because we're trying to create some definition around the edges to consciously choose to create a look for an image that will draw the viewer's eye to a certain area of the image or certain details want. To access the sharpening sliders, we go over to the right-hand panel and open up the detail section. You will notice that there are two subsections; sharpening and noise reduction. Noise reduction will be covered in another section. But for now, sharpening has four different sliders. The amount is the intensity of the sharpening that's going to be applied. Radius is the size of the details that the sharpening is going to be applied to. The detail is how very finely we want to bring out those details within the image, and masking is about where and which areas of the image we want to sharpen. I hope this section has been helpful. If you do have any questions, please don't hesitate to reach out.
Full Course and Free Book
-

Adobe Photoshop Lightroom Classic
Course5.0 average rating (1 review)Are you a professional an amateur or an aspiring photographer or a digital artist? Impress by creating breathtaking photos with Photoshop Lightroom Classic CC. Learn hands-on techniques from one of the best photo editors there is.
Purchase$1 / month
-

Adobe Photoshop Lightroom Classic Book
CourseAre you a professional an amateur or an aspiring photographer or a digital artist? Impress by creating breathtaking photos with Photoshop Lightroom Classic CC. Learn hands-on techniques from one of the best photo editors there is.
Free