Adobe Lightroom Classic Spot Removal & Heal vs. Clone Brush
About Lightroom Spot Removal & Heal vs. Clone Brush
Product: Adobe Lightroom Classic | Subject: Adobe Photoshop Lightroom Classic
In this exercise, we will learn about Adobe Lightroom Classic Spot Removal & Heal vs. Clone Brush.
This section will talk to you about spots and what you can do to remove them using Adobe Photoshop Lightroom. So I have created a quick collection of these few images to demonstrate the Spot Removal Tool.

You can find the first four images in your images folder, and the last three are in your portraits folder. So, let us go to the develop module to show you what I mean. I'm going to select this photo.

The above photo is a photo of a digital camera sensor. If I zoom into the image, you'll notice that this is the actual sensor itself.

It has accumulated some dust spots. This is what happens over time as you use your camera, change lenses, and take photos. What will happen is that dust will find its way to the sensor in one way or another. When it does, it's going to show up in images like this.

This is the image that I have zoomed in on, and you can see that those are all dust spots in all of the areas. They are going to show up in all of your images as blotches that you need to remove. This is where the Spot Removal Tool comes into play. You can find the Spot Removal Tool on the tool strip as the second tool.

You can either click on its icon or click on the Q key on your keyboard to access the spot removal tool. I'm just going to click on the icon and show you what becomes available. You have the brush, which appears as crosshairs. You also have the brush's size, you have got the brush's feather, and you have got the opacity of the brush.

Now, these three settings are going to work together to remove the spots on the photo. There are two more options. One is a clone brush, and the other one is a heal brush, notice they use the same setting. The difference between the two is a clone is just a direct copy of one area of the image to another area to get rid of this book. This may or may not work. Heal uses the best match algorithm, and it will blend in certain things to make that spot disappear in a very natural way. Most of the time, you will be using the heel brush, and in very few situations, you will use the clone brush.
For now, I will demonstrate how you can use the spot tool. Ensure that your brush's size is just a little bit bigger than the spot you're going to remove. You can adjust the brush size by using the slider left and right or using the keyboard's bracket keys. So I'm just going to make this smaller or bigger as I see fit. I'm going to go ahead and click the spot. You will notice as I click it Lightroom has created two circles.

One is the target circle, and the other one is the source circle. The one thing that I can do is I can hover over these circles, and when the hand comes up, I can change the source. So when I change the source, I'm telling Lightroom to know the area it picked is not the area that I want. This is the spot I want to remove. But I want you to take pixels from this area that I've chosen.
Once it does that, it will make sure that it takes the right pixels, and it will apply them to the target you have chosen. So while you are on the image and your toolbar is set to auto, you will notice that the targets will appear. If you want to see the spot you have removed, you will have to move away from the image and notice that the spot is gone. Now very quickly, we can work like this, and if we want to find more spots to remove, we can click on them, and they are all going to disappear. You will notice that over time, the image will be a series of little circles that you create while removing the spots. So as I hover over it, you will see that the all of the spots that I have chosen to remove. The currently active one is the one that I've highlighted.

Now let's go back to select a different spot that we want to work with. If you remember, this was our very first spot. Let's hover over it and click on it. That becomes the active spot now.

Now I can change the target's size and the source spots that I want to work with. I will hover over the area, and when I see the arrows come up, I will adjust the settings. Now the lower circle was the source area, and the upper one was the target spot that we removed.

By adjusting the circles' size, we can adjust the area's size that we want to cover up. This is all well and good to work with a great background because it makes removing spots easier. But a practical application for removing spots is usually with portrait photography. When we want to get rid of a few blemishes, perhaps a little more marks or maybe little birthmarks here and there. Now, this is where the Spot Removal Tool comes in very, very handy. Of course, you want to work with your client because sometimes they may not actually want these spots removed. Now you can see this lady here. If we wanted to make a few adjustments, we can just very easily do so and ensure that the final image becomes a little bit crisper and a little bit more visually appealing.

That is not to say that she is not a young, pretty lady. But it is just for your shoot. For the image, you want to make a few changes. I'm just going to move away from the image. You will notice that the before and after views are very subtle yet have a different kind of impact when you look at the final image.


So you will notice that I have removed few spots. You can see that the adjustment is quite nice.
Let me go ahead and work on this photo here.
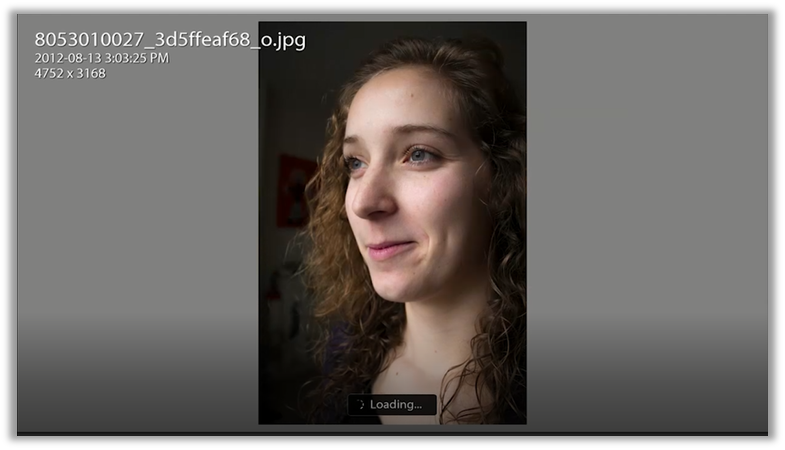
You will notice that this is a young lady, so she has got nice smooth skin. So there is not much to worry about in terms of Spot Removal. But perhaps she might want to get rid of some of the birthmarks. Now, one option that I haven't talked to you about is visualizing spots. In the other section, I mentioned that working in grayscale is helpful to you as a photographer because you can catch things that you normally wouldn't when your eyes are bombarded by color. Now, the option that I turned on in the toolbar is something called visualize spots.

It has a threshold slider to adjust to seeing how you want to visualize the spots. You will notice that as I adjust it to the right, many more things come into white. You will notice that maybe these things are not spots that we want to work with. But other things do pop up. In this case, the birthmarks on her forehead and chest. You can easily work with a Spot Removal Tool using this overlay, and then hopefully, you're getting all the right spots you want to remove. So, in this case, there are only a few that I want to remove. So let's go ahead and double-check to make sure that our visualization was correct. You will notice the before and after.


Once again, we have reduced some of the spots, and we have made sure that her skin is a little bit better and smoother.
The visualized spots option did not show us too many blemishes that we may want to work with within that image. Let us go back to our gray screen.

We will notice that when we are under the visualize spots, we see a lot more of the areas that have spots that maybe we want to correct.

It is very easy to remove the spots. We need to go to the image and select all of the spots, and Lightroom will go ahead and do the rest.
Since this was a gray background, and the lighting is even, we are confident that whatever shows up in the visualize spots view is the spots we want to remove. I will notice that I've adjusted to the right. And Lightroom is picking up different areas of light that show up in this gray background. So we might want to adjust it just a tad to the left to just focus on the big spots we want to work with. And that's it for the visualize spots overlay and then the heel brush.
But let me just take off the visualized spots overlay. You can access it by the keyboard shortcut A or just clicking on the icon.
Now for this example, I have chosen this image.

I want to show you the difference between the heal brush and the clone brush. Now, this young lady has a few birthmarks and a few freckles that perhaps she might want to adjust, or perhaps we might want to adjust depending on the kind of final product that we want to showcase. So, for now, let me use the heal brush. I will work on a few more spots. Now I could always work with the visualized spots overlay. But I'm choosing not to because it's a little bit noisy. Now let me move away from the photo and show you we have removed a little bit of a mole and a freckle here and there.

That looks good for the moment. This was the heal brush. I want to show you the difference between the heal and the clone. I will choose the heal brush and choose the spot on her forehead as my target spot. Then I am going to move the source spot to this spot near her hair. You will notice the difference between a clone and heal. What heal is doing is it is taking the source pixels and sort of blending them within all of the pixels that are found in the target. So it's adjusting to what the target should look like.

Let me change it to a clone brush. You will notice that it copies the pixels directly from the source to the target.

Essentially that's the difference between a clone and heal. Clone is a direct copy and heal will do its best to blend in what it finds in the source to what is around the target. Now, in this case, it's not an ideal situation, because we have got hair and different coloring, We can move it to a different part of her face a different lighting condition that is mostly similar to the spot we want to remove, and you will notice the slight adjustments that it's making.
The other options within the heal and clone spotted tool is the feather and opacity options. Let me go ahead and pick this spot on her forehead. Then I'm going to adjust the feather. A feather value of zero is a very hard edge. This is better illustrated under the clone. Now you can see the circle here is a very, very hard edge. The more I adjust the feather, the softer the edges become. So let me zoom into the photo to show you what I mean with the feather 100. If you don't have access to the zoom cursor, you can always go to the navigator pane and select 1:1, and you will zoom into the photo. Now, this is the feather at 100%.

You will notice how it blends in and all of these pixels to the outside edges.

You will notice that it is a very hard edge. But depending on how well you want to work with it, you can always adjust the feathering.
Let's just change this to a heal. We will move the source away from the hair to another location that is a bit more suitable. Of course, we can always adjust the feather back and forth as we want, and it will change the spot as well.
Now opacity tells you how much that change is going to blend into the background. An opacity of 100 means it's right there, and you're not going to see any of the backgrounds behind it. But as we drop down the opacity, we're going to see that spot we want to remove and show up a little more. And it'll become a little bit more visible as we drop down the opacity. An opacity of zero means that the target area we want to work with is not going to show at all. And what's left is the underlying image itself.
But let me zoom out, and I can use the keyboard shortcut Z, or I can click on the fit view. So now you can see, we have made a few adjustments to this image. This is the before view.

And this is the after view.

We have made just a few adjustments., It now has a cleaner and more pleasing look. This, of course, depends on what you want for your final image and what your client wants for their final image.
So to quickly recap, In this section, we worked with a Spot Removal Tool. You can find that in the tool strip under the develop module. The spot added tool allows you to remove spots in a very creative way. You can either clone source pixels to the target pixels or use the heal mode, where Lightroom will take care of all the calculations to adjust the spots so that it becomes more pleasing and blends in with the background. So, you can adjust the size, adjust the feathering, and adjust the opacity of the spot you want to remove.
Spot Removal Tool For Custom Lines
In this section, I want to continue with the Spot Removal Tool to give you more ideas of how you can use the Spot Removal Tool to create a certain different kind of effect. Now, we are still in the develop module. We had already worked with this picture in the previous section.

Notice that there are a whole bunch of spots that we removed. Now I am going to work once again with the Spot Removal Tool, and this time. I'm going to adjust it for the kind of lighting underneath her eyes to smoothen it. So we are going to find an appropriately sized brush. That is to say, we don't want a really big size brush, nor do we want a small size brush, but something that is easily adjustable. I'm going to show you with the right eye here of this young lady. I'm going actually to click and paint around her eye.

You will notice that I painted over the eye section using the brush tool, and Lightroom went ahead and decided to find an appropriate source.

I don't like it on the bridge of her nose, so I will bring it down her cheek, which I think sort of matches the lighting underneath her eye. We will notice that the Opacity is at one. That means most of the background is going to show, which is not what we want. So let's adjust it. You will notice how it has just blended in very nicely so that we don't see that deep dark shadow under her eye.

We can also work with the feathering. We can soften it up, we can make it lighter, or we can always adjust different areas of the skin. So we can bring a look of naturalness into the final product. So now I'm going to do the same thing to the other eye. I will continue to use the heal brush. Perhaps, I may adjust the brush size slightly. Then I'm just going to paint underneath the second eye. Now I kind of liked this look. But I can show you what happens when you exaggerate it. So I'm going to drive the opacity 100. You will notice that it's blended all of these things in now because it is a heal brush. It sort of looks unnatural. Let me zoom in, show you what I mean. And you can see how it's kind of unnatural.

Let me reduce the opacity to blend in with the background to have a more natural look. And I think that looks all right.

I may just adjust the feathering just a tad to give it a bit more of an appropriate look. This is the zoomed-in closer view. I'm going to hold down the spacebar and adjust the image down. You can see it is all right. It's not bad. Let me zoom out again and show you the final look. It looks natural and sort of looks like how I would want to work with it, and I'm going to keep it that way.

Now there are a couple more things I want to point out when you are using this tool. When you paint over it, you will notice that you can no longer resize the target and source areas. That's because this is a custom paint job in some sense. If I showed you this Spot Removal Tool, you could see that I can always adjust the source's size and target areas to make changes. But when I use the brush tool to paint an area, I can’t. What Lightroom does is drop a couple of pins to indicate that these are custom areas.

Now with the pins, when I hover over it and click on it, it becomes active. I know that the pin is active because there is a black spot in the pin's middle.

Now that the pin is active, I can go ahead and make adjustments to it. I can change the feather and the Opacity values of the pin. I can just work on all the adjustments that I want.
Spot Removal Tool for Straight Lines
In this section, I want to give you another example of how you can remove straight lines using the Spot Removal Tool. Now the Spot Removal Tool is quite versatile. Let me show you what I mean by that. So for this section, we are using this example of this power lines photo. You can find this photo in your images folder.

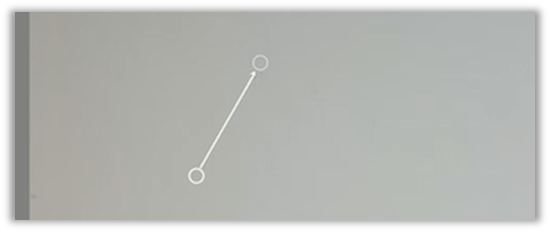
This photo has power lines, vertical column lines, clouds, and even the aerosol trails. The way you can work with this image to remove all these areas is to select the Spot Removal Tool once again and adjust your brush's size to something that's going to cover the area you want to remove. First of all, we want to select the one point or end of the line we want to remove. Then we are going to hold down the shift key and select the other end of it. You will notice that it's made this into a horizontal line.

Once again, you will notice the pins, which indicate that it's not a circle or a Spot Removal, but a rather custom shape. So we can adjust where we want the source and the target to be, and we can ensure that Lightroom will blend in the rest of the photo. Now you will see that the cloud is still there. That's because the feather and the opacity are not adjusted fully. If I adjust that and move away from the image, you will see how most of that cloud has disappeared.

As a second example, I want to show you this image of the few birds hanging out on this power line.

I find that this image is quite nice, except for the power line above. It sort of doesn't go with the rest of the image. Once again, I am in the Spot Removal Tool. I'm using the heal brush properties, and I have adjusted my feather to zero and opacity to 100. To show you how very easily this is going to work. So what I'm going to do since this is a straight line, I'm going to find one end of the line that I'm going to remove and click on it, then I'm going to hold down the shift key on my keyboard and find the other end of it.

You will notice that Lightroom has made a duplicate area that it thinks is appropriate, and it has applied the settings to it. I'm going to hover away from the image, and you can see very easily how the distracting power line was very quickly removed from this image to make this a little bit more interesting.

I hope this has been helpful. If you have any questions about how you can remove horizontal lines or shapes with Lightroom, please reach out.
Full Course and Free Book
-

Adobe Photoshop Lightroom Classic
Course5.0 average rating (1 review)Are you a professional an amateur or an aspiring photographer or a digital artist? Impress by creating breathtaking photos with Photoshop Lightroom Classic CC. Learn hands-on techniques from one of the best photo editors there is.
Purchase$1 / month
-

Adobe Photoshop Lightroom Classic Book
CourseAre you a professional an amateur or an aspiring photographer or a digital artist? Impress by creating breathtaking photos with Photoshop Lightroom Classic CC. Learn hands-on techniques from one of the best photo editors there is.
Free