-
Get It
$19.99
$19.99SSA Stormwater Book and Practice Files
Storm and Sanitary Design Tutorial: Orifices
Stormwater Orifices
Product: Autodesk SSA | Subject: Storm and Sanitary Analysis
In this exercise, we will learn about stormwater orifices.
About Stormwater Orifices
The orifice will control the low flows inside the control structures. This will be the permanent pool of the pond. Anything above that elevation will go through the control structure.
- Keep working with the same file if you are following along. If not, open the file 04.05-SEWERS-Hydraulics-Links.spf
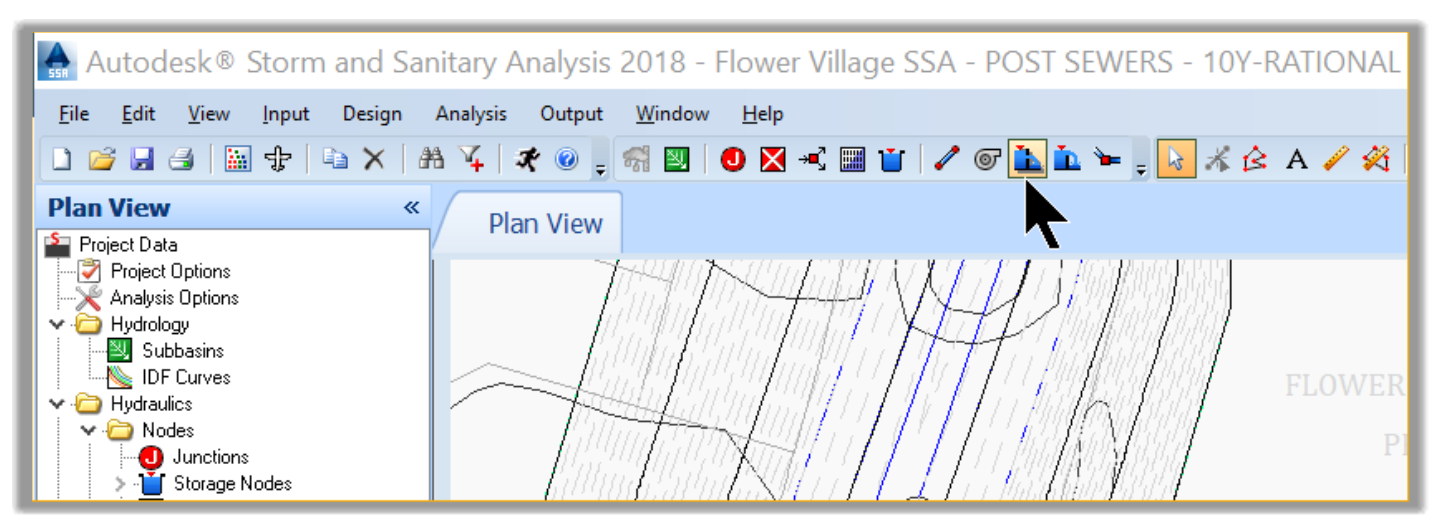
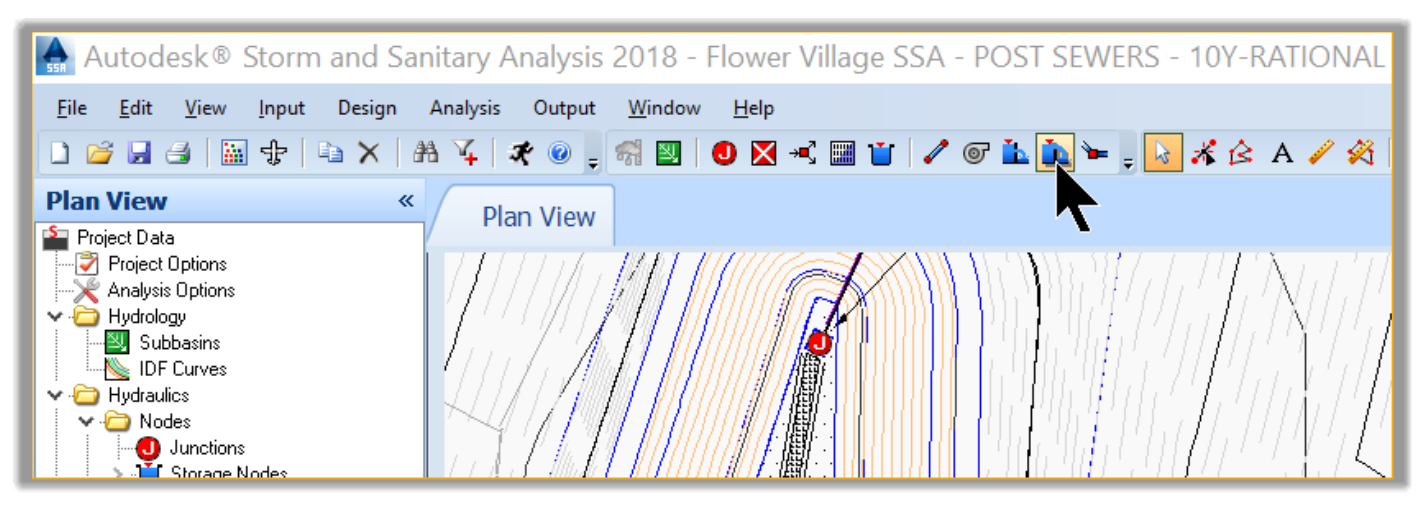
- To create an orifice, on the Elements toolbar, click on the orifice command
- Next, click on the Pond.
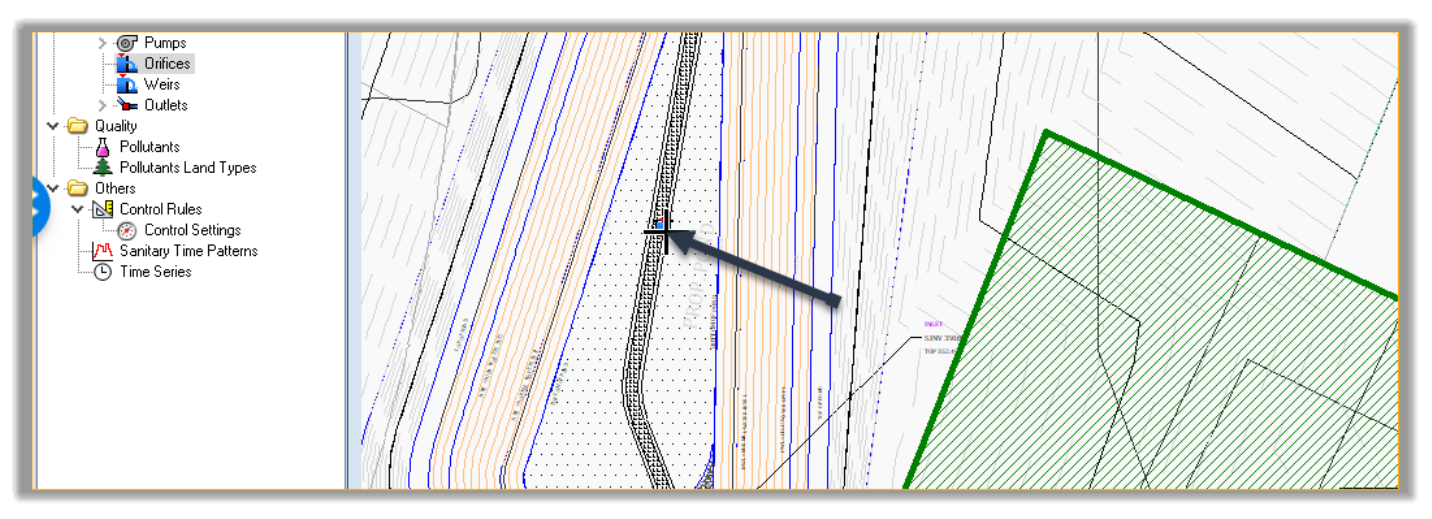
- Then, click on an intermediary point between the pond and the control structure.
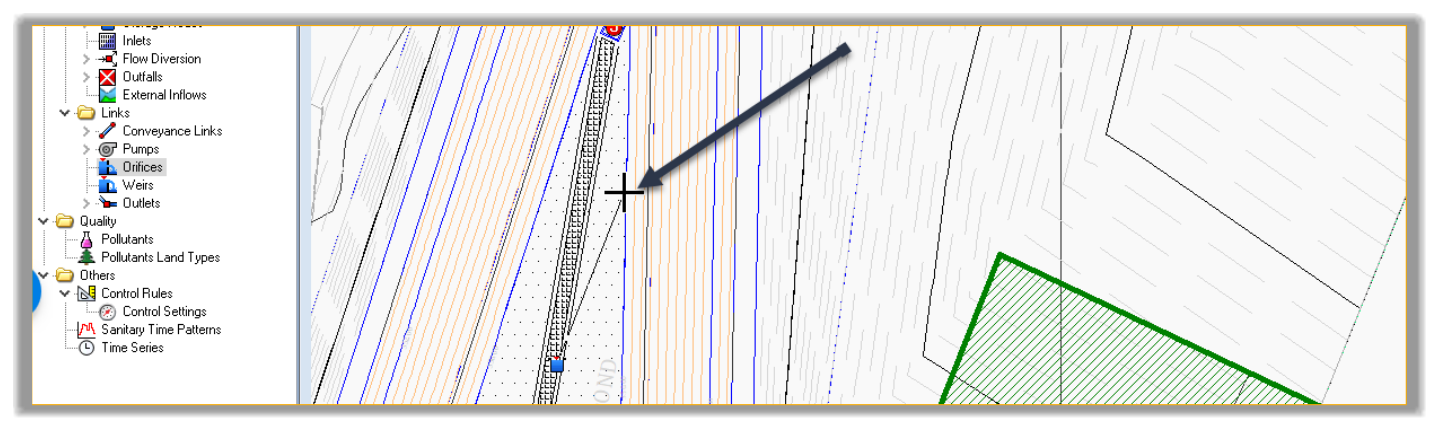
- Next, click on the control structure and hit escape to end the command.
- This creates the orifice through the control structure. Now we need to set its parameters.
- Hit ESC to exit the orifice creation command. Then, double-click the orifice to open its parameters.
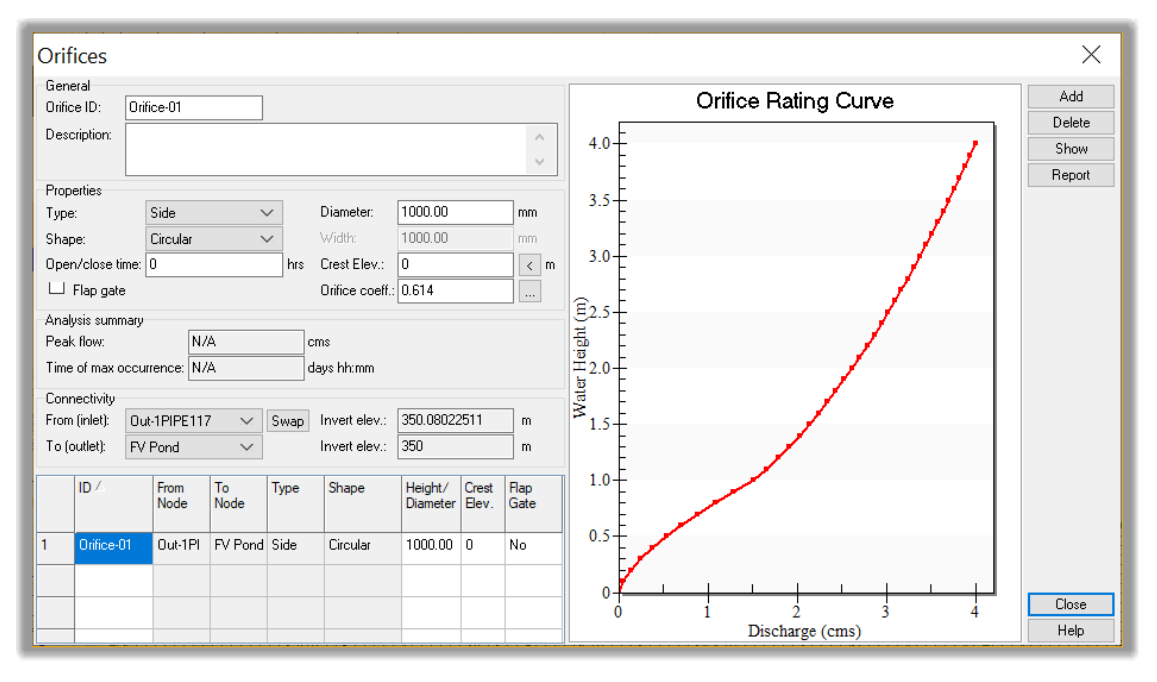
- Next, set:
The orifice diameter to 150mm or 6in.
The crest elevation to 350.60m or 1152ft.
- Leave all the other parameters to their default values and click on close to dismiss the Orifices window.
- The next step is to design the weir for higher flows. To create a weir, click on the weir command on the menu bar.
- Then, click on the pond.
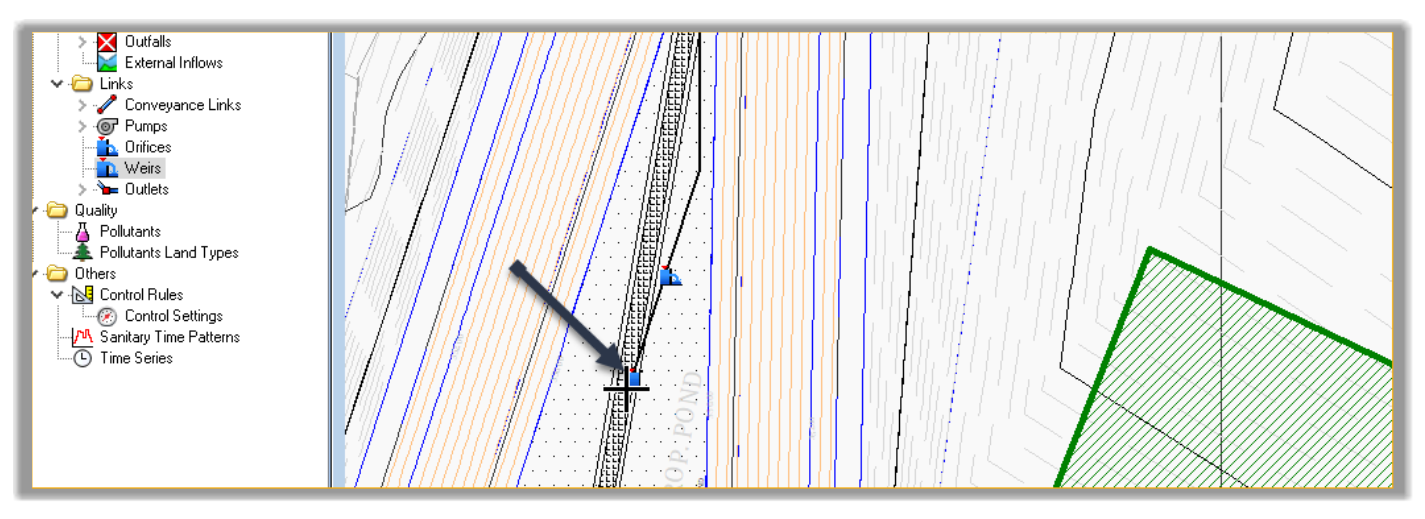
- Next, click on an intermediary point between the Junction and the control structure. We are doing this, so we don’t have the weir sitting on top of the orifice. This will not impact the calculations, but it allows us to easily select each element.
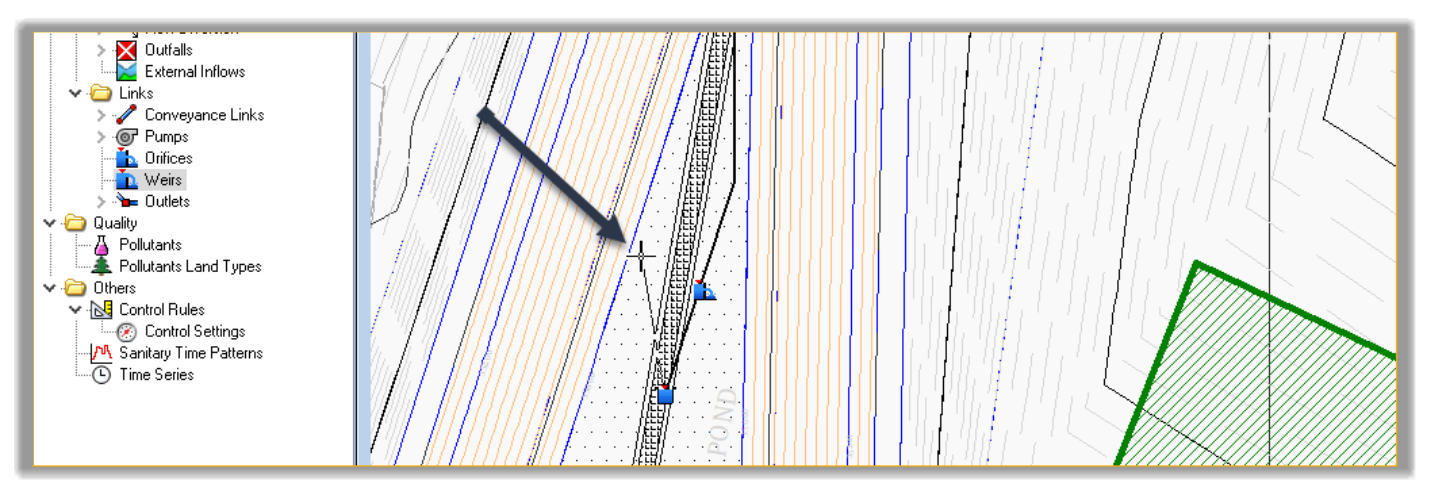
- Then, click on the control structure and hit Escape.
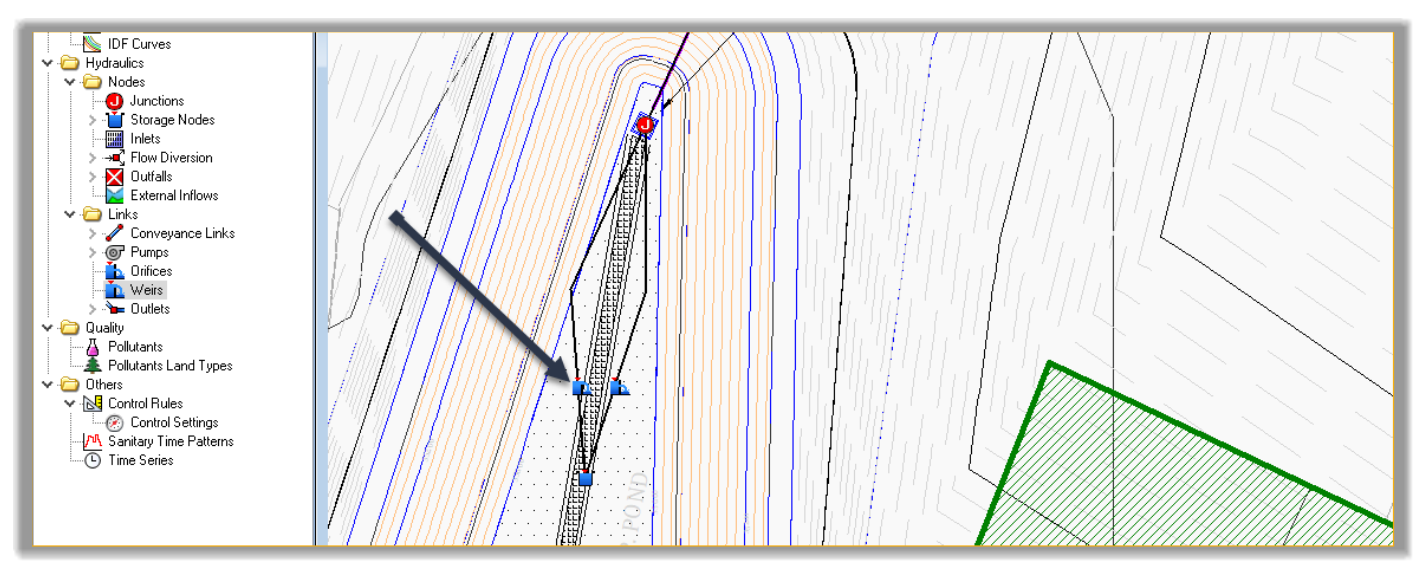
- The weir is now inserted. We need to modify its parameters. Double-click on it to open the Weirs window. In the weir editor, select the following parameters:
Crest Elevation: 352m or 1155ft. This is a temporary value. We will know the final weir crest elevation after the detention calculation.
Type: Rectangular, to conform to our outfall structure
Crest length 1m or 3ft.
Crest height 0.25m or 0.80ft.
- Click Close to dismiss the Weirs window.
- Next, we need to tie the control structure to the pond’s inlet. We can create another link to tie them. Or, we can just tie the incoming pipe to the. This is what is actually happening in reality. To do that, select the pipe, right-click and select Connect From/To.
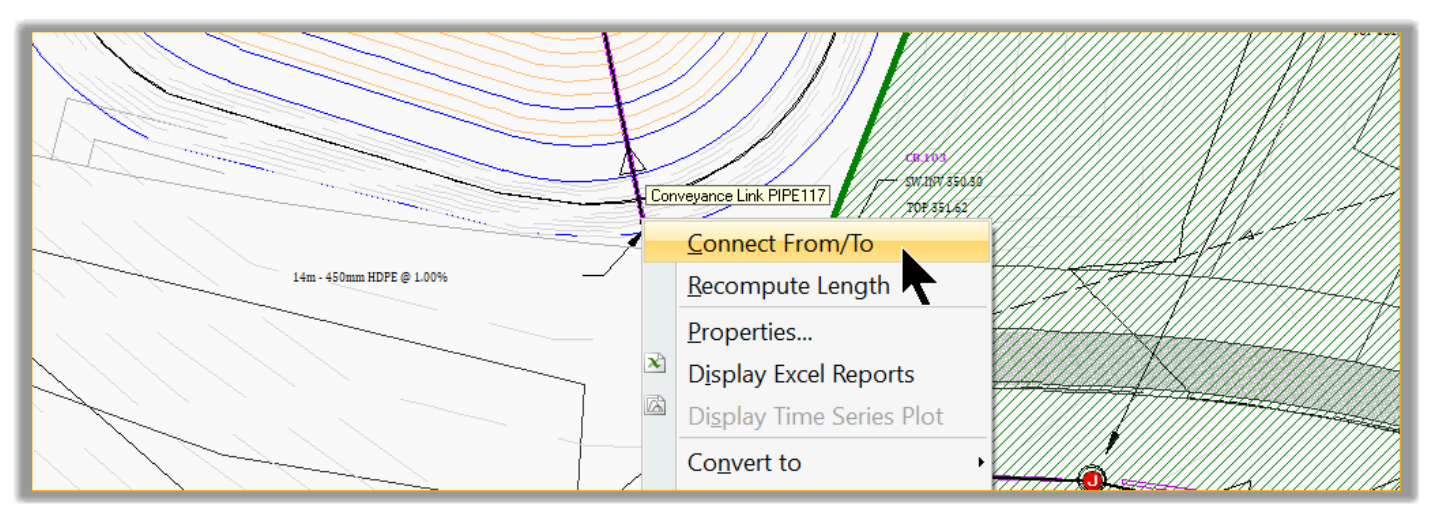
- Then click on the Junction manhole DM.104.
- Then on the Storage node.
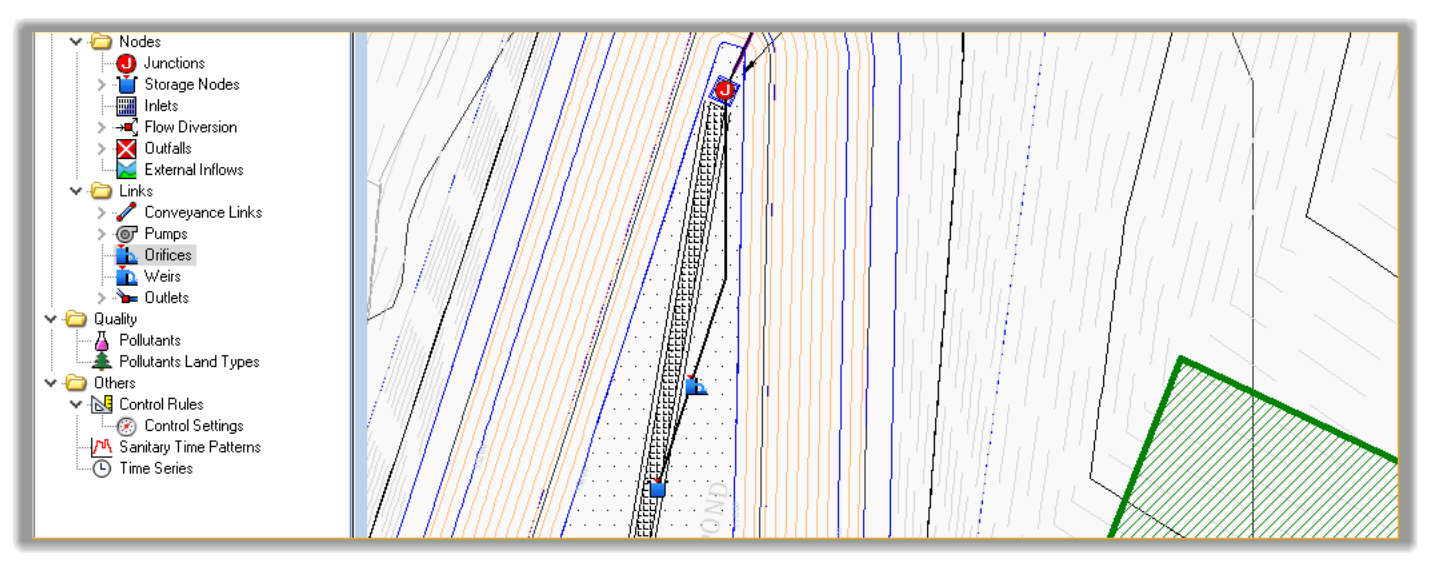
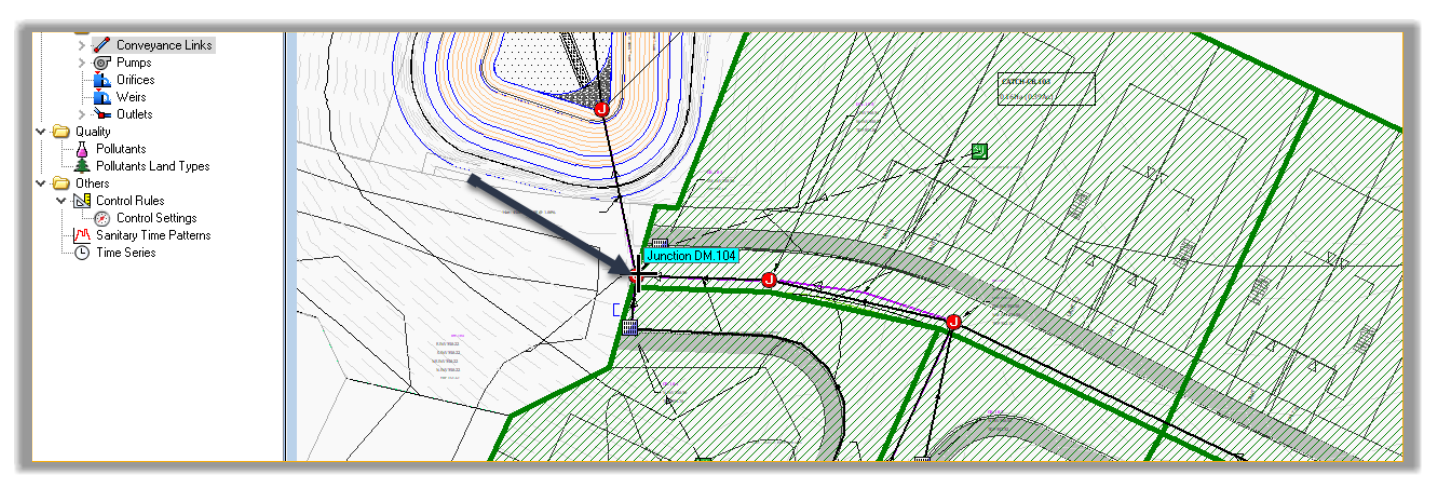
- Next, delete the inlet Junction and move the pond to its approximate location. The final result should look like this:
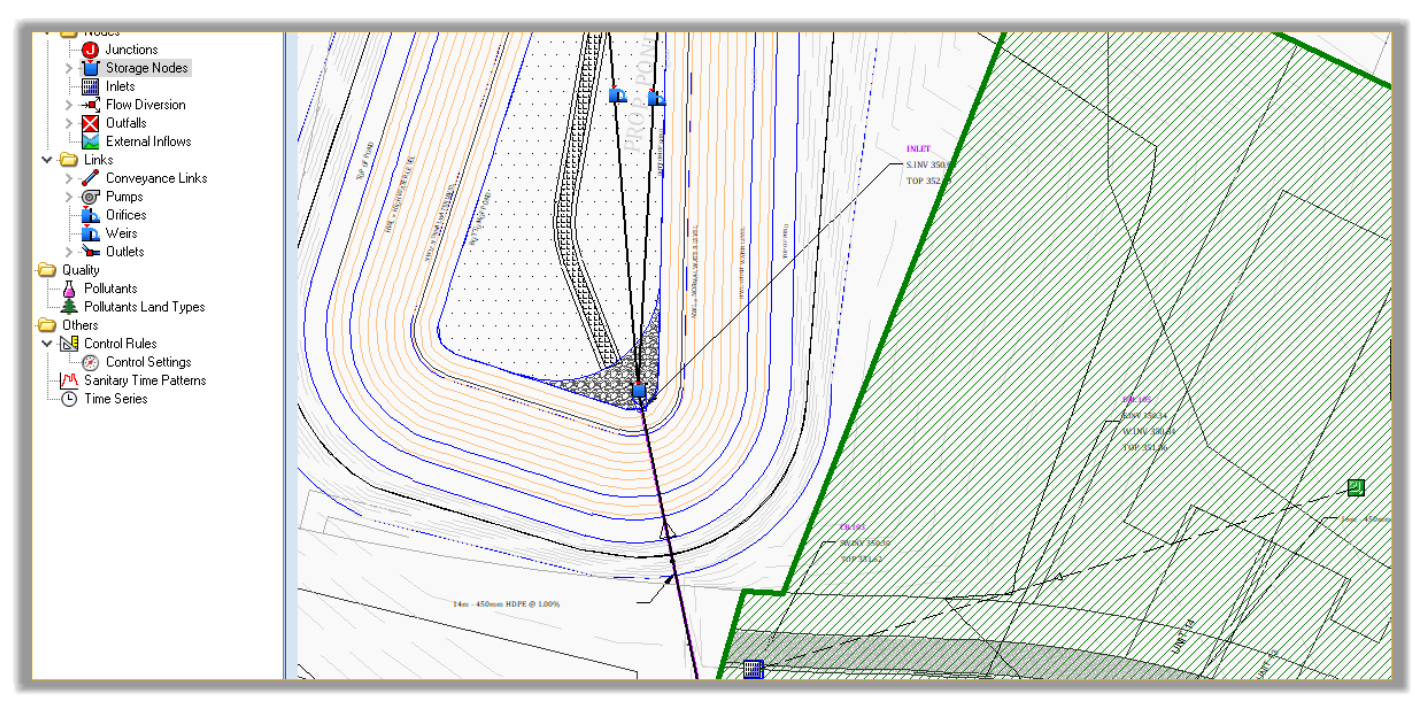
- Another option would be to create the Pond storage node directly at that location by converting the inlet Junction to a pond.
Full Course and Free Book
-

SSA Stormwater Book and Practice Files
Course4.9 average rating (31 reviews)This pdf book includes the training manual and practice files for the advanced AutoCAD Civil 3D Storm and Sanitary Design course. This manual covers the skills needed to successfully design and analyze stormwater detention and sanitary sewer systems.
Purchase$19.99
-

Civil 3D Storm And Sanitary Analysis
Course4.9 average rating (14 reviews)In this Online Storm and Sanitary Analysis (SSA) training course, participants will learn and apply the tools offered by SSA, the Civil 3D companion software for stormwater management and design.
$99 / year