-
Get It
$19.99
$19.99SSA Stormwater Book and Practice Files
Storm and Sanitary Design Tutorial: Rain gages and Rainfall Distribution
SCS Rainfall Distribution
Product: Autodesk SSA | Subject: Storm and Sanitary Analysis
In this exercise, we will learn about stormwater rain gages and rainfall Distribution.
Rainfall Distribution with Rain Gages
- Now, double-click on Rain Gages.
- In the Rain Gages window, click on Add
- A new rain gage is added. Let’s call it FV-100Y-24H, to indicate that it will represent the 100-year rainfall for the 24-hours duration.
- In the rain characteristics section, make sure we have selected the Cumulative option.
- Next, we need to design the time series. Click on the ellipsis
 , on the time series line item.
 - Click on Add to associate a time series to the rain gage.
- Call the time series 24H distribution
- Next, we have different options. We can either:
Load an existing time series
Paste or type numerical values in the table; or
User the Rainfall designer, which covers all US counties.
- To use the Rainfall Designer, we only need to know the location of the project and the required distribution method. Let’s say our project is located in Lee County, Southwest Florida. We would then choose the State, the County, and the 100-year return period. Since we are in Florida, we can then choose the SCS Type II FL 24-H distribution. This automatically generates the 24-hour rainfall time series.

- What’s even better, we can save this time series for future use. This automatically generates the 24-hour rainfall time series. If your project is not in the US, you can still use the rainfall designer. All you need is to know the cumulative rainfall, then input the value. The distribution method will automatically distribute it over the 24-hour period for you. Once again, you need to be careful if you are using metric units. The rainfall designer does not convert units. As you can see, it is showing 11mm for the 100-year rainfall, which is obviously not correct. This is the value in inches. So, for instance, if we are designing a project in South Africa, we need to:
Put none for State.
Input the cumulative rainfall, let’s say 110mm.
Select the recommended distribution by your agency.
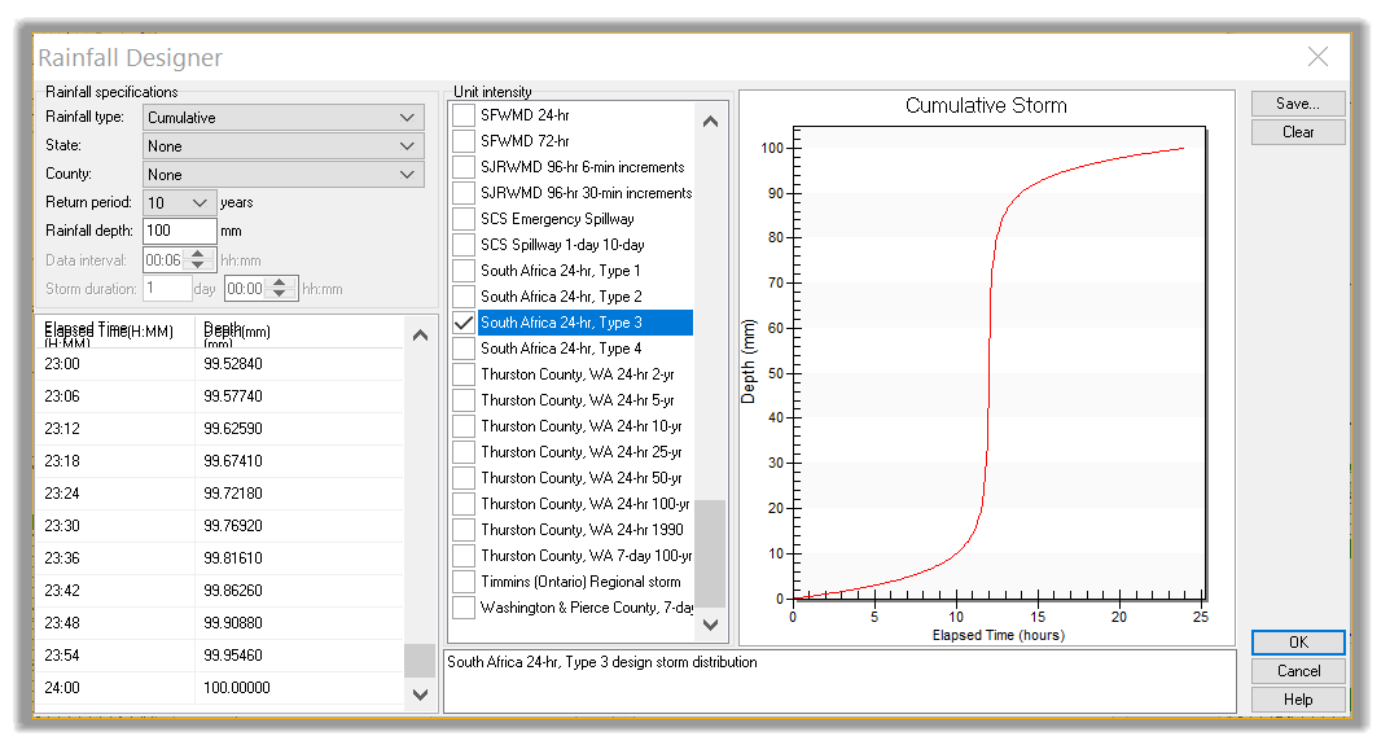
- Click on Cancel to exit the Rainfall designer.
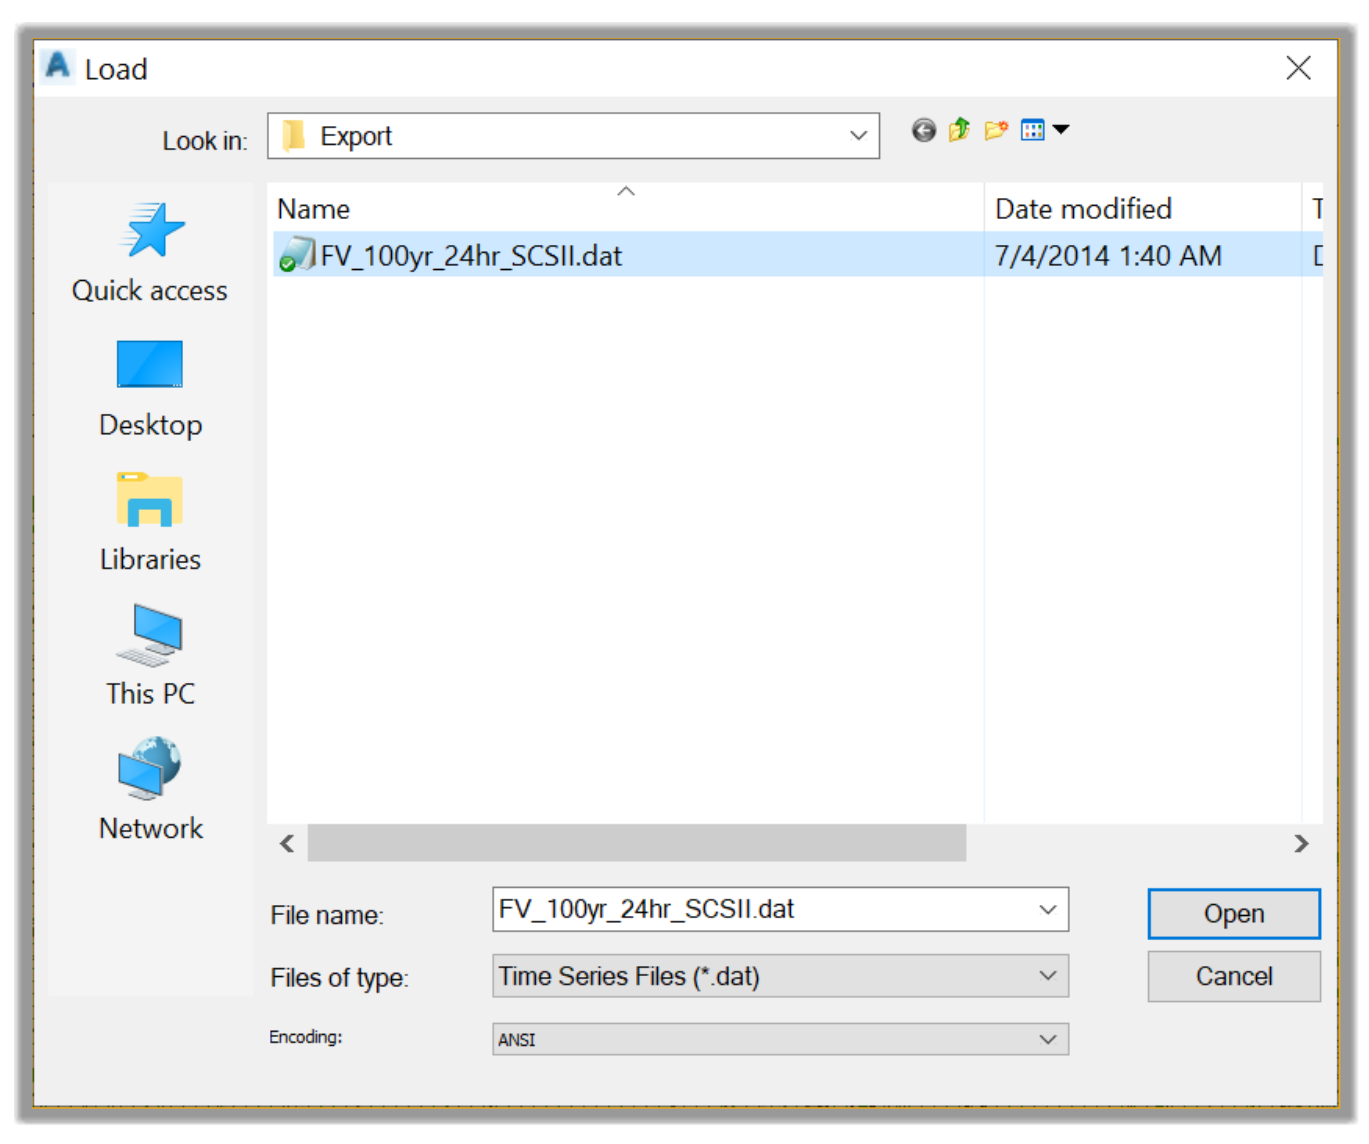
- The next option is to upload a rainfall site. Click on Load and browse to the Export folder and select the FV_100yr_24hr_SCII file. This type of file is created from the Rainfall Designer we just explored.
- The rainfall is now imported with a hydrograph over the full 24-hours.
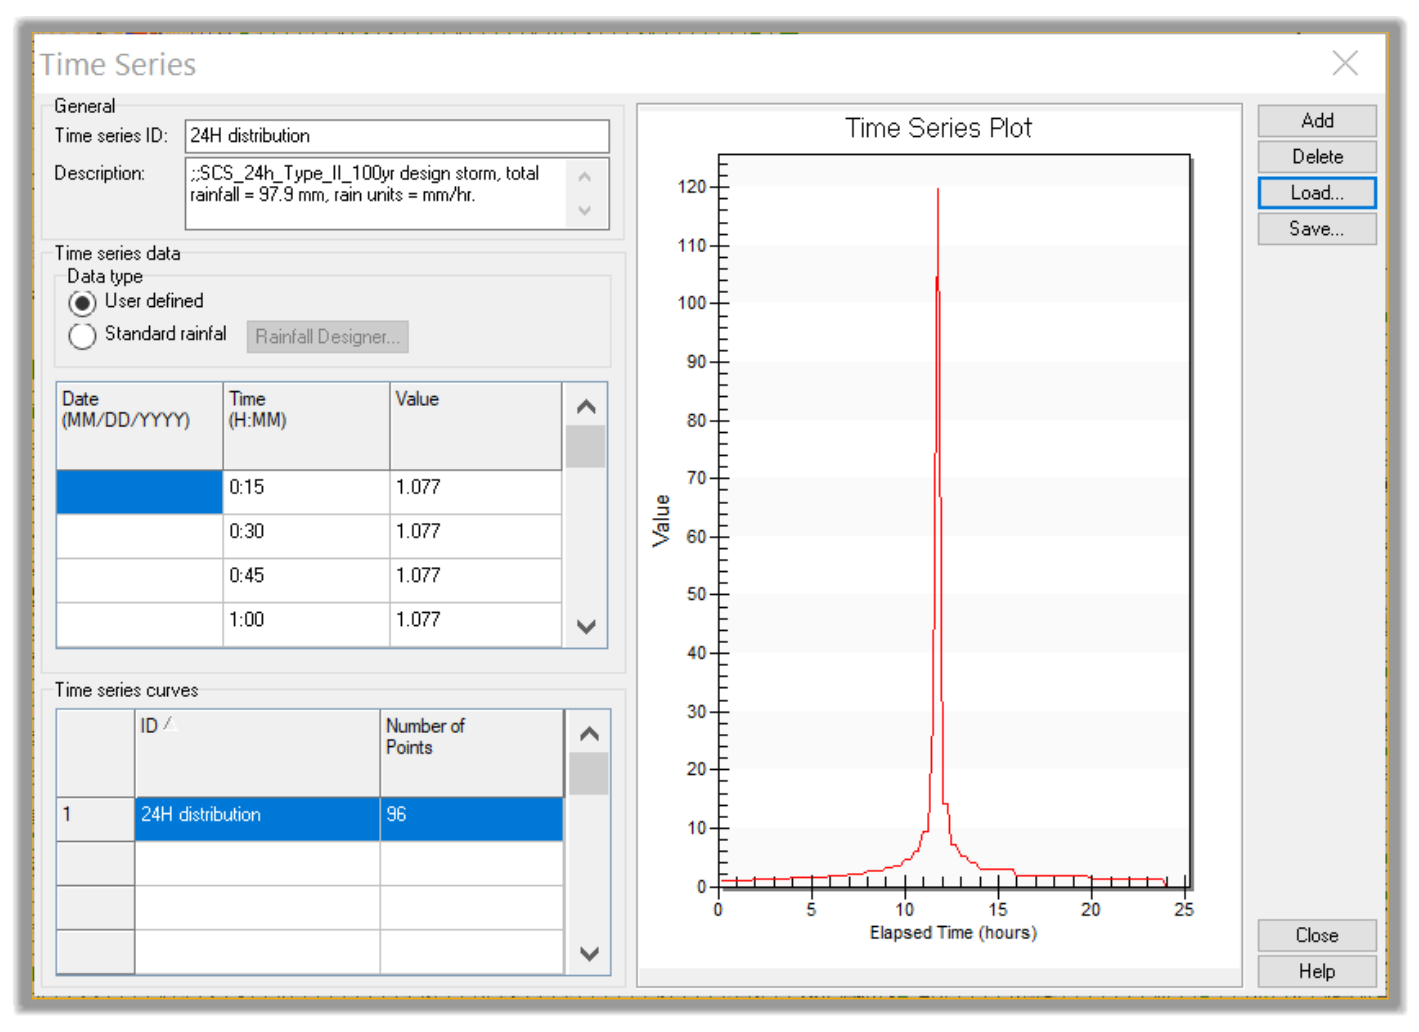
- Next, click on Close to dismiss the Time Series
- We now need to assign the new Rain gage to the sub-catchments. Remember, they were initially assigned the IDF Curves from the Rational model. To assign the rain gages, click on Assign.
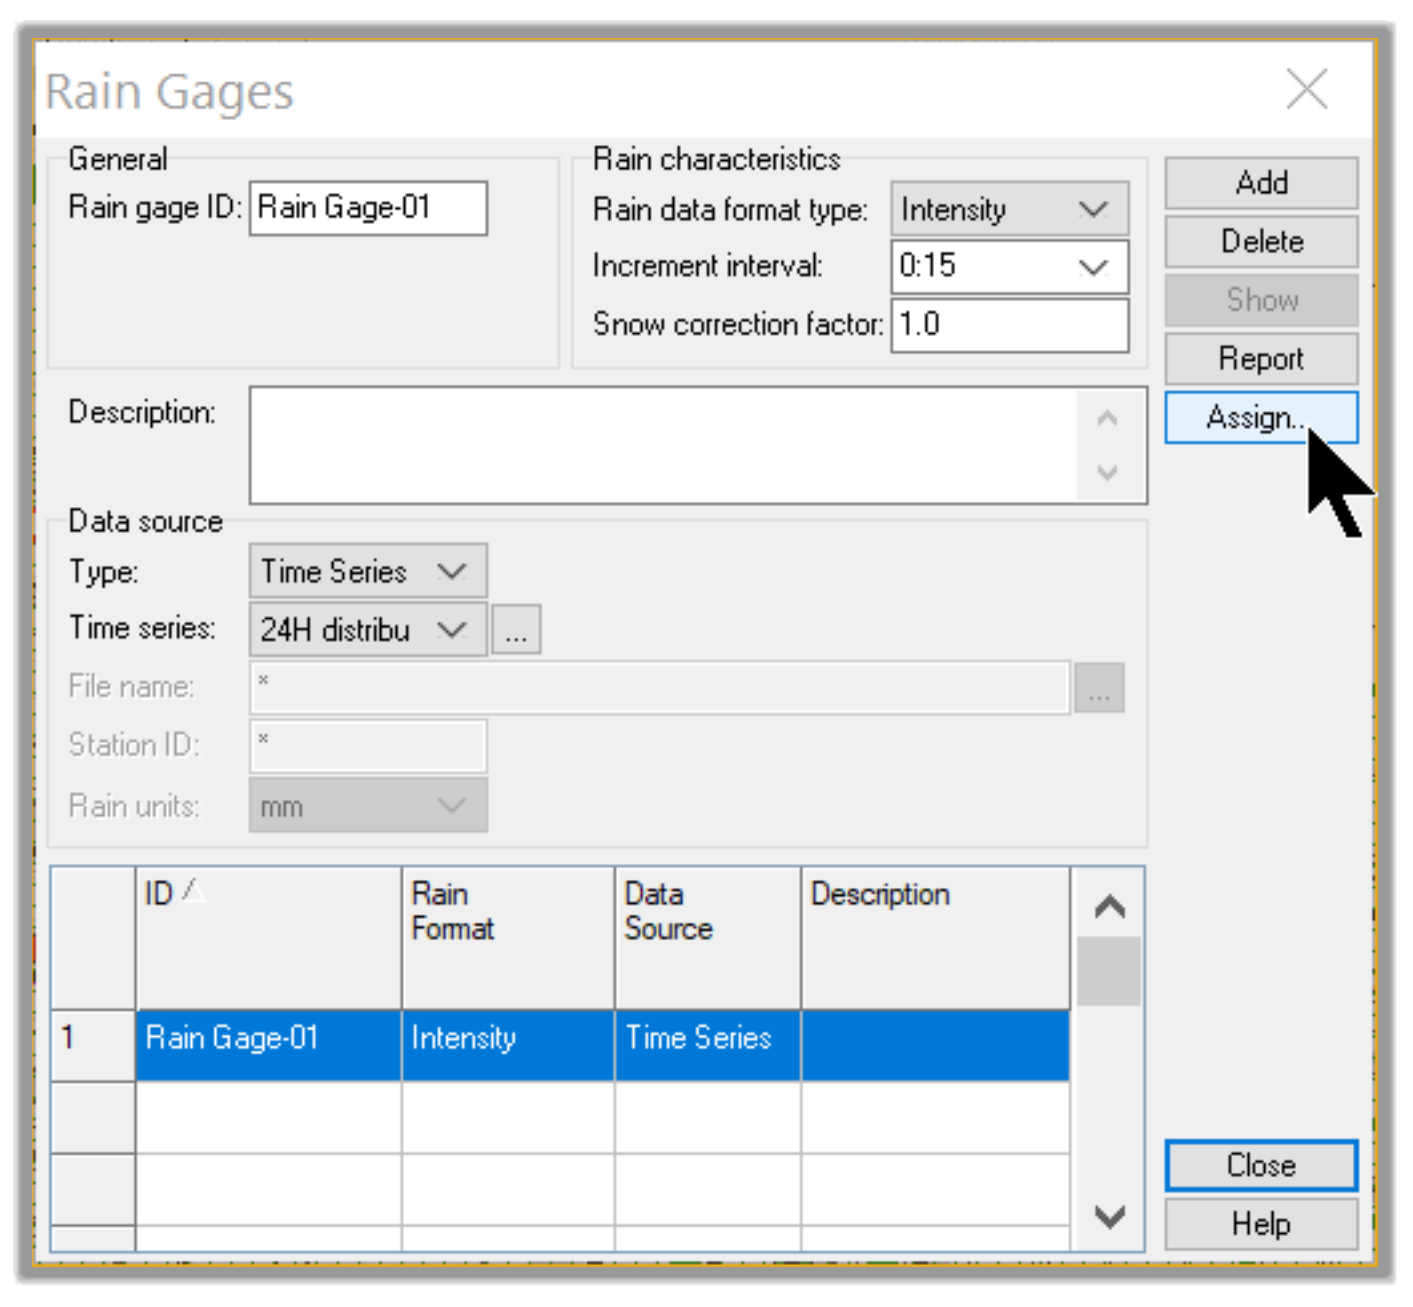
- Then, click on Yes to assign the rain gage to all catchments
- Now, Close the Rain Gages windows.
Full Course and Free Book
-

SSA Stormwater Book and Practice Files
Course4.9 average rating (31 reviews)This pdf book includes the training manual and practice files for the advanced AutoCAD Civil 3D Storm and Sanitary Design course. This manual covers the skills needed to successfully design and analyze stormwater detention and sanitary sewer systems.
Purchase$19.99
-

Civil 3D Storm And Sanitary Analysis
Course4.9 average rating (14 reviews)In this Online Storm and Sanitary Analysis (SSA) training course, participants will learn and apply the tools offered by SSA, the Civil 3D companion software for stormwater management and design.
$99 / year