-
Get It
$19.99
$19.99SSA Stormwater Book and Practice Files
Storm and Sanitary Design Tutorial: stormwater catchments
Stormwater catchment design
Product: Autodesk SSA | Subject: Storm and Sanitary Analysis
In this exercise, we will learn about designing stormwater catchments.
Designing the Stormwater Catchments
 Another essential component of hydrological modeling is the catchment. The catchment represents an area served by a common outlet. In this section, we will learn how to delineate catchment areas.
Once again, in order to create accurate catchment areas, we will need a designed surface. We can use the surface to pull catchment area information automatically. Let’s see how to do that.
- First, open the file 02.02-CATCHMENTS.dwg. To make the file easy to work with, we are only showing the stormwater design components and the final grading surface.
- For each Catchbasin, let’s determine the associated catchment area. We can do this manually by studying the contour lines and drawing polylines. Or, we can determine the catchments automatically, using the Civil 3D catchment area tool. Let’s go with the latter option.
- Select the design surface by clicking on one of the contou
- Next, from the ribbon, click the Catchment Area command, in the Analyze panel.
- In the next window, make sure you select C-HYDR-CTCH-BNDY for Catchment Layer.
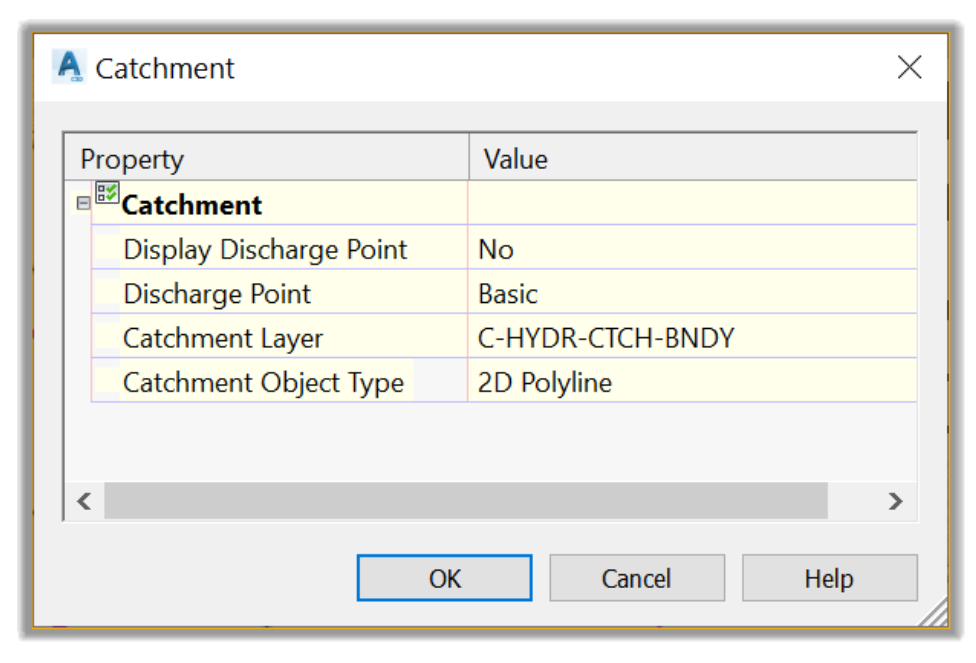
- Then, click on OK.
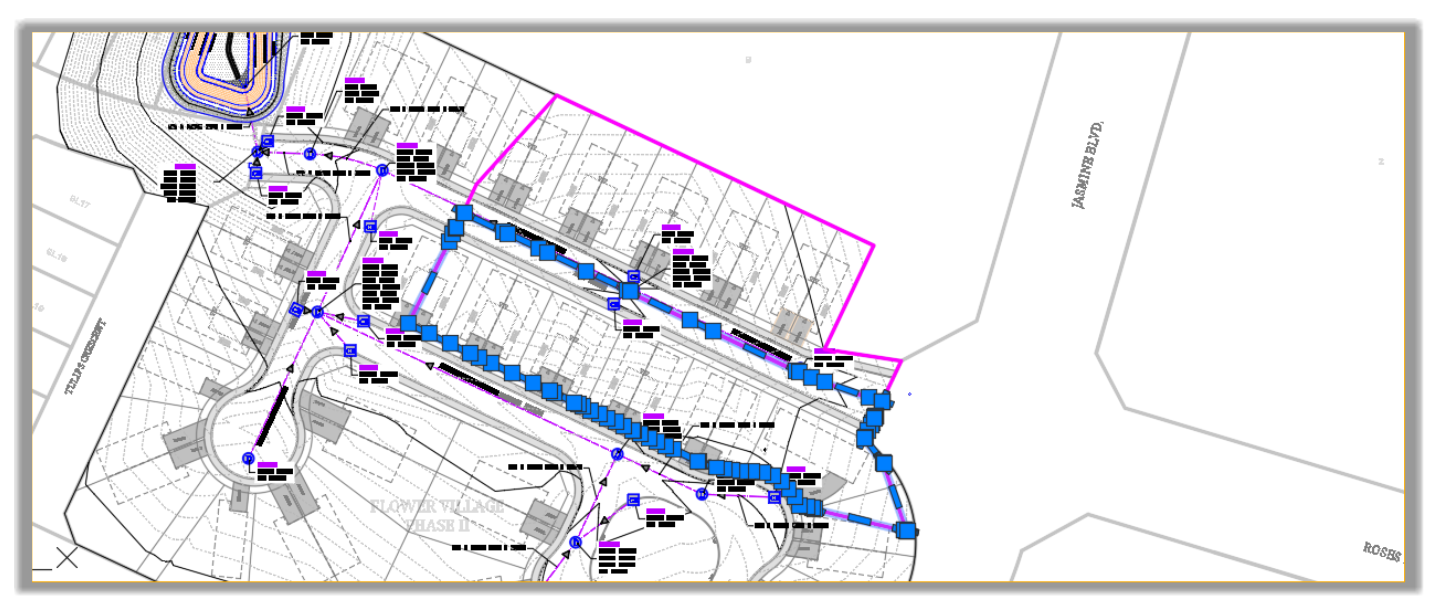
- Next, we will need to click on the catchbasins (CB.10X) to determine the catchment area for each one of them. Let’s note that we will not need to click on the Manhole (DM.10X). Now start by clicking on catchbasin CB.101, on Rose Drive. Make sure you click the closest possible to the center of the CB.
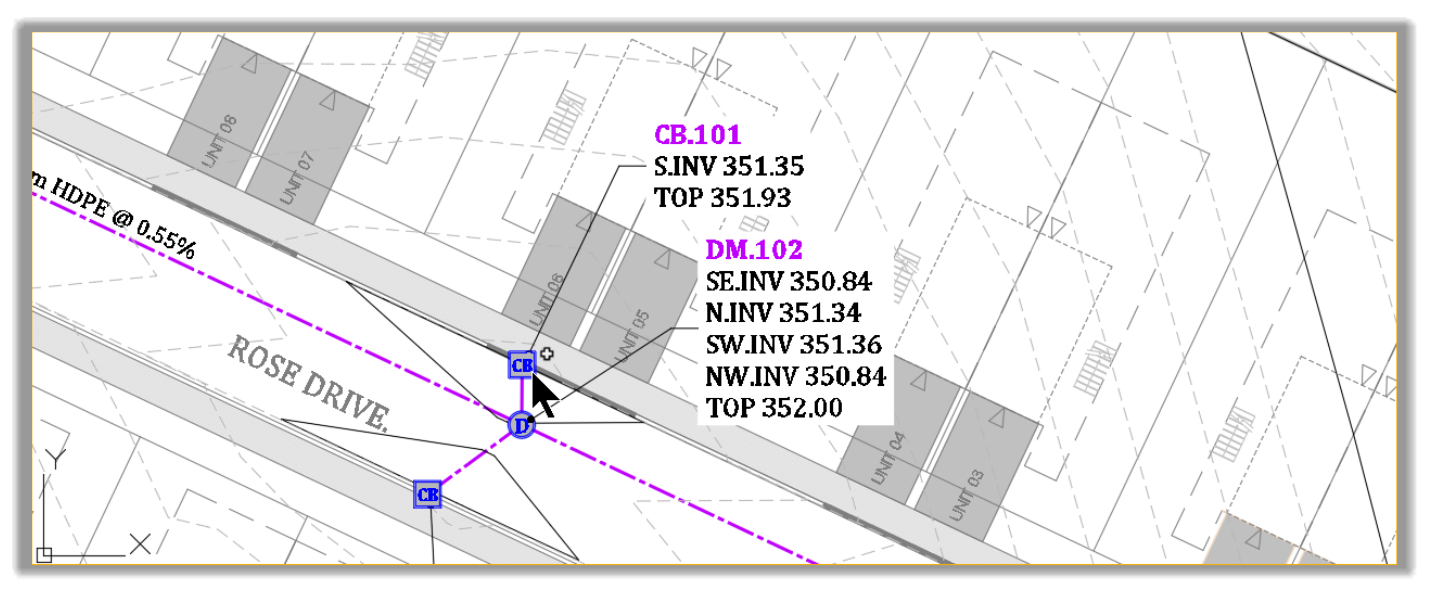
- The associated catchment area is automatically created.
- Next, use the above steps to create the catchment area for CB.102, just south of CB.101. Make sure you click on the CB as close to the center as possible. Be careful not to click on the curb or sidewalk, but rather on the pavement.
- The catchment area for CB.102 is now created.
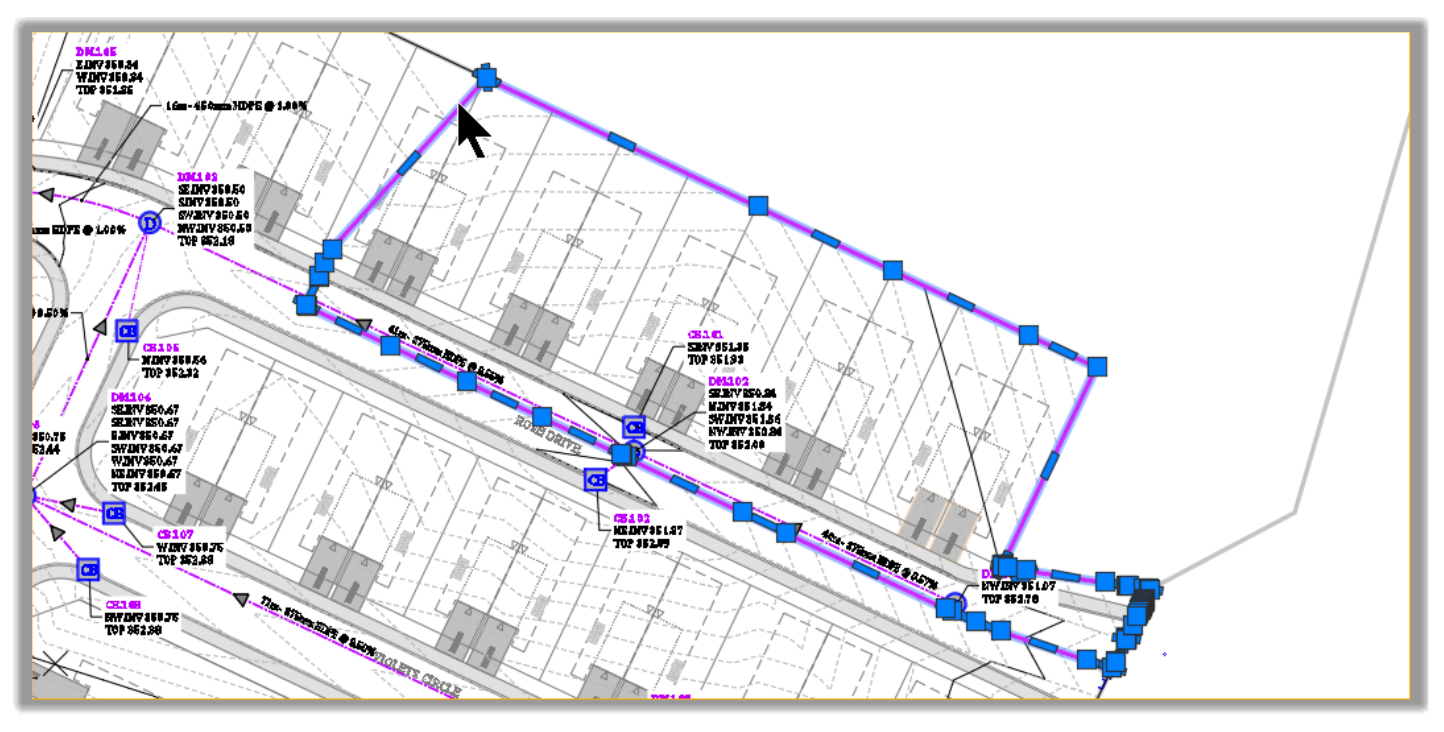
- Next, follow these same steps to create the catchment areas for CB.103, CB.104, until CB.111
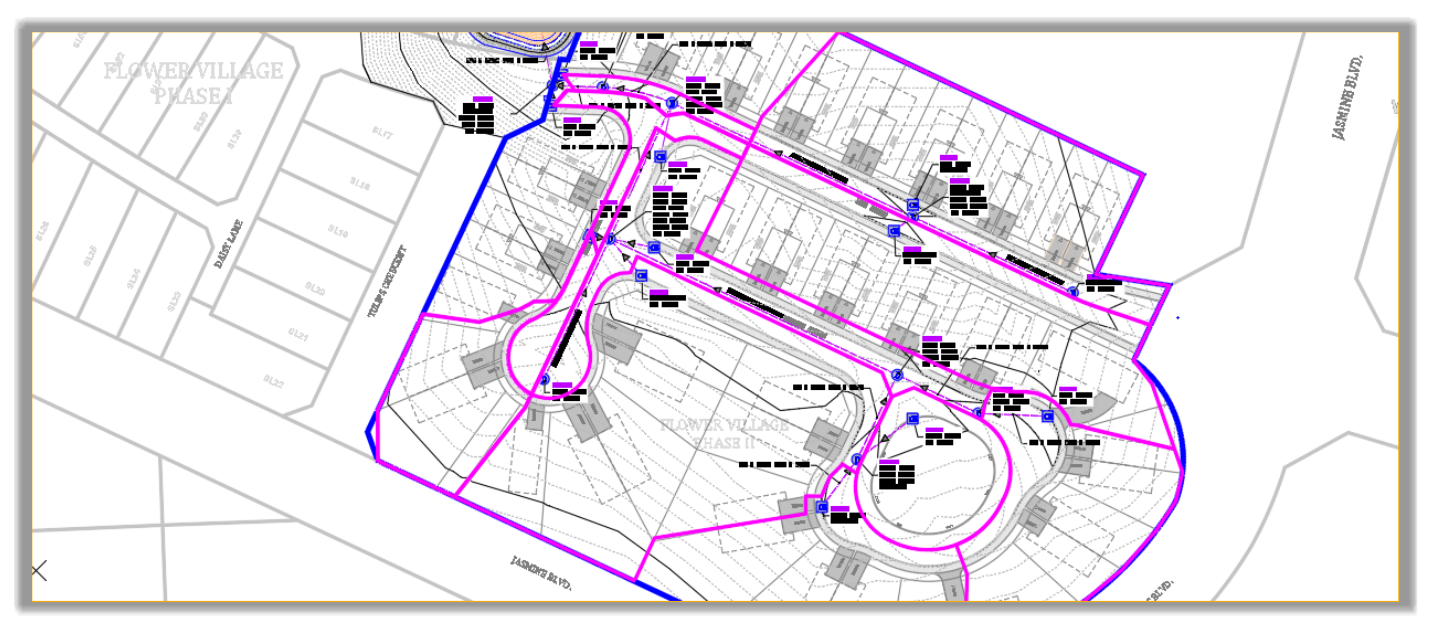
- Even though the catchment areas created from the surface are very close to what is expected, some fine-tuning is needed.
- In order to use the catchments in SSA, we will need to convert them to Parcels. Since the current surface represents the rough grading of the subdivision, this is an opportunity to look carefully at the proposed catchments and manually edit them if needed.
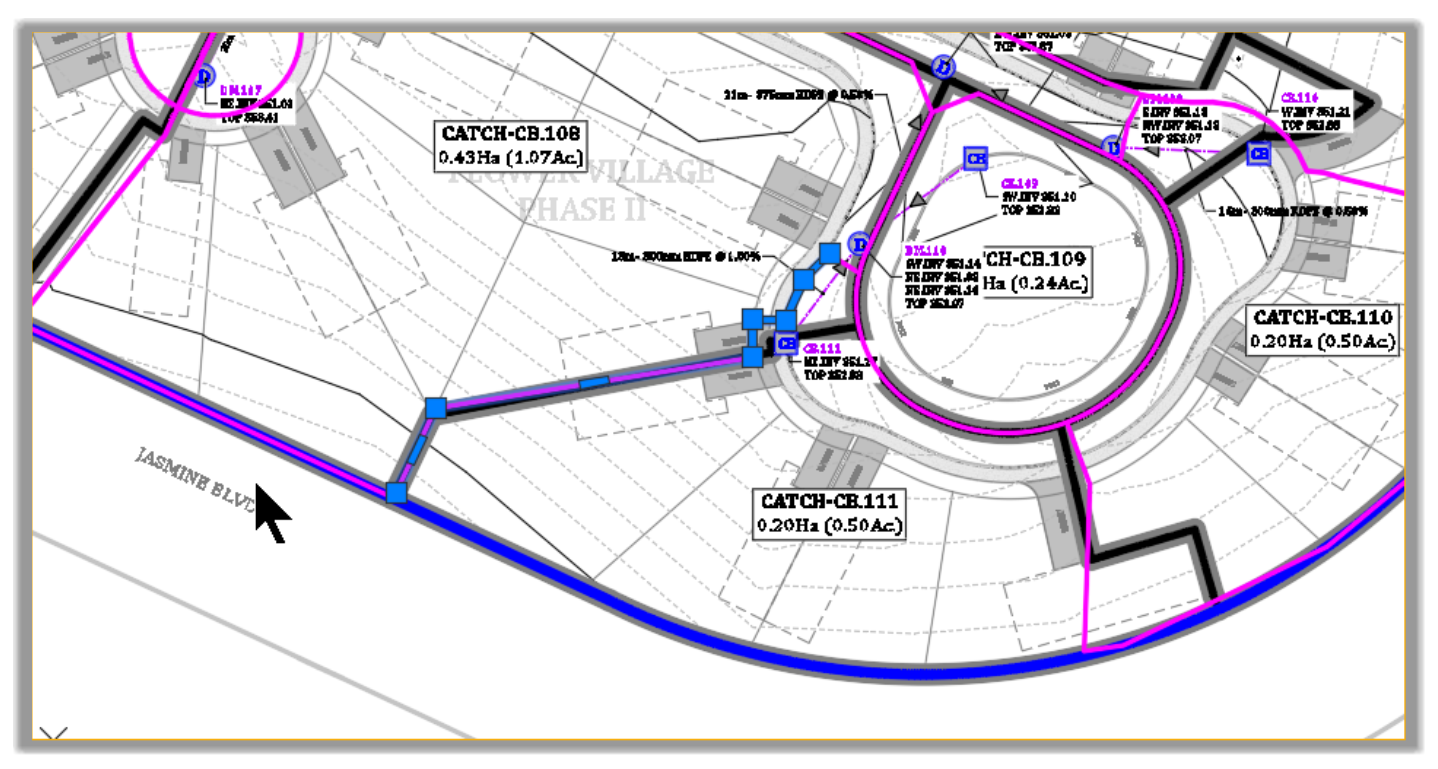
- In this case, we have already created the final catchments and converted them to Parcels. For more details on how to create parcels, you can refer to the following link for the Civil 3D Essentials course. To see the final proposed catchments, turn on the layer.

- You will notice that, except for a few areas, the final catchment areas (parcels) match the automated parcels very closely.
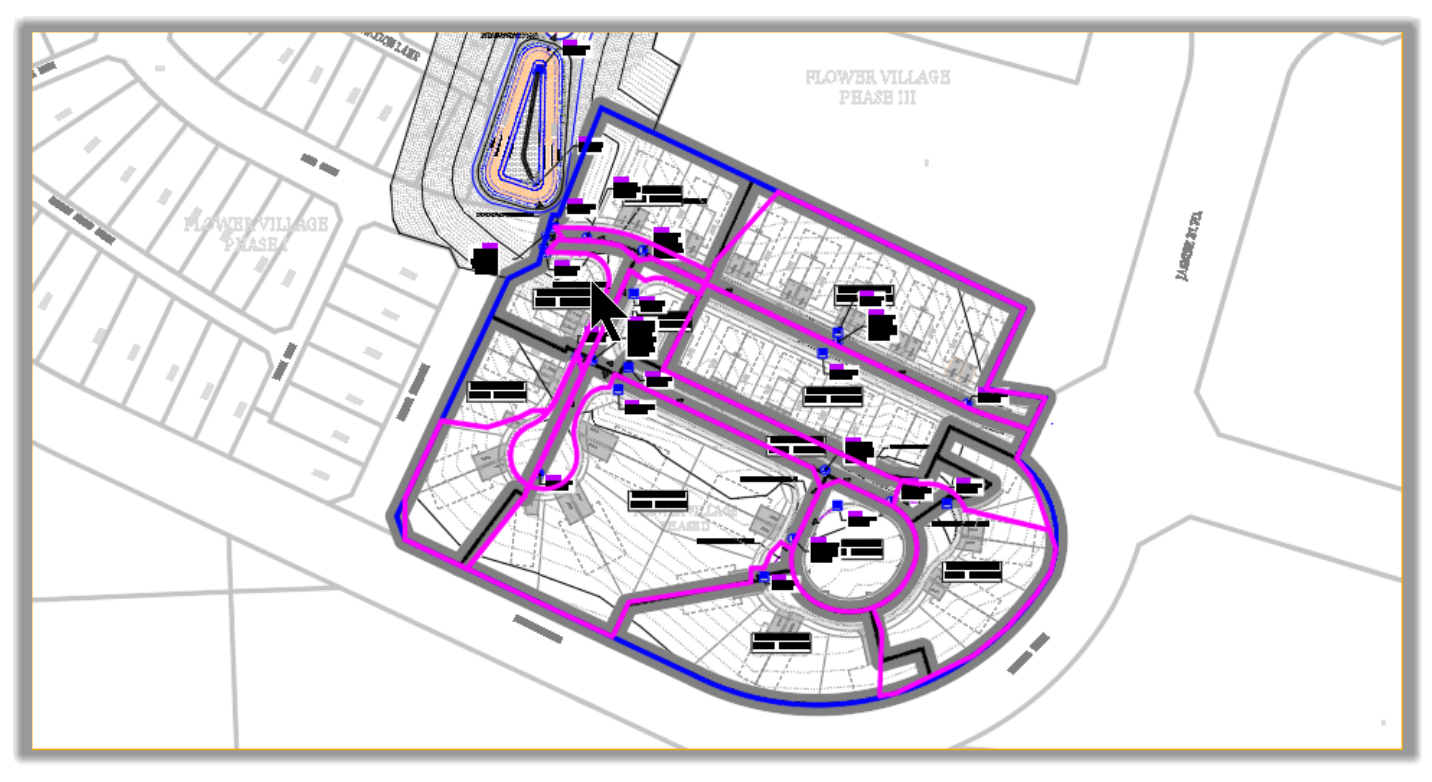
- Now select one of the automated parcel segments (magenta lines)
- Right-click and Select Similar

- Click on Delete on the keyboard to delete the automatic catchment lines.

- The catchments were created by fine-tuning the automatic catchment lines (adding missing lines or removing unneeded ones, where necessary). Once the lines were cleaned up, they are converted to parcels using the Civil 3D Create Parcels From Objects commands.
- We have now defined the Post-Development Catchments.
Full Course and Free Book
-

SSA Stormwater Book and Practice Files
Course4.9 average rating (31 reviews)This pdf book includes the training manual and practice files for the advanced AutoCAD Civil 3D Storm and Sanitary Design course. This manual covers the skills needed to successfully design and analyze stormwater detention and sanitary sewer systems.
Purchase$19.99
-

Civil 3D Storm And Sanitary Analysis
Course4.9 average rating (14 reviews)In this Online Storm and Sanitary Analysis (SSA) training course, participants will learn and apply the tools offered by SSA, the Civil 3D companion software for stormwater management and design.
$99 / year