-
Get It
$19.99
$19.99SSA Stormwater Book and Practice Files
Storm and Sanitary Design Tutorial: Part Migration Default
Exporting Storm water Parts from Civil 3D to SSA
Product: Autodesk SSA | Subject: Storm and Sanitary Analysis
In this exercise, we will learn about Stormwater Part Migration Default.
Now we are ready to do the last setup of the system before exporting to Civil 3D. So, let’s get going:
- First, open the file 02.04-MIGRATION DEFAULTS.dwg
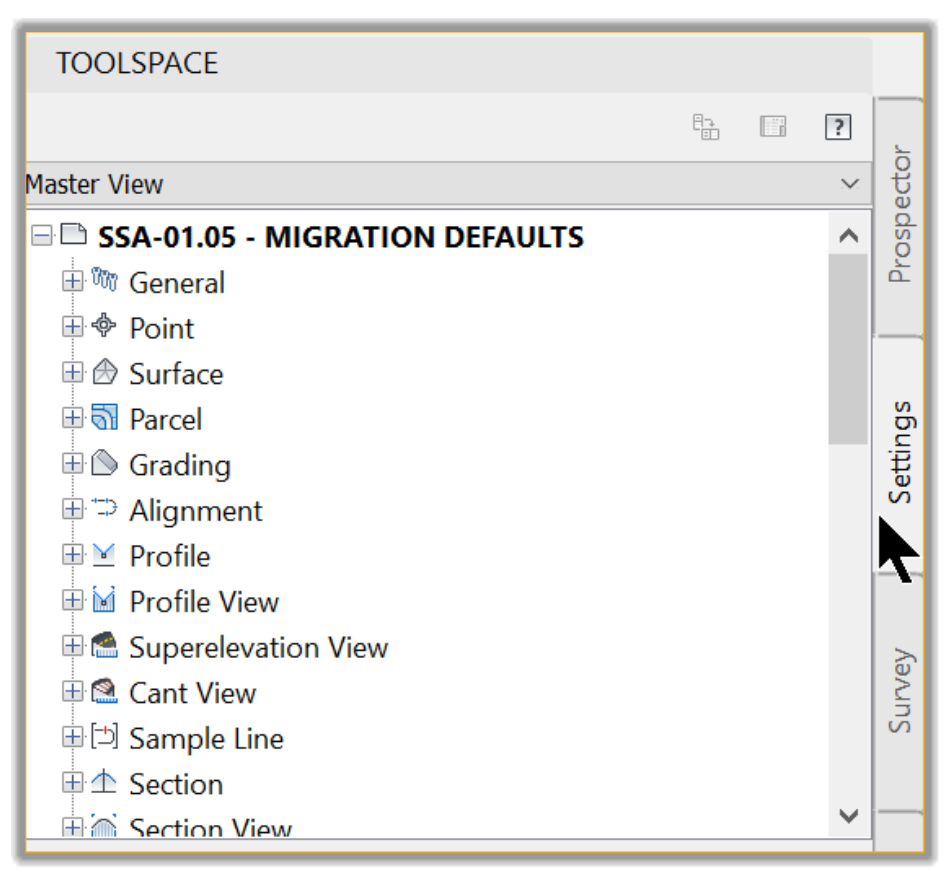
- Next, access the migration settings window, from the toolspace Settings tab.
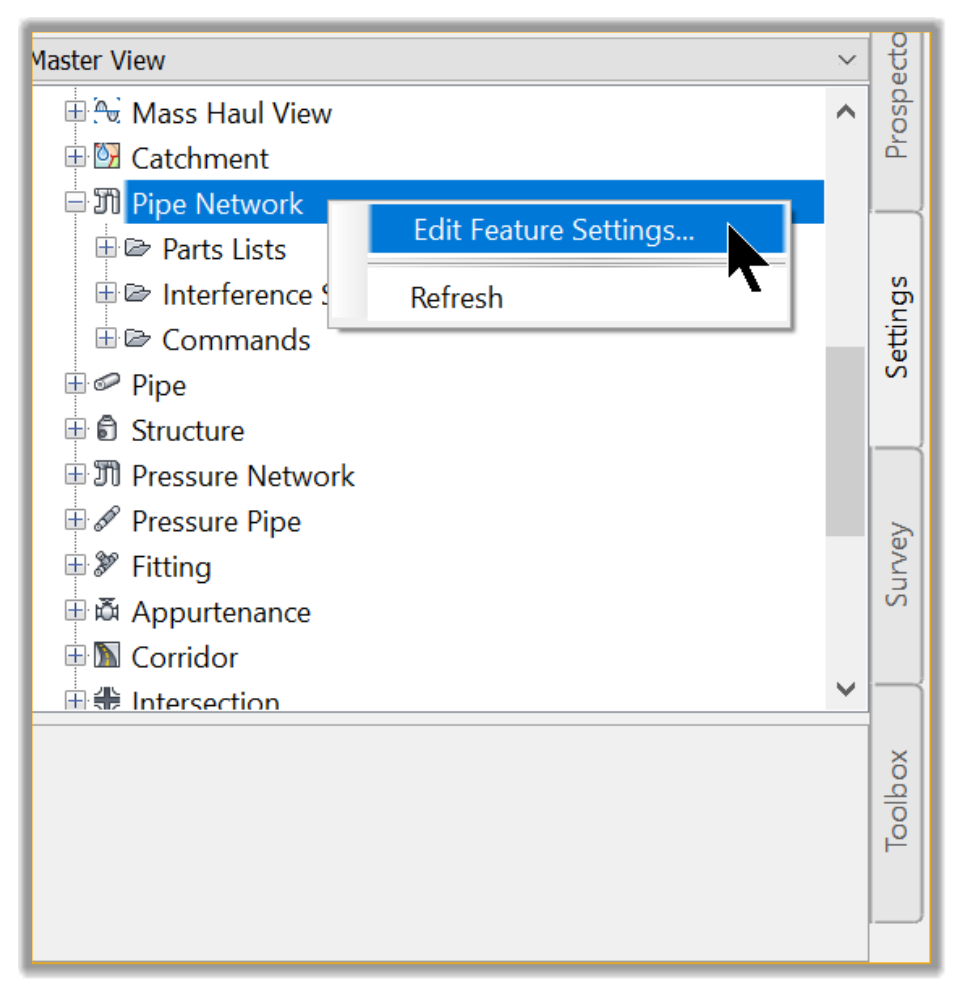
- Then, navigate to the Pipe Network sections, right-click, then click on Edit Feature Settings.
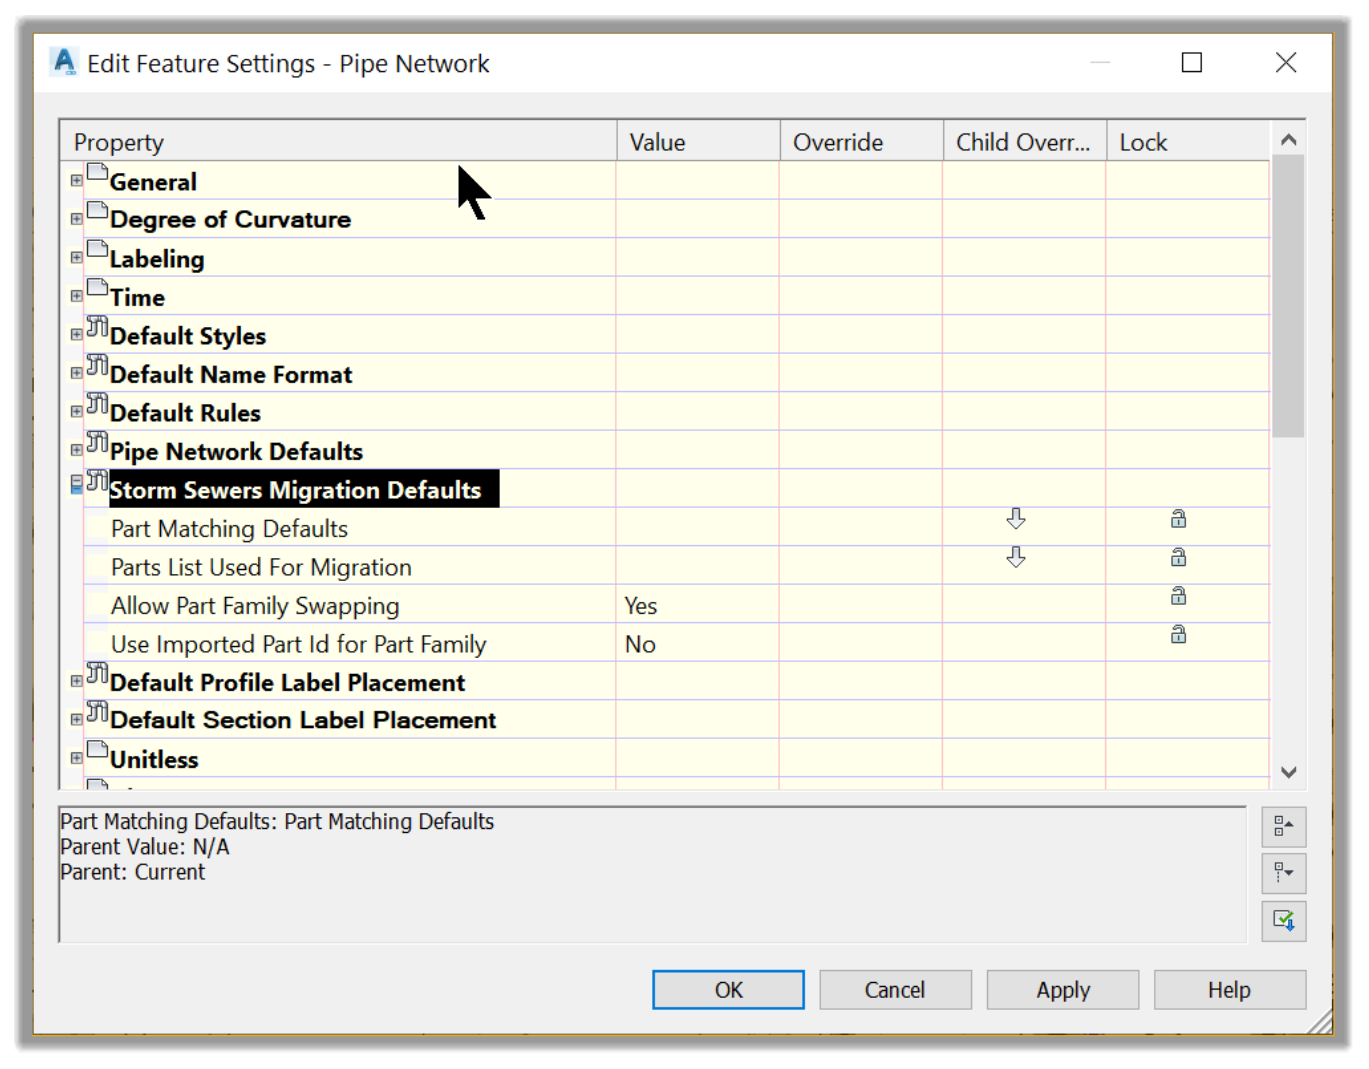
- Next, scroll to the Storm Sewers Migration Defaults section of the Edit Feature Settings window.
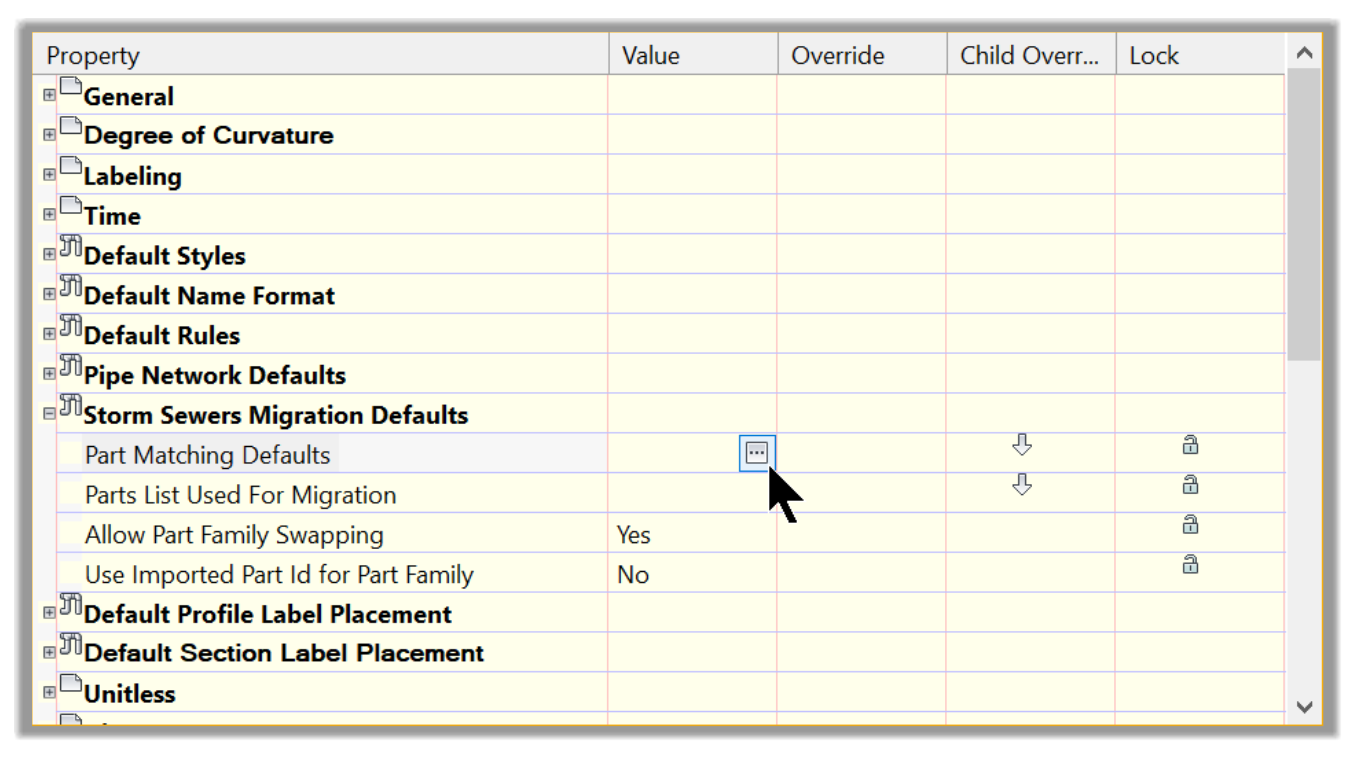
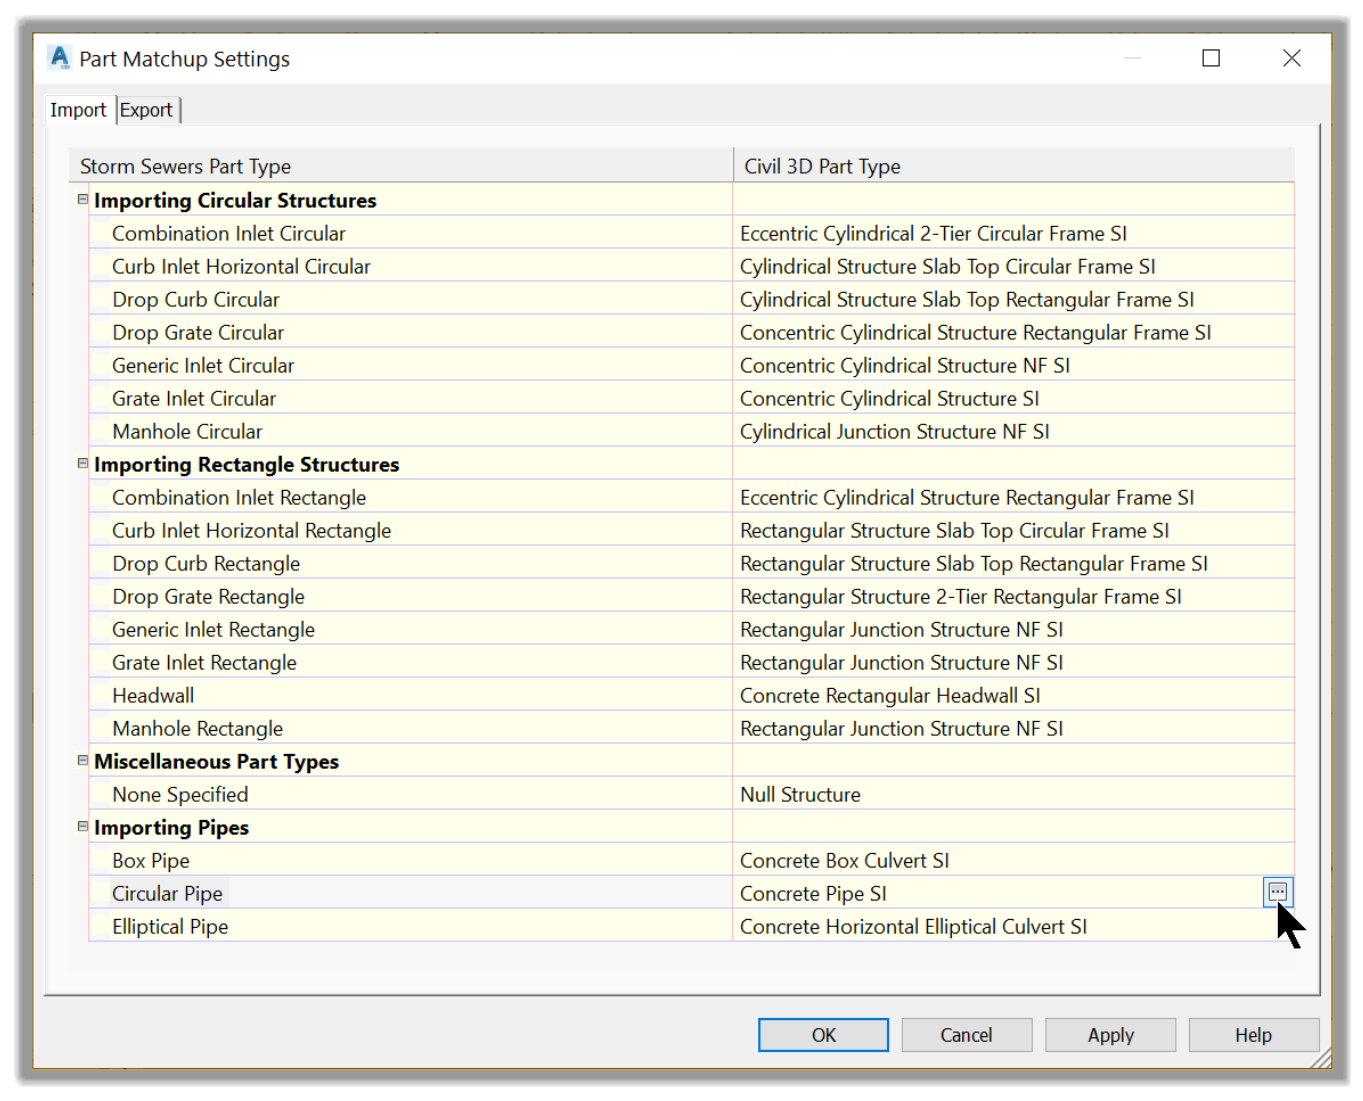
- In the new window, click on the ellipsis (three dots) that appears when you click on the Part Matching Defaults line.
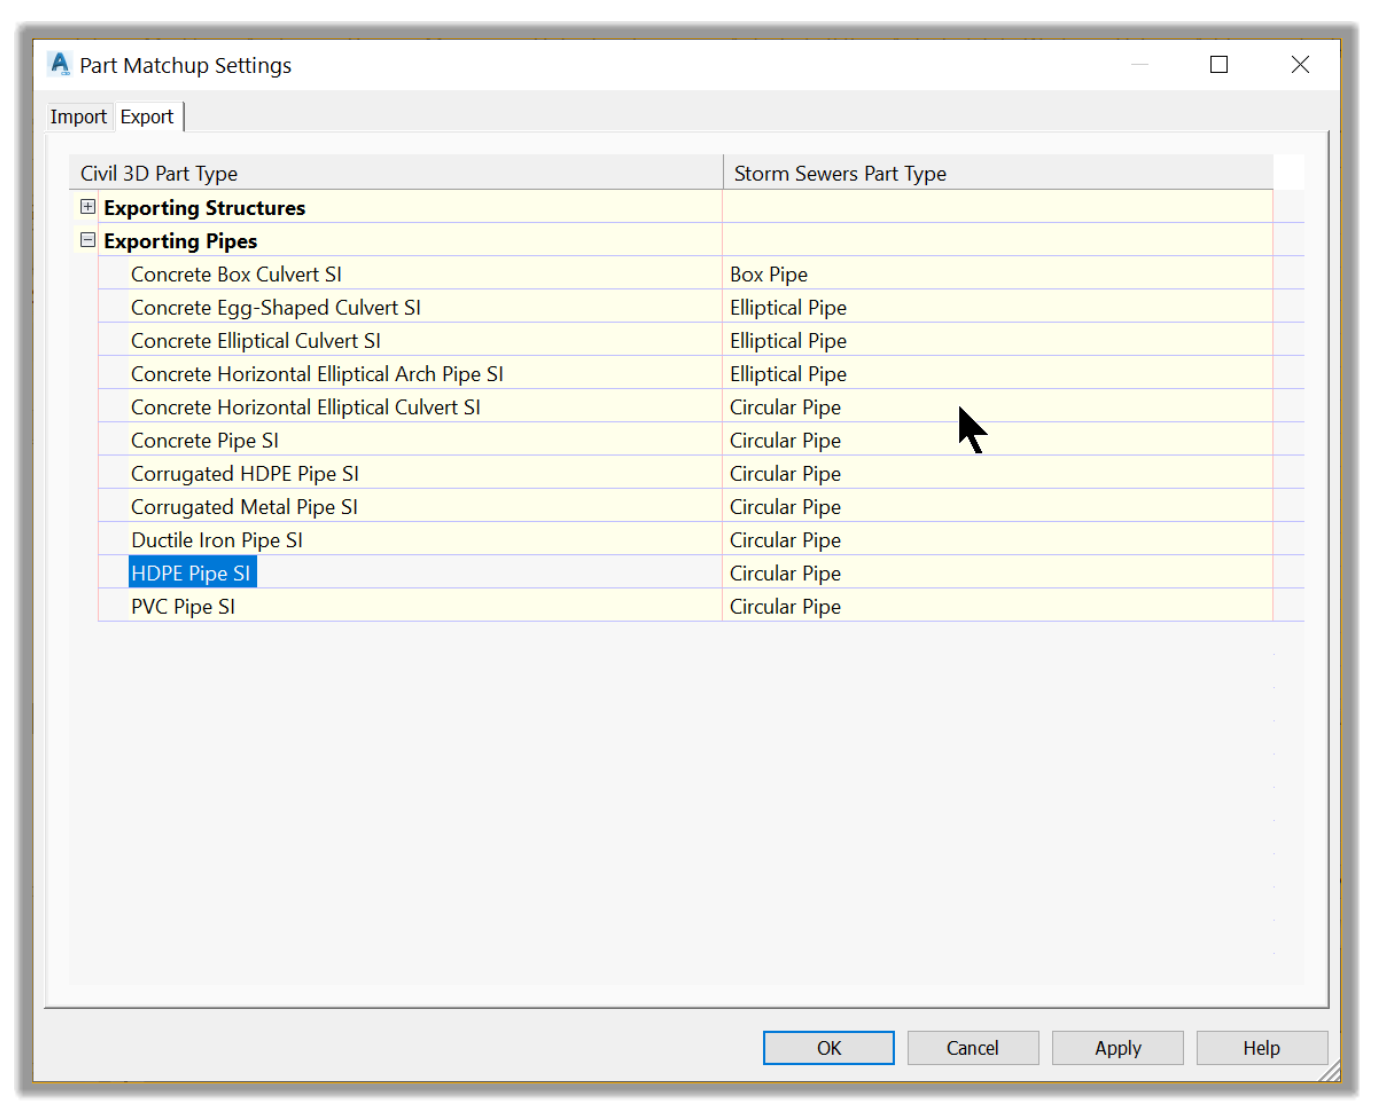
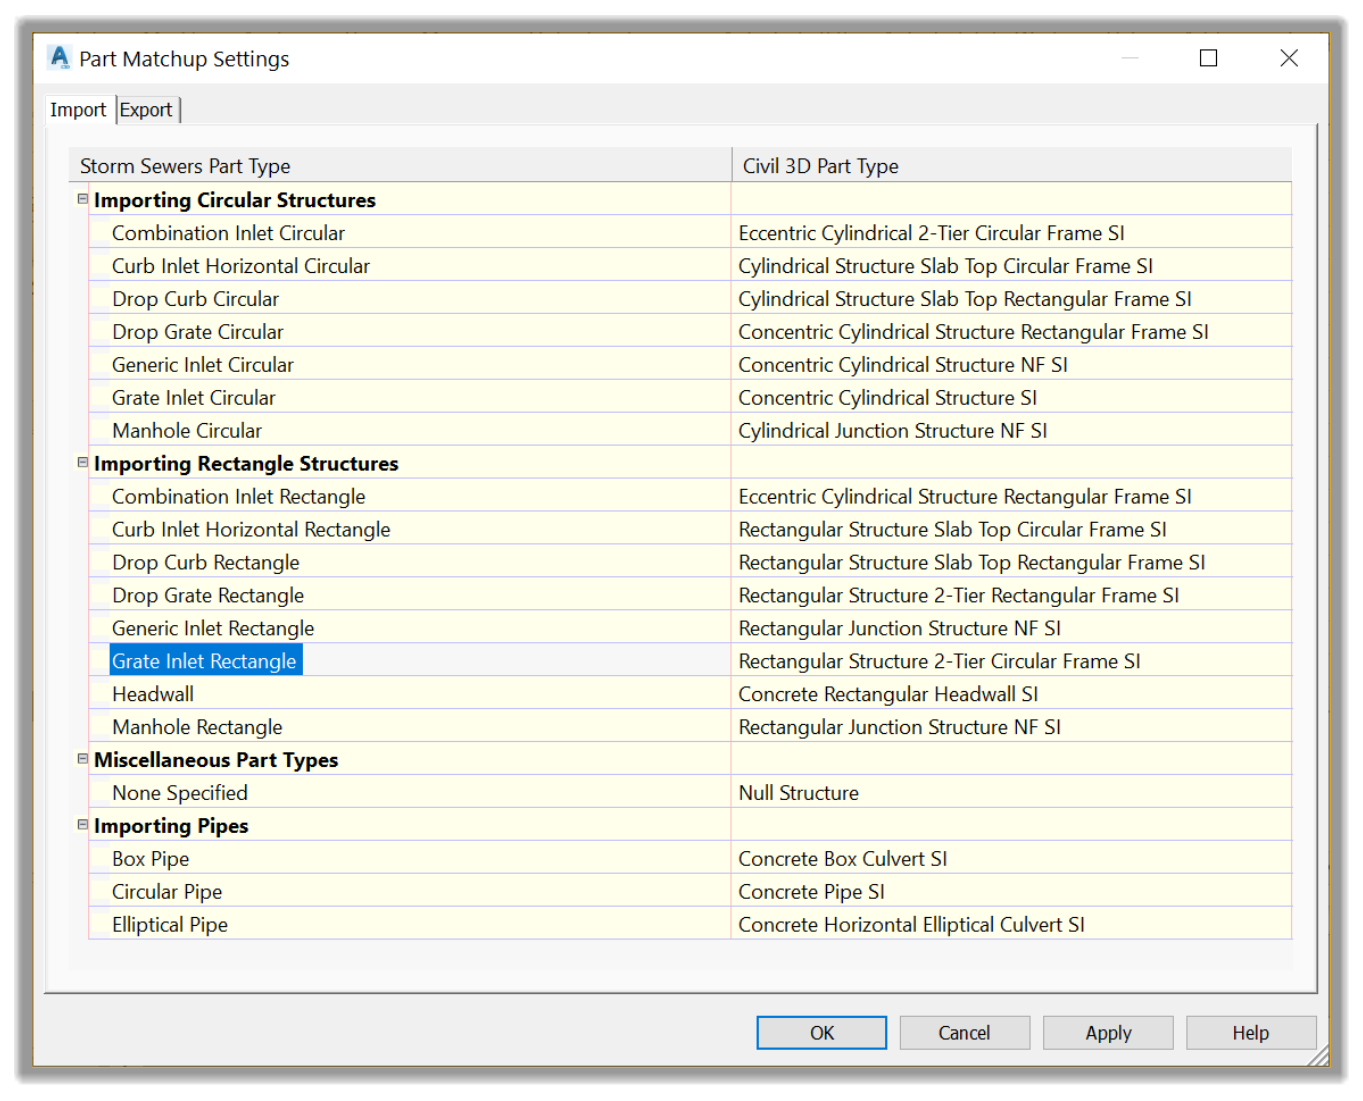
- In the new window, we have two sections: Import and Export. This is the window where we set up the part matching settings for the migration from Civil 3D and SSA.
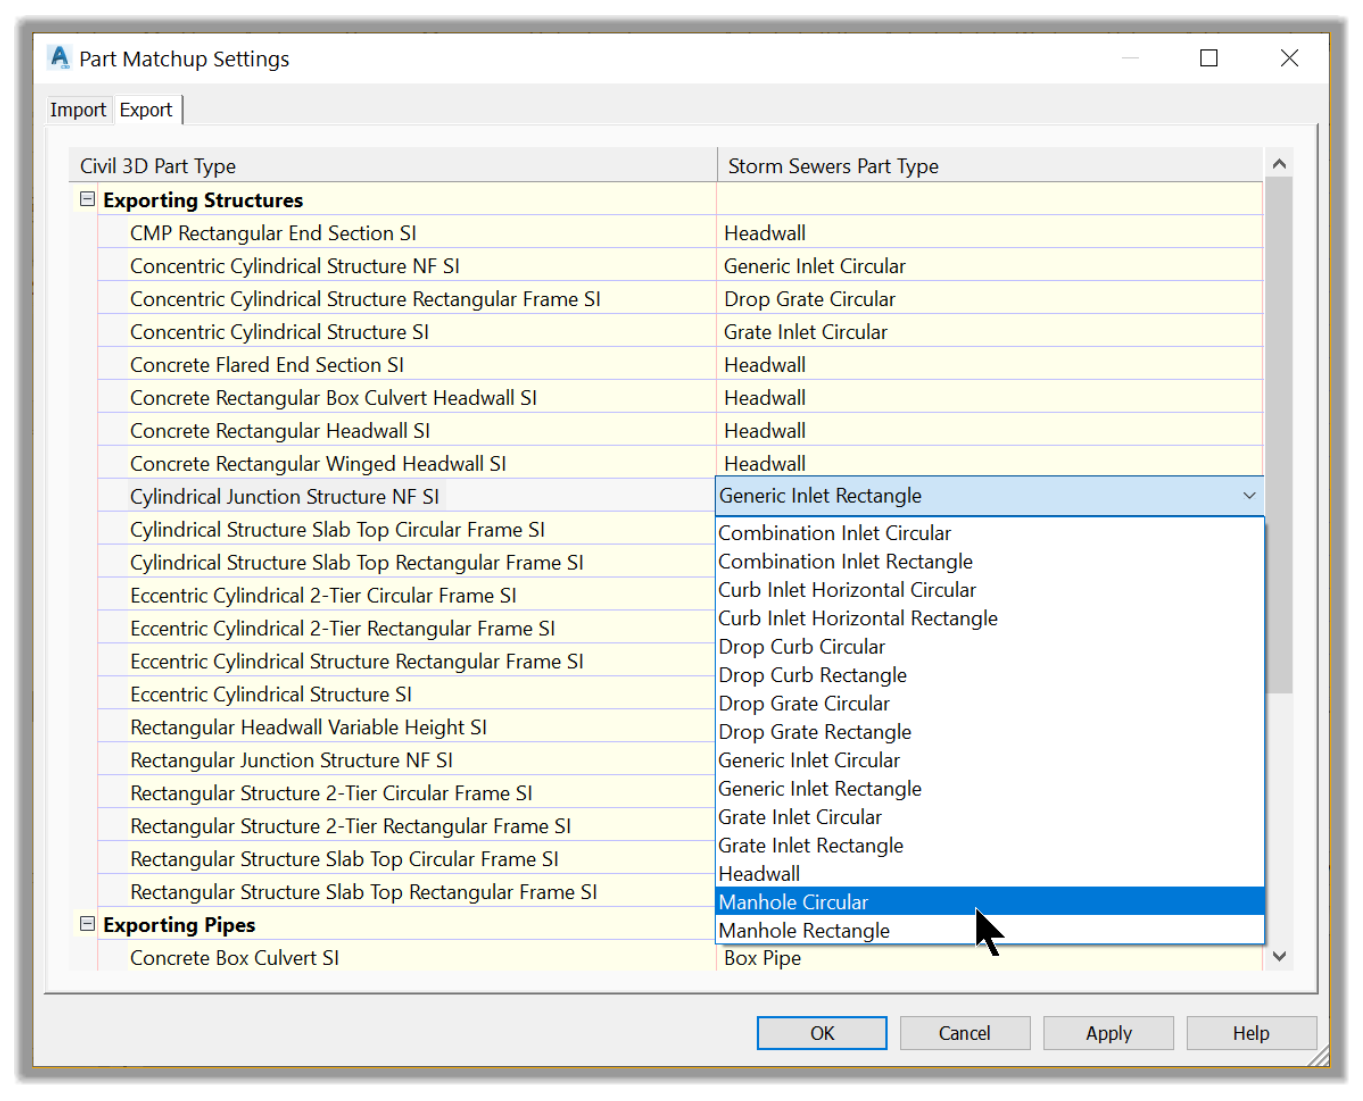
- Let’s start with the Export tab. As a reminder, for our projects, we only have 3 types of parts: HDPE pipes, cylindrical manholes, and rectangular catchbasins. So, we only need to set the migration default for those parts and not worry about the remaining ones. Let’s start with the Cylindrical Manhole that we have set in our part list.
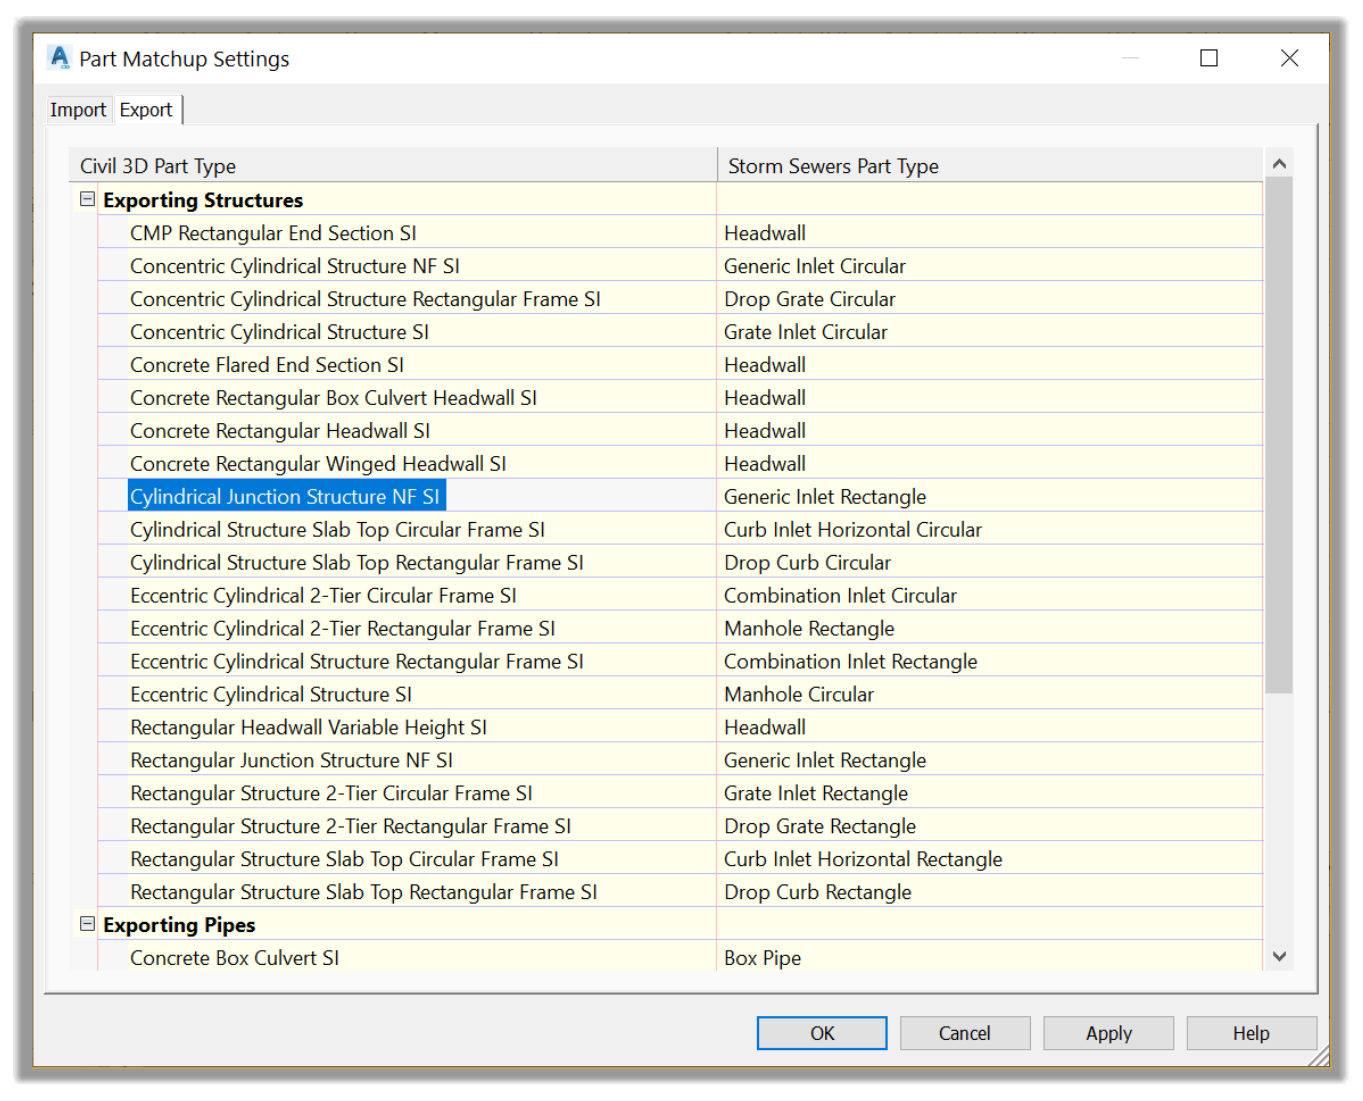
- Next, match it to a Manhole Circular in SSA.
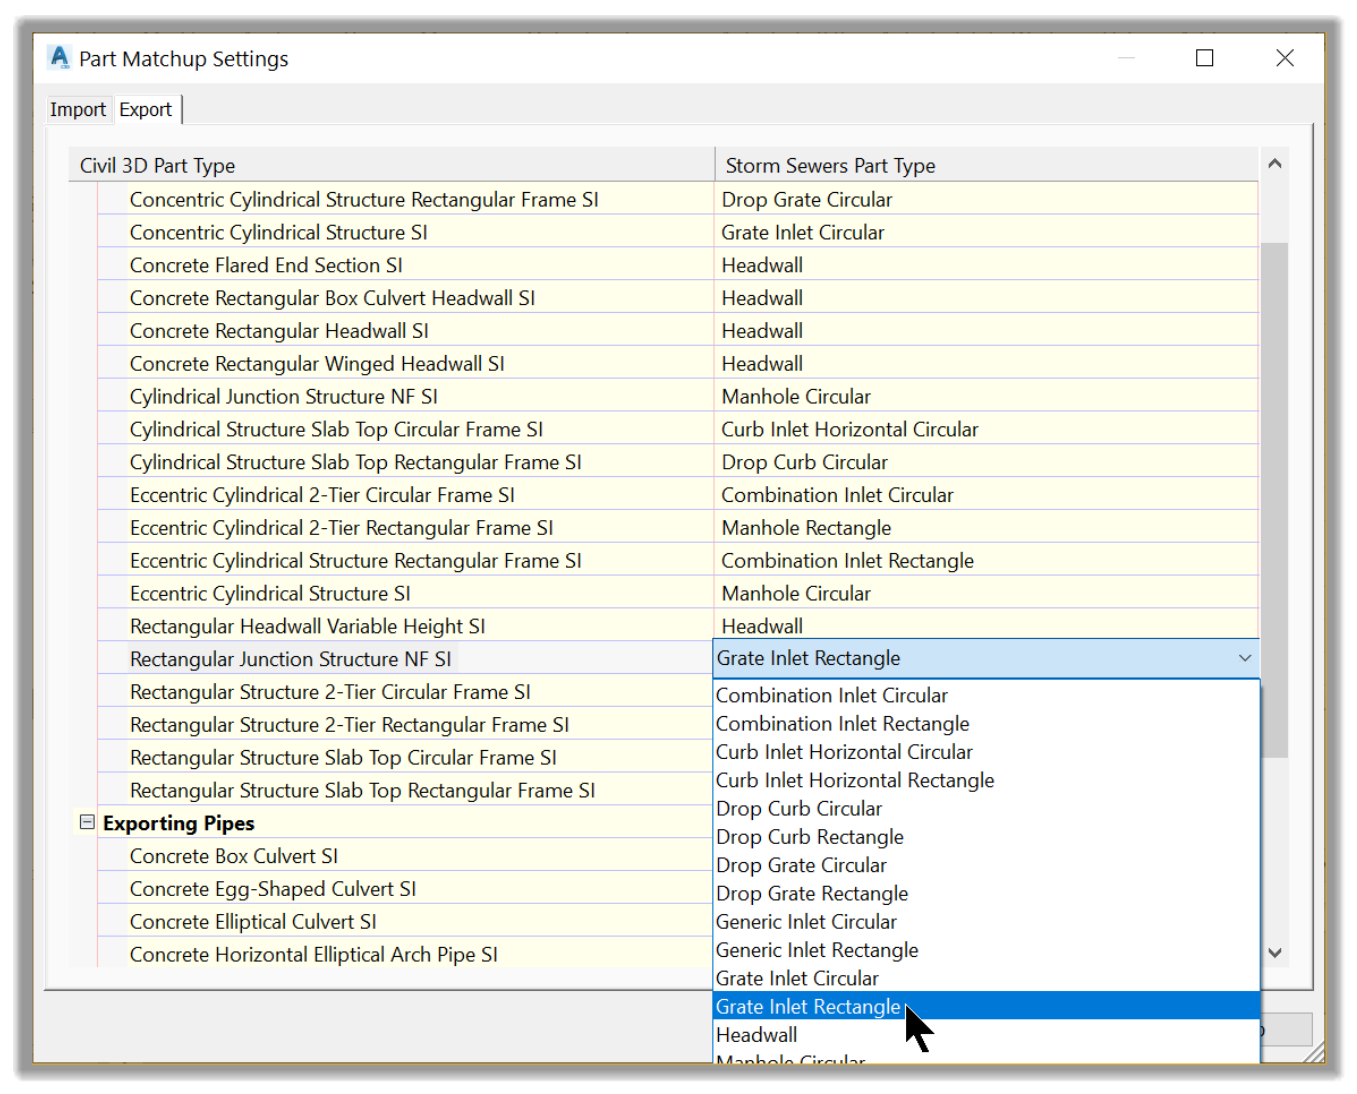
- Now, let’s set the Catchbasin migration default.
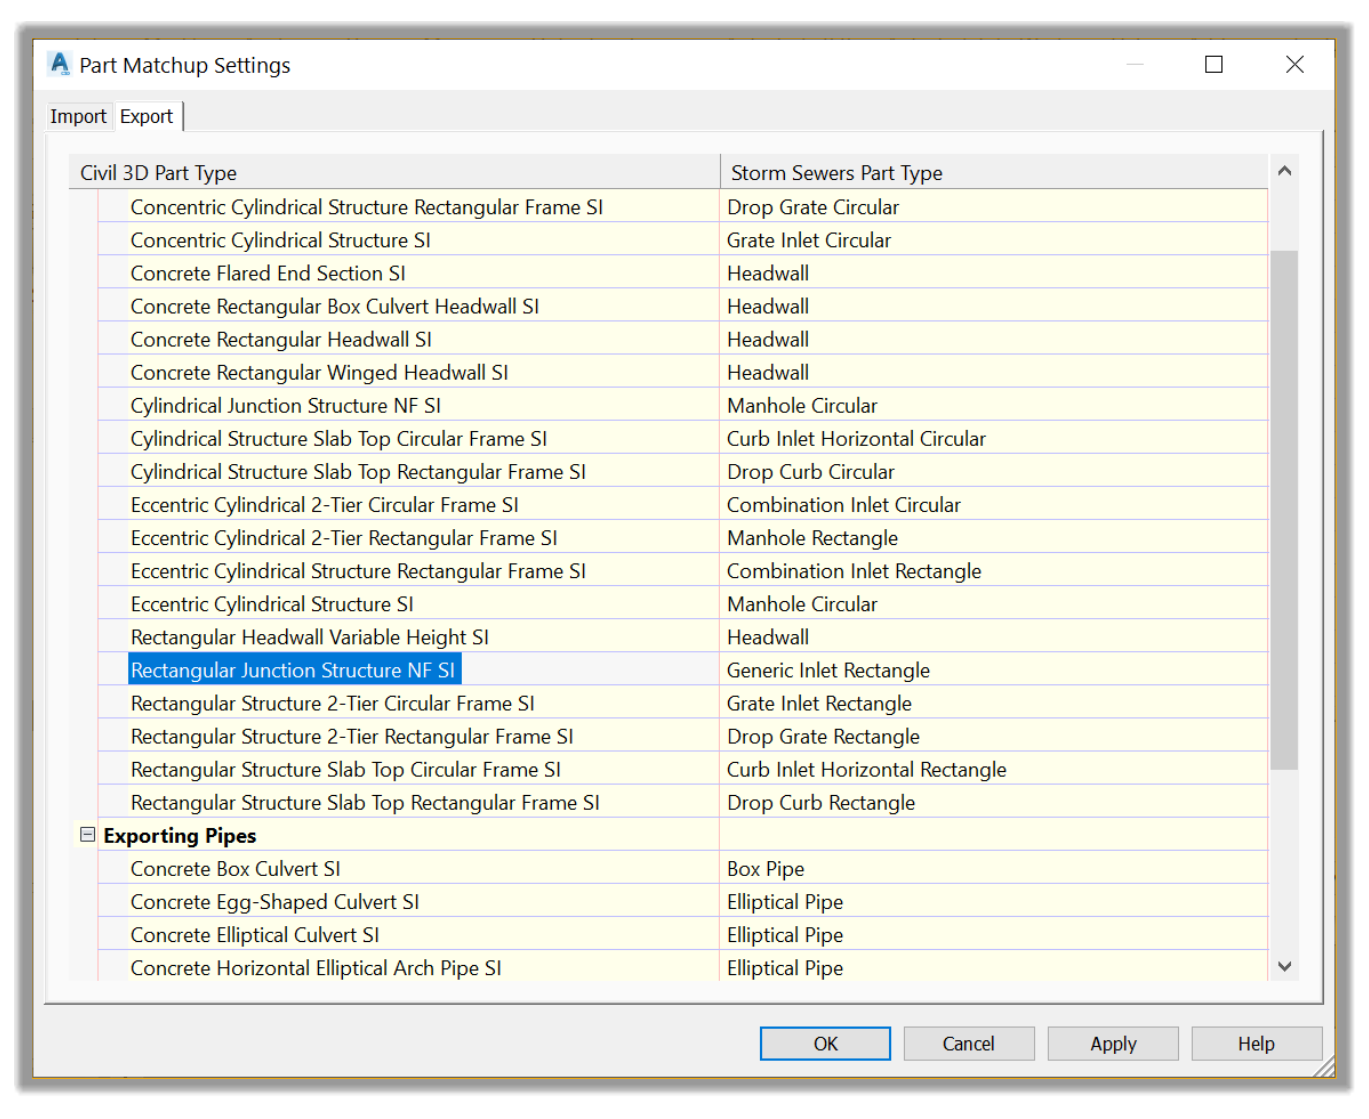
- We will match the Catchbasin to a Rectangular Grate Inlet.
- Last, we need to set the matching option for the pipes. This section is easier to match since we can accept the migration default settings and match all our pipes to the Circular pipe type in SSA.
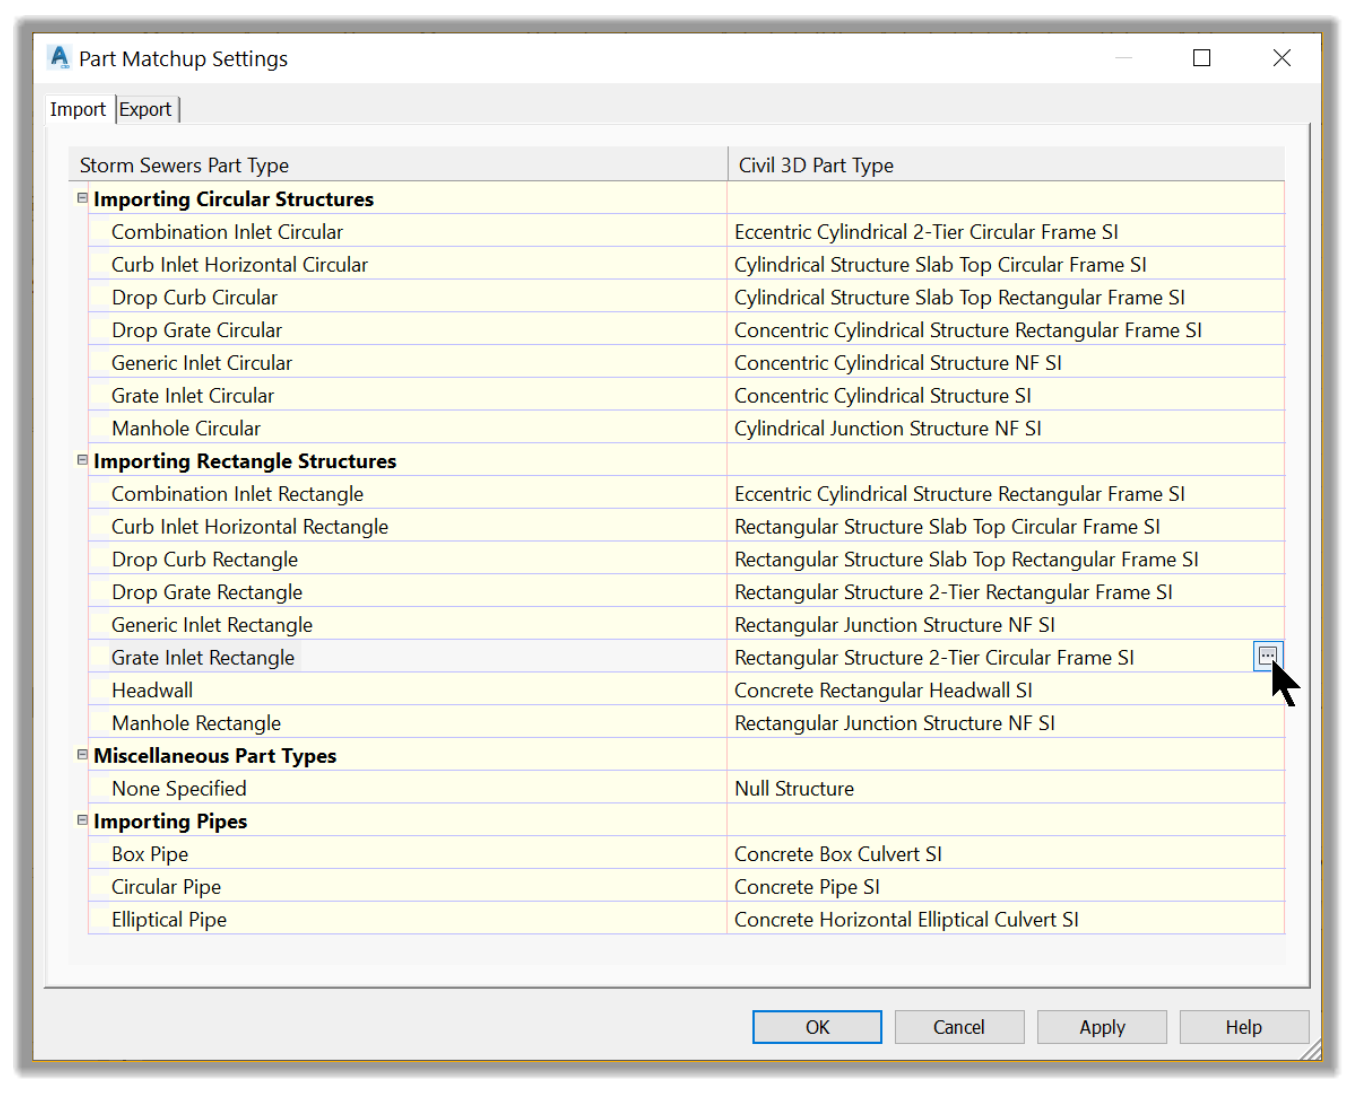
- Now, let’s switch to the Import tab of the stormwater part migration default. In this section, we will do the exact opposite of what we did on the export tab.
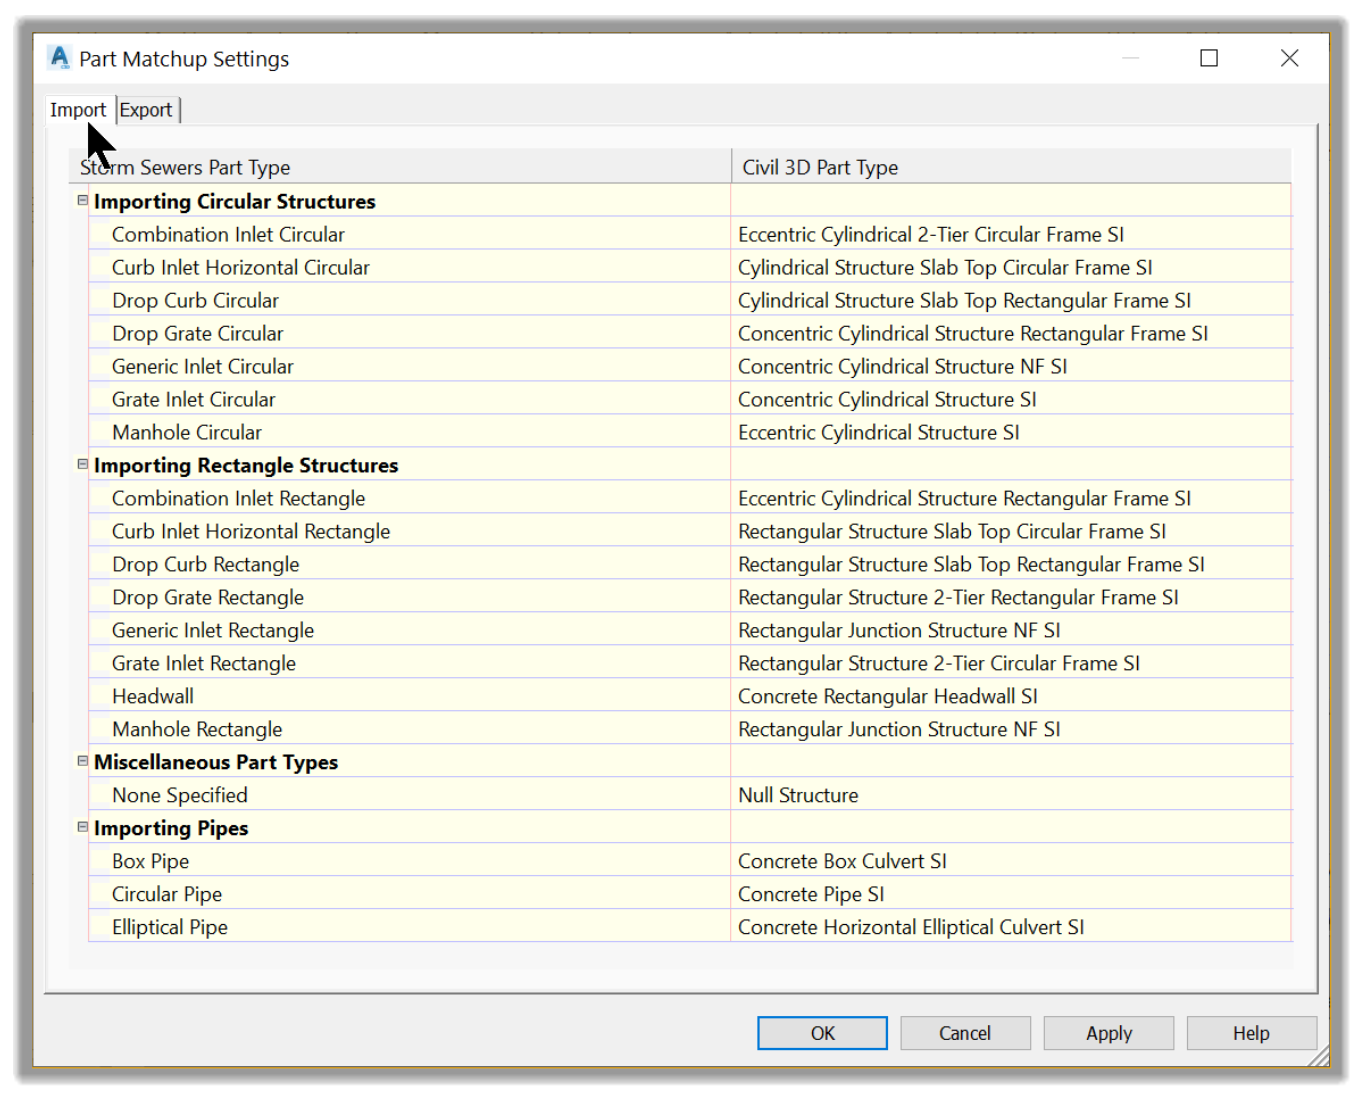
- We will need to match parts coming from SSA to parts in Civil 3D. To summarize, we need to match Circular Manholes to Cylindrical Junctions Structures in Civil 3D, Grate Inlets to Rectangular Junctions, and Circular Pipes to HDPE pipes.
- Let’s start with the manhole.
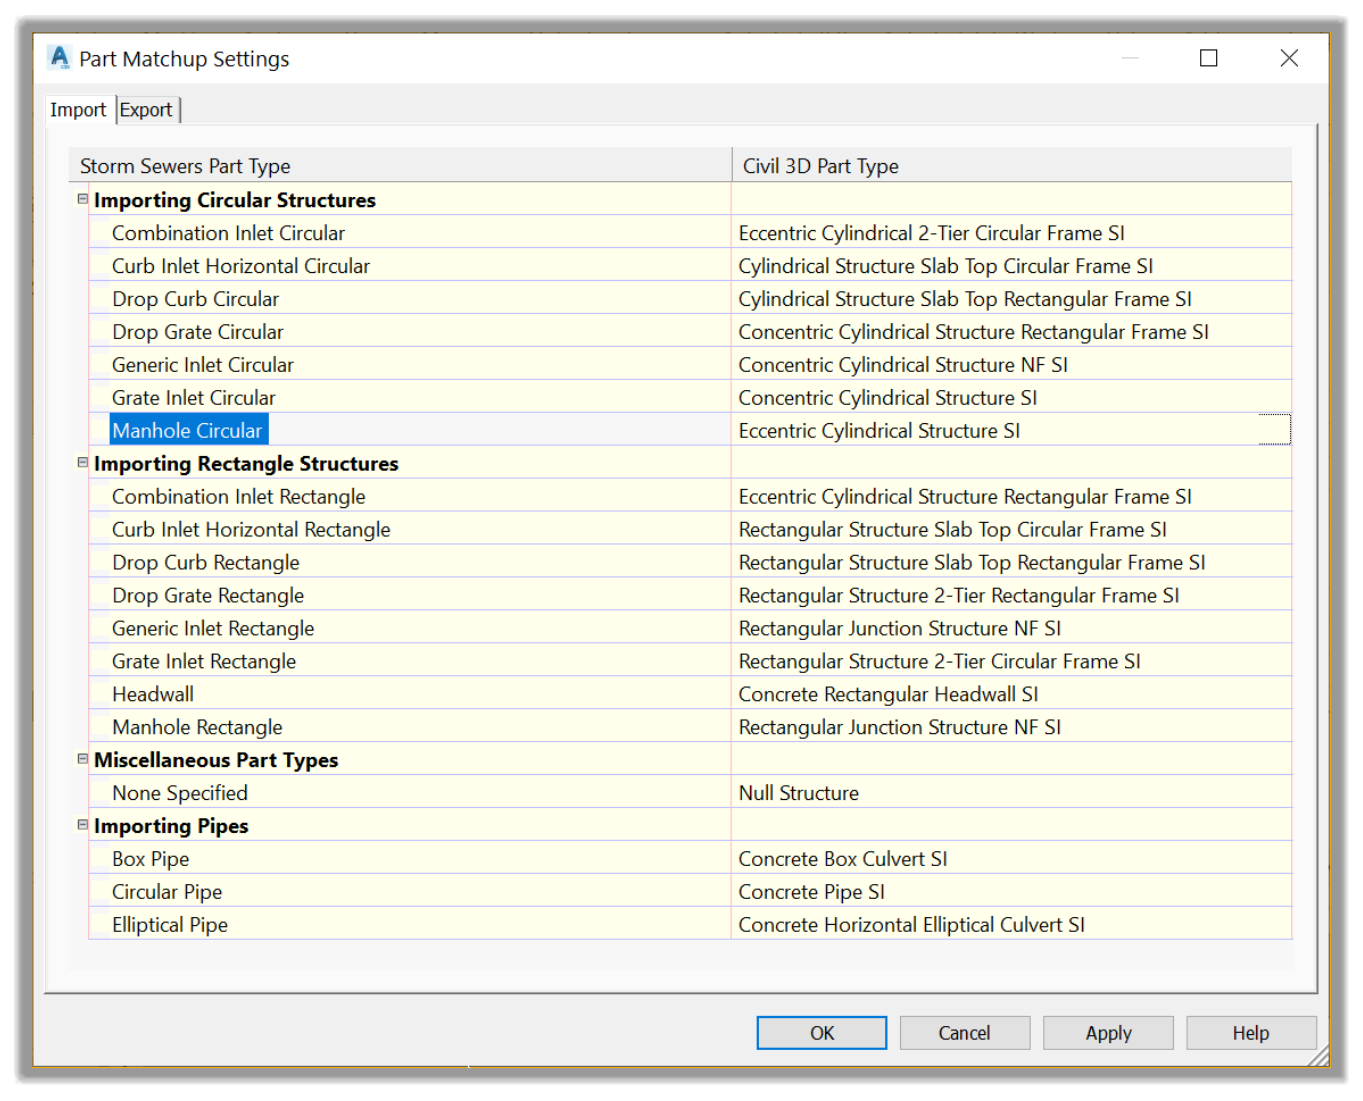
- Click on the ellipsis on the same line
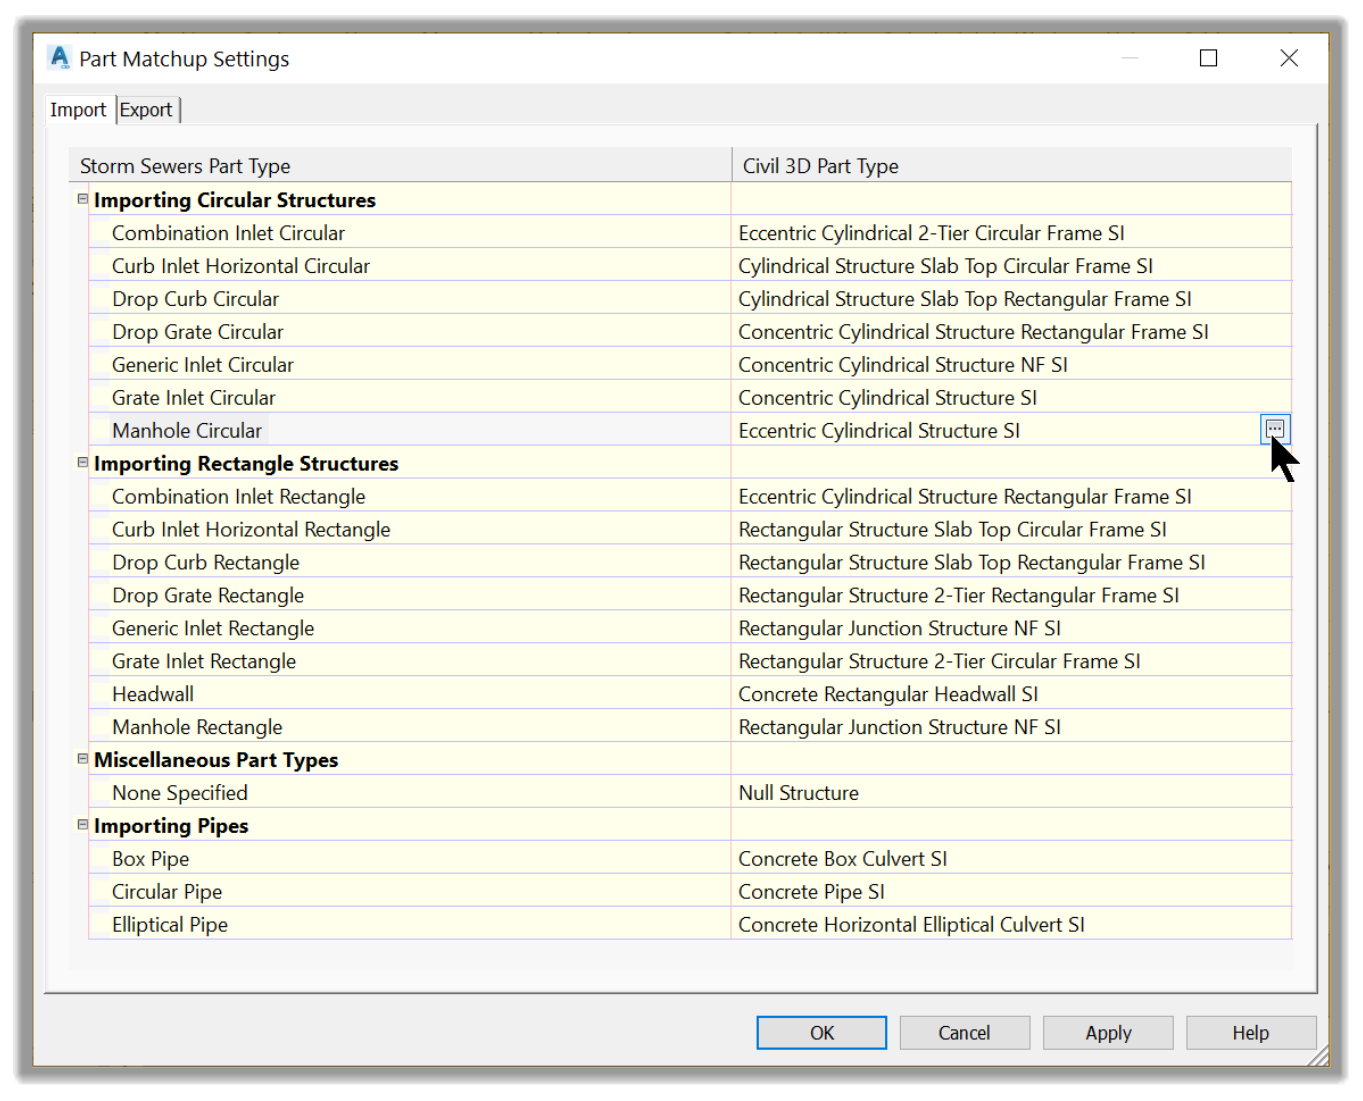
- Next, select the Cylindrical Junction Structure with No Frame (NF).
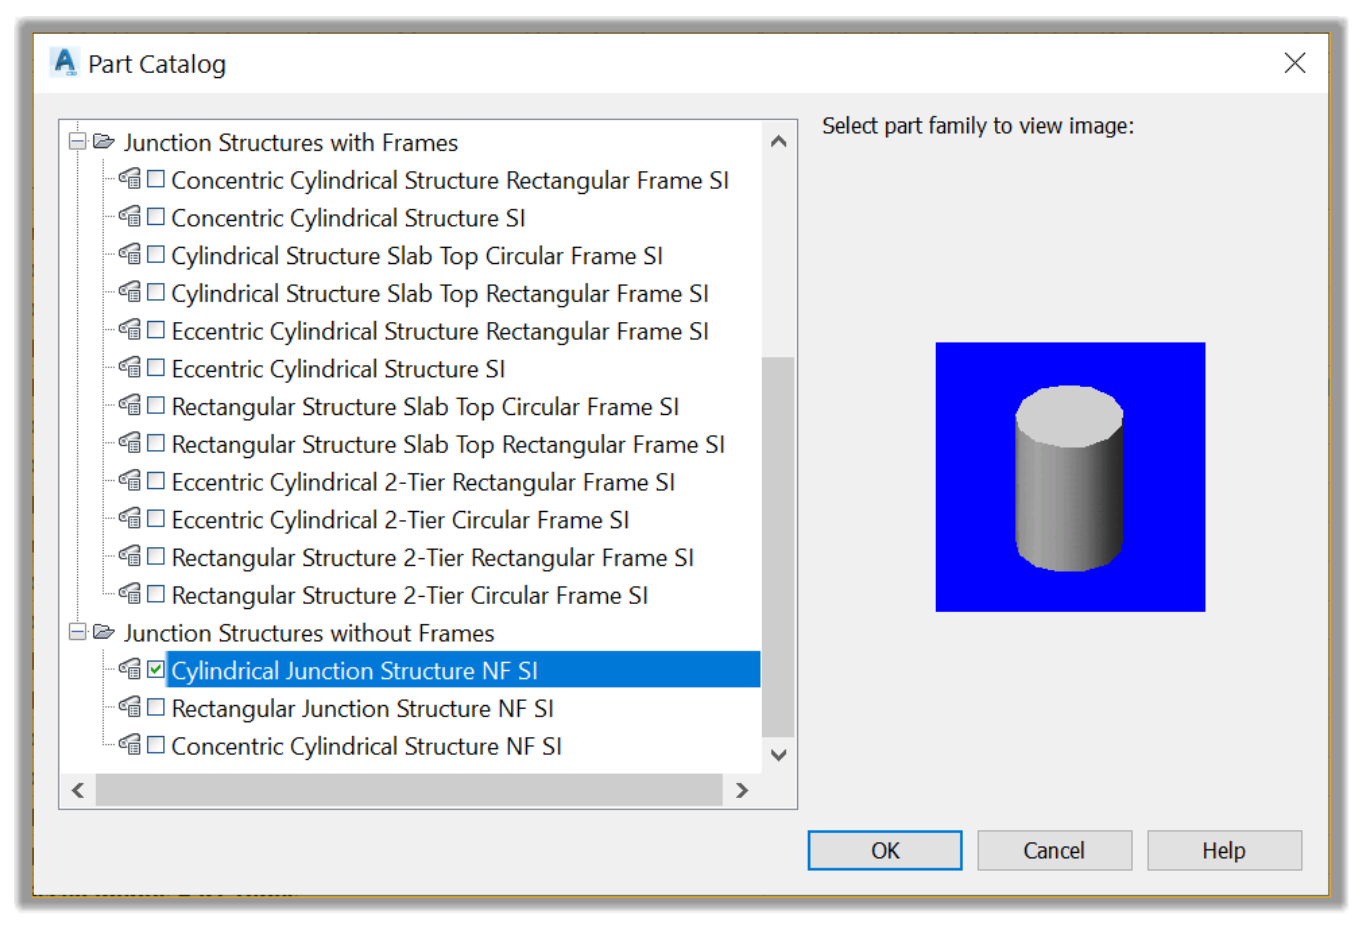
- Click OK
- Now, we need to set the Rectangular grate structure.
- Click on the ellipsis on the same line.
- In the Part Catalog window, choose the Rectangular Junction Structure NF part.

- Click OK to close the Pipe Catalog window.
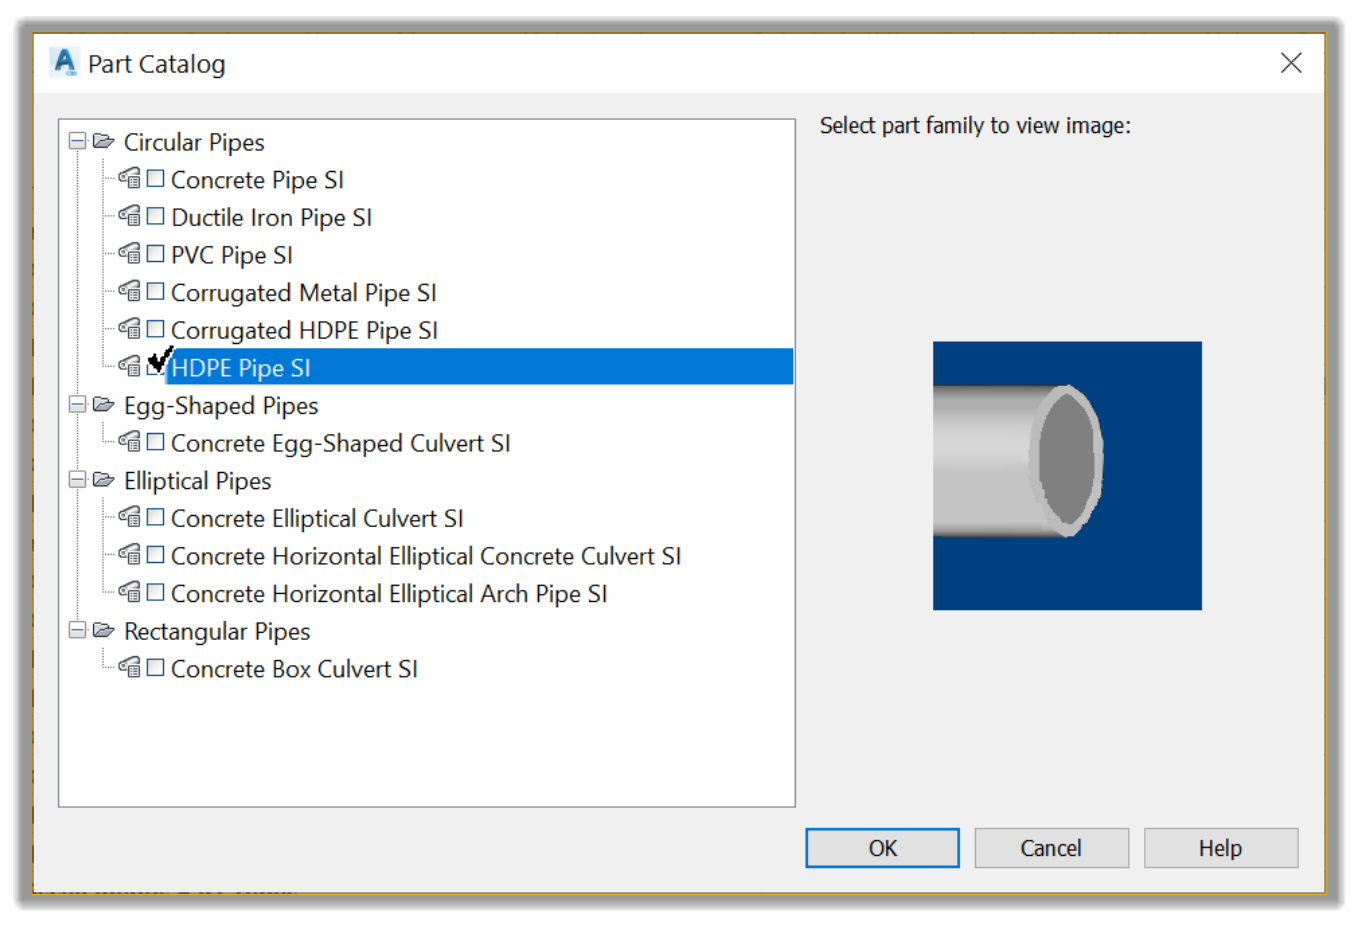
- Lastly, we need to match the pipe for migration default.
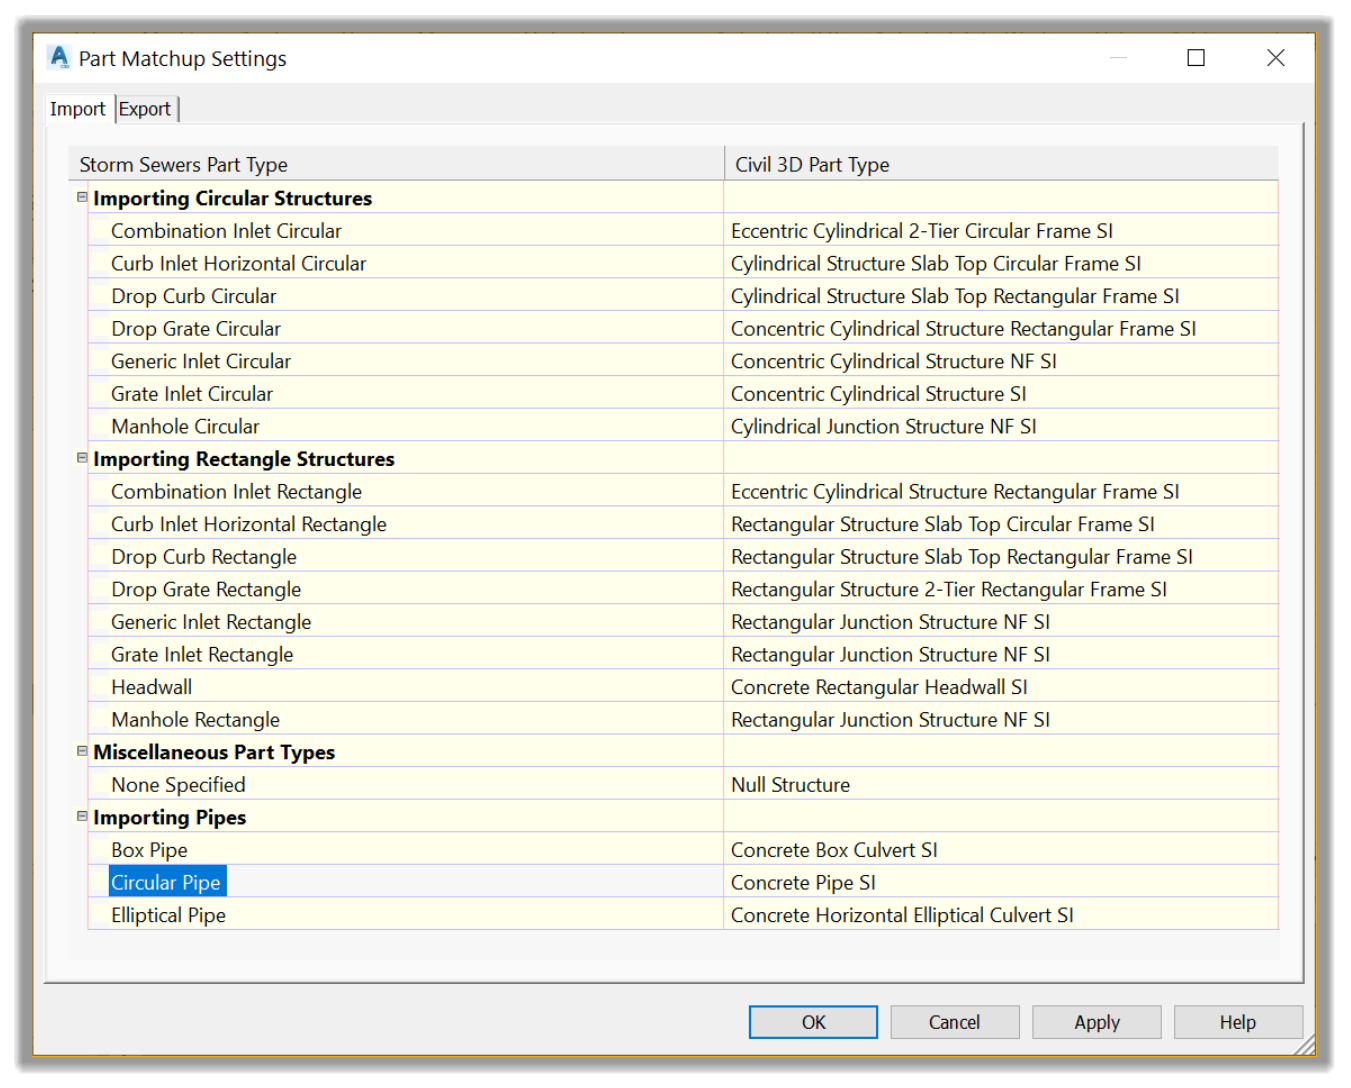
- Click on the ellipsis
- In the pipe catalog window, choose the HDPE pipe type.
We have now completed the stormwater pipe migration default set up. Because this seems like a little bit of a long process, we must mention that this is not a process that we should repeat for each project. This whole setup should be part of your company template and does not need to be repeated again.
Full Course and Free Book
-

SSA Stormwater Book and Practice Files
Course4.9 average rating (31 reviews)This pdf book includes the training manual and practice files for the advanced AutoCAD Civil 3D Storm and Sanitary Design course. This manual covers the skills needed to successfully design and analyze stormwater detention and sanitary sewer systems.
Purchase$19.99
-

Civil 3D Storm And Sanitary Analysis
Course4.9 average rating (14 reviews)In this Online Storm and Sanitary Analysis (SSA) training course, participants will learn and apply the tools offered by SSA, the Civil 3D companion software for stormwater management and design.
$99 / year