-
Get It
$19.99
$19.99SSA Stormwater Book and Practice Files
Storm and Sanitary Design Tutorial: Pond Area and Volume
Determining the Pond Area and Volume in Civil 3D
Product: Autodesk SSA | Subject: Storm and Sanitary Analysis
In this exercise, we will learn to design the stormwater pond and determine its area and volume.
Designing the Stormwater Pond
 In Civil 3D, the stormwater physical design is usually done during the grading process. However, several considerations should be done during the grading process. Before starting the design of the stormwater pond, we first need to understand its purpose. An excellent storm sewer management design usually aims to maintain a proper balance of water quantity (volumes), water quality, erosion, sedimentation, and flood control.
In this course, we will focus on the most important components of a stormwater design:
- Quality for pollutants control; and
- Quantity for flood protection (control of volumes).
Today, regulatory agencies are implementing more and more stringent regulations. Consequently, pulling a development permit is becoming lengthier and more complicated. For this reason, it is even more critical for consultants to become well versed in new design technologies and processes. Buzzwords such as BMP (Best Management Practices), LID (Low Impact Development), and many more are being tossed around and are becoming part of the engineers and developer’s lingo.
Even though the stormwater management terminologies and methods vary from city to city, county to county or even country to country, they all lead to the same objective: improve water quality and protect the well-being of people. It all goes back to various implementations of clean water acts, frameworks, and directives in the US, Canada, Europe, and many countries around the world.
These groundbreaking legislation and policies aim to implement a sustainable stormwater management practice.
SSA provides us with the tools and techniques to meet most design criteria for stormwater Quantity (volumes Control) and Quality (removal or attenuation of pollutant loads) to an acceptable level.
Depending on the area of your project, you may need (or not) to size the stormwater pond in SSA. In some jurisdictions, the volumes and sometimes the area of the pond are imposed by a formula which will establish the required volume and areas of the permanent pool (the water quality component). The extended detention volume (water quantity component) is then determined during the modeling phase of the calculation.
As you will notice from the following sample graphics from different jurisdictions, stormwater principles are very similar. The same overall principles are given different names and calculated with different formulas, but the general principles remain the same. Case in point, we can use the following terminologies to refer to the same things:
Water Quality: Permanent Pool volume, Normal Water Level, Wet Detention, Settling Zone, Low Flow Zone, and many more.
Water Quantity: Extended Detention volume, Flood Control Zone, High Water Level, 100-year Level, and the likes.
2.3.1 Establishing the Pond Area
New Jersey, USA Stormwater Manual

Ontario, Canada Stormwater Management Manual

Type A basin: International Erosion Control, Australia (Source: austieca.com.au)

For the reason of varying local vocabularies, we will only use the terms Quantity and Quality in this course.
As mentioned before, the volume of the water quality component is determined by a formula specific to each local authority. Let’s assume that in the case of the municipality of Flower Bay, the requirement is to have a permanent pool of m In some regions, like Florida for example, the treatment volume is required as the first 0.5" of runoff over the entire site or 1" (varies from district to district) of runoff from the impervious area; 1” over 1-acre amounts to a volume of roughly 0.08 acre-feet or 100 m3
For our development with an area of 2 Ha (5 Ac), we will need to have a permanent pool with a volume of 140 m3 (5,000 ft3). Let’s also assume that the permitting authority requires a permanent pool depth of 0.6m or 2ft. Therefore, we will need an area of 233 m2 (8,200 ft2) for the pond. This will be for the water quality component.
Whatever your case may be, simply use the locally provided formulas to determine the volume you need for quality.
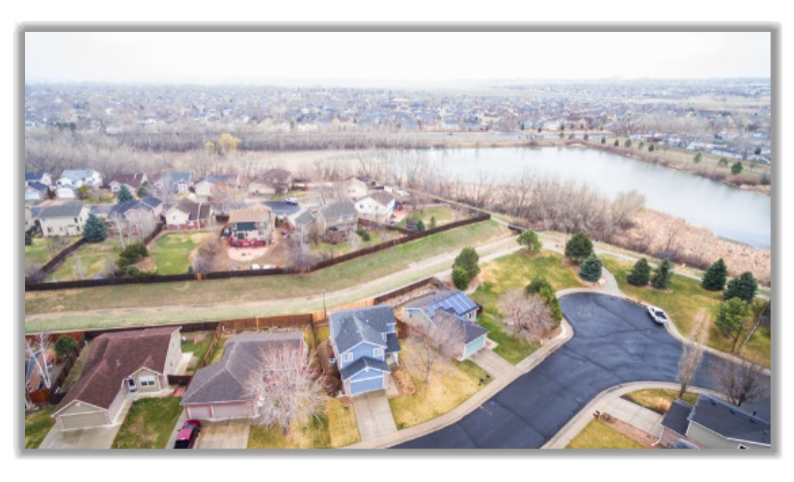
- Keep working with the file 01.01-INTRODUCTION.dwg or open it by double-clicking on it from the practice folder or launching it from Civil 3D.
- Then, let’s zoom to the pond area.
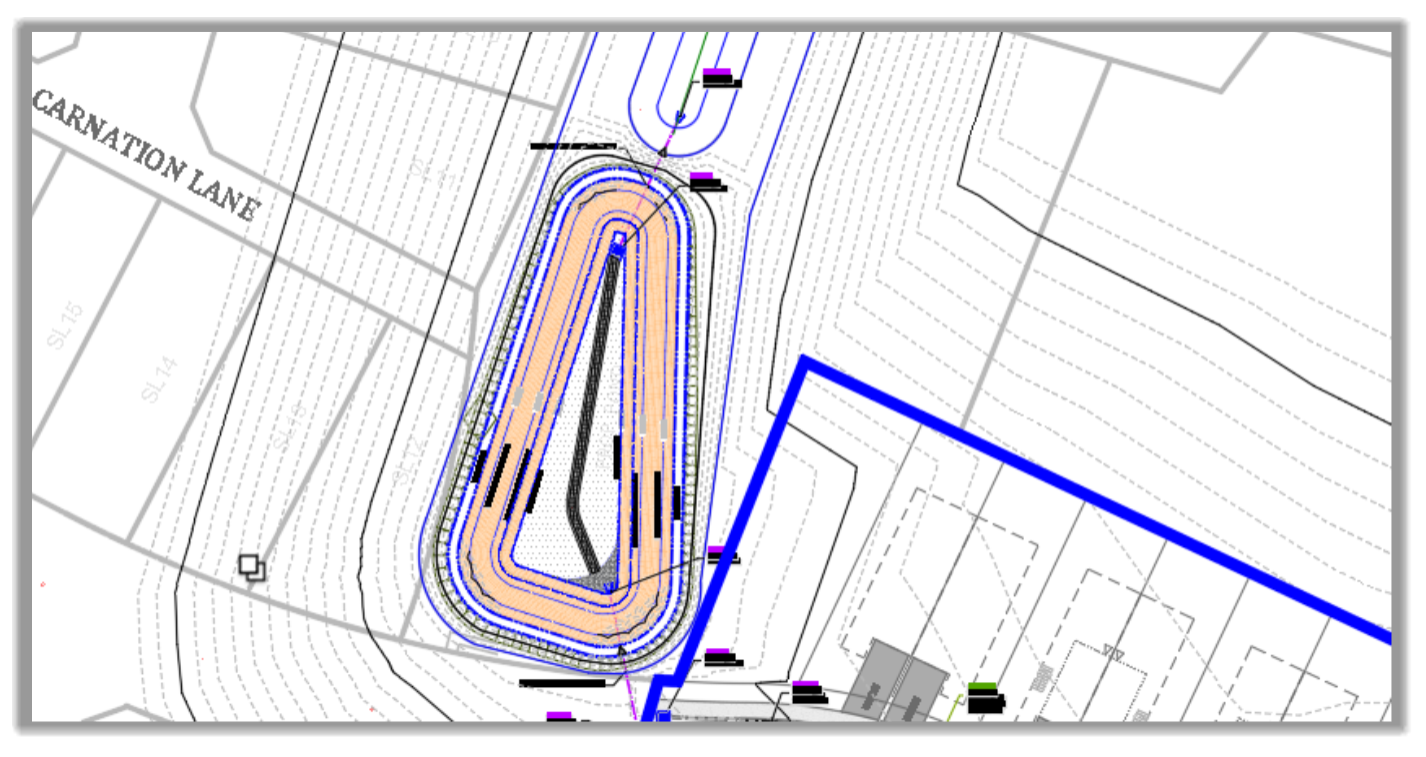
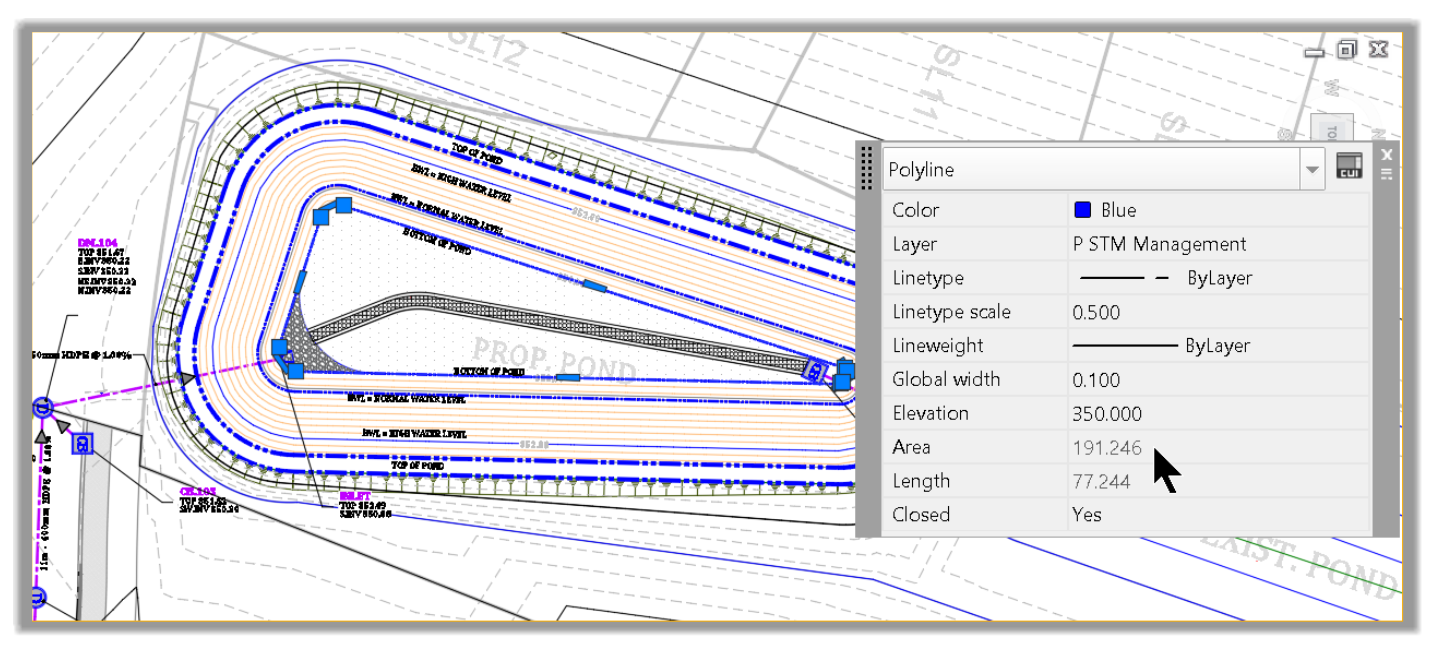
- You will notice that we have already created a few blue polylines. Each of these lines represents a design feature of the pond, such as the Bottom of Pond, the NWL (Normal Water Level a.k.a Permanent Pool a.k.a Water Quality Volume), or the Top of Pond.
- Let’s check if indeed we have the required volume for water quality. Zoom in closer, at the bottom of the pond area, and select the Bottom of the Pond line. We can see that it has an area of 190 m2 (2,000 ft2) with an elevation of 350m (1,150ft).
- If we select the next line NWL, we will have an area of 290m2 (3,100 ft2), corresponding to the elevation of 350.60m.
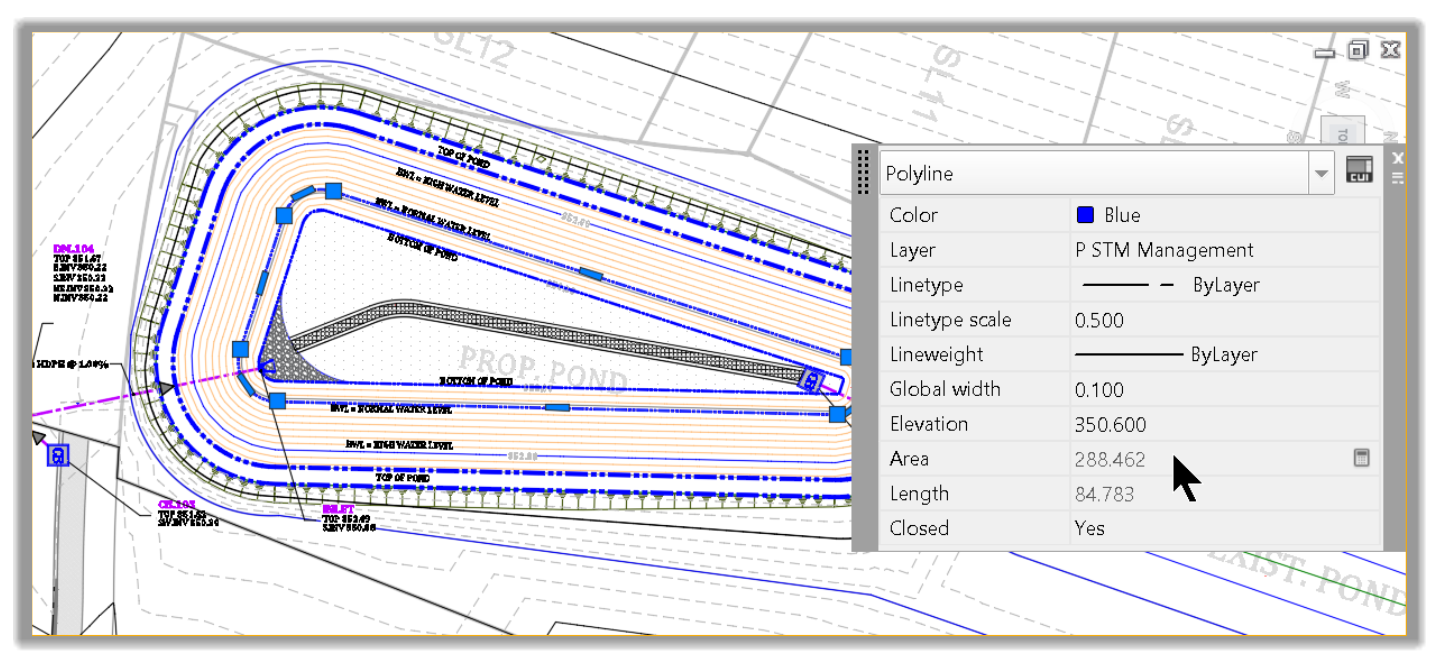
- If we use the average area method, we will get a volume of:
(190 + 290)/2 x 0.6 = 144m3 (5,090ft3), which is more than the required 140 m3 (4,940 ft3). If we happened to have less volume than the required, we will then need to widen the pond area, since we can’t exceed the maximum 0.6m or 2ft allowable for permanent pool. Once again, check your local guidelines for the exact formula to use for the volume of Water Quality.
- Now that we have met the required volume for the Water Quality, we will design the pond to meet the requirements for the Water Quantity volume component. This next step will be finalized in SSA. However, we can already provide a temporary design of the pond. The reason for having a temporary design is that we need to get stage storage information. That information can then be used in SSA to estimate the storage volume. For the temporary design, we will simply extend the pond from the NWL level all the way up to the maximum allowable elevation. We know the max elevation because there is a regulatory limit on how deep the pond can be. Since we know the bottom elevation, we can determine the maximum elevation, area and volume. Typically, the maximum depth allowed for a pond is around 2m or 6.5ft. To that maximum depth, we will add any required freeboard. That will bring the top of pond elevation to 352.60m (1,156.80ft). Once again, we will know the final numbers once we do the simulation in SSA. For now, we will leave the pond as is, hoping that we will be able to lower it when we get in SSA.
- Next, the pond is graded to tie back from the existing ground. For more details on how to perform grading, please refer to the Civil 3D Essentials course.
Full Course and Free Book
-

SSA Stormwater Book and Practice Files
Course4.9 average rating (31 reviews)This pdf book includes the training manual and practice files for the advanced AutoCAD Civil 3D Storm and Sanitary Design course. This manual covers the skills needed to successfully design and analyze stormwater detention and sanitary sewer systems.
Purchase$19.99
-

Civil 3D Storm And Sanitary Analysis
Course4.9 average rating (14 reviews)In this Online Storm and Sanitary Analysis (SSA) training course, participants will learn and apply the tools offered by SSA, the Civil 3D companion software for stormwater management and design.
$99 / year