Civil 3D Survey: Figure Prefix Databases
Field to Finish Surveying Prefix databases
Product: Autodesk Civil 3D | Subject: Surveying with Civil 3D
In this exercise, we will learn about Civil 3D Survey figure prefix databases.
Figure Prefix Databases
We previously saw how to edit figure styles from the settings tab of the Prospector.
We need to see how figures are created and how Civil 3D connects the dots to create the shapes. For example, when the pond lines are created, how does Civil 3D create a closed polyline, how is the 3-point arc created for the fence, etc. This is done by combining two factors, the Figure Prefix Database and the Linework Code Sets.
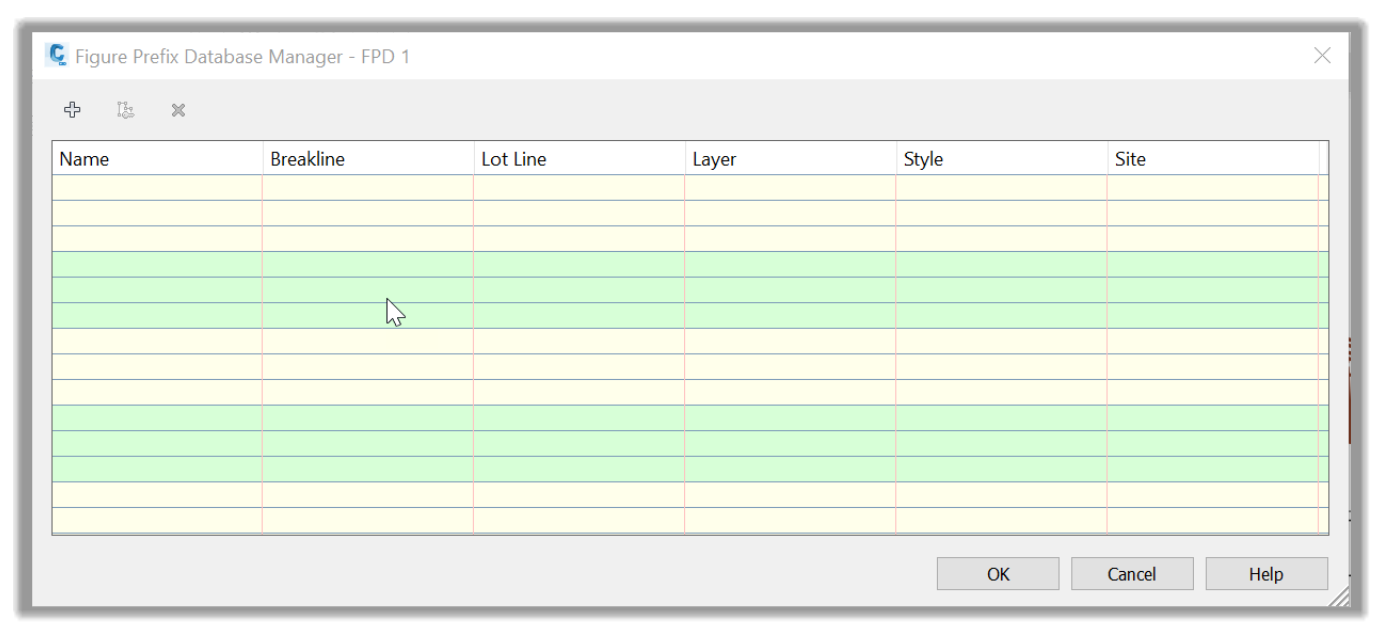
- The Figure Prefix Databases are found in the Survey tab of the Toolspace.
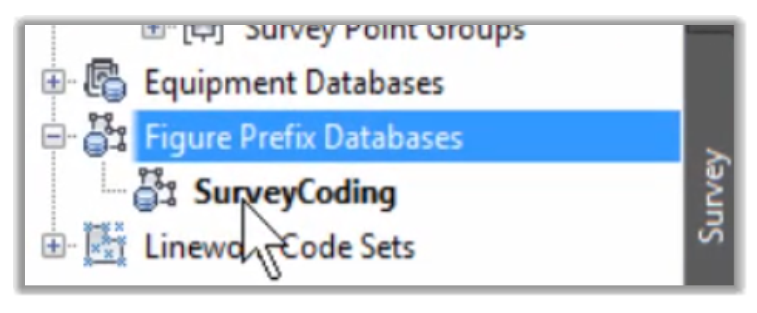
- Within the Figure Prefix Database, we simply need to assign the codes we will use. Our current database is set to the Sample database. To create a new database, we simply need to right-click and create a new one.

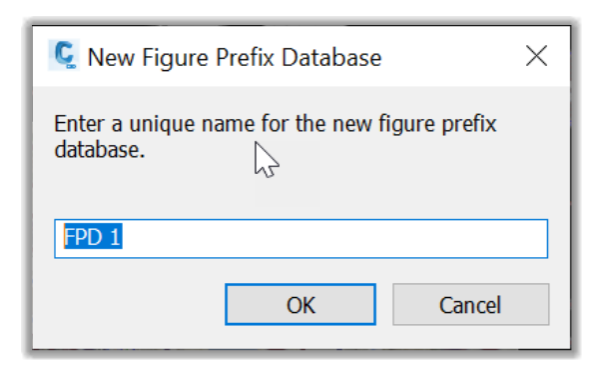
- Let's call it FPD 1 for Figure Prefix Database 1, for example.
- Once the new FPD is created, we simply need to right-click on it to Make it current.
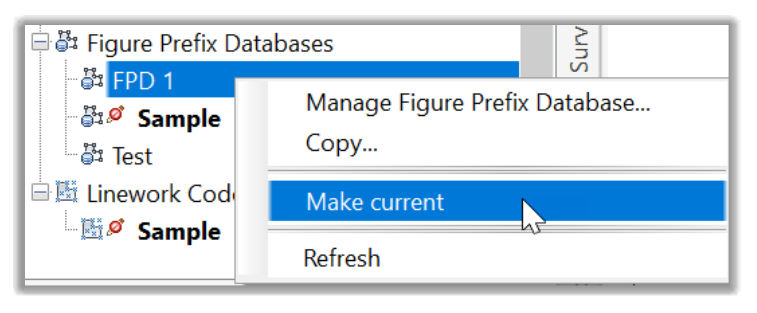
- We can then proceed to Edit it and customize it to our needs.
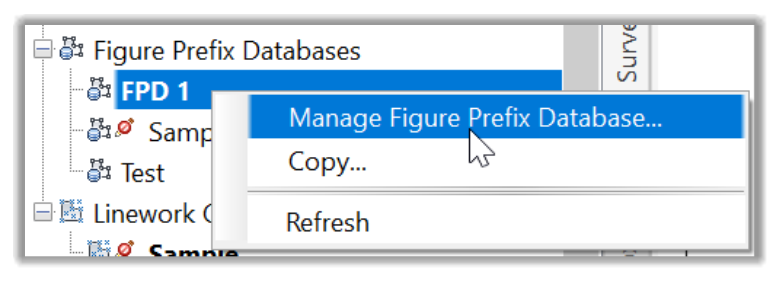
- In the Figure Prefix Database Manager, we need to set the list of figures we will need to draw. Let's see how to add a couple. The main thing to keep in mind is that the list of codes we will need to match the Survey controller's codes. The good news is that this setup should be done only once. The chances are that you already have a similar list in your office template. We currently have a blank FPD, so you should learn how to create one for yourself if needed.
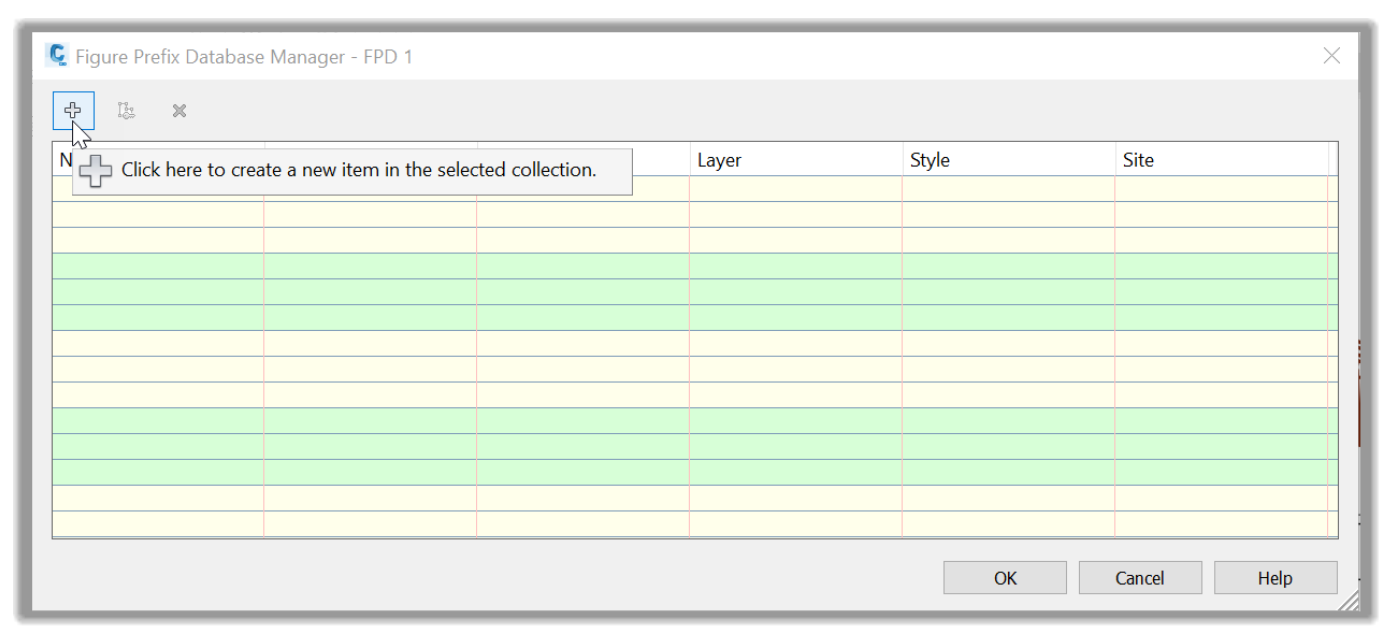
- In the Manager, right on the + sign to create a new Figure code.
- A default code, named Sample, is created. Let's click inside the Name to rename it to FE. That would be the code for the FENCE in the controller.
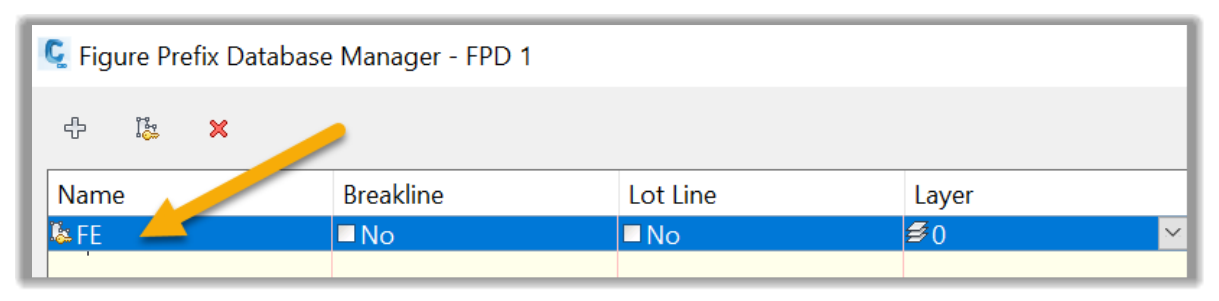
- Next, we need to decide if this code can be used as a breakline to create a surface later from these figure lines. Let's choose YES.
- We do not need to create Lot Lines from the figures, so let's leave that option unchecked.
- Next, we need to decide which Layer to put the Fence lines on. Let's make it easy and put all Figures on the V-SURV-FIGR layer.

- Then, we need to specify a Style for the Fence lines. As we've seen previously, the Style will assign the line style, weight, colors, etc. Let's click on the list and choose the style Fences.
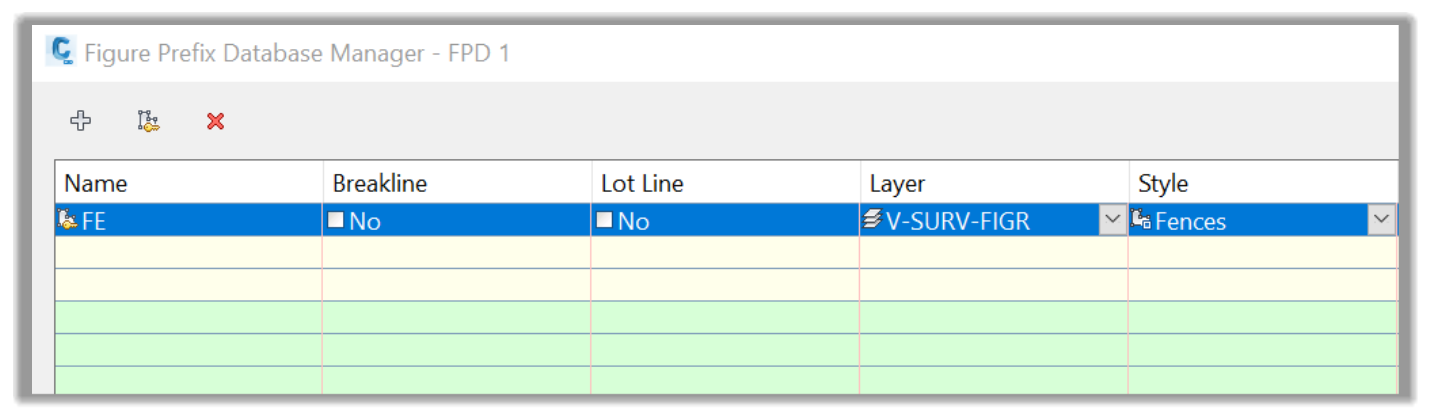
- Finally, for the Site, let's leave it at the default Survey Site.
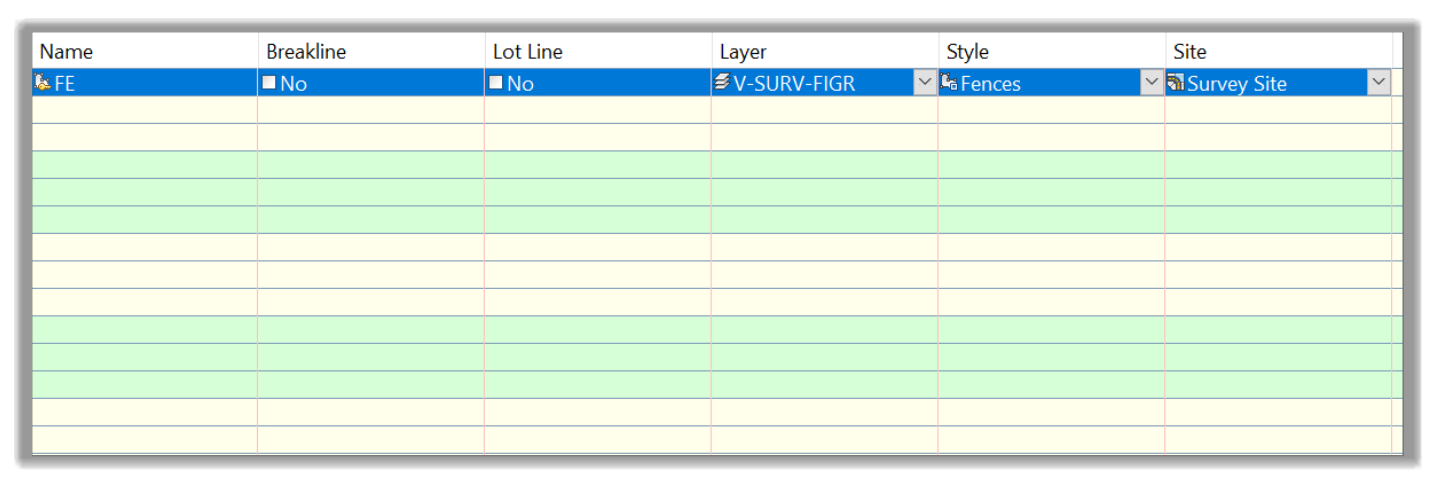
- That's it for how to create a Figure Prefix. Now it just a matter of repeating the process and creating as many Prefixes as we think we will need. Once again, this database will reside in your template file, and you will not need to touch it again unless for adding or adjusting prefixes.
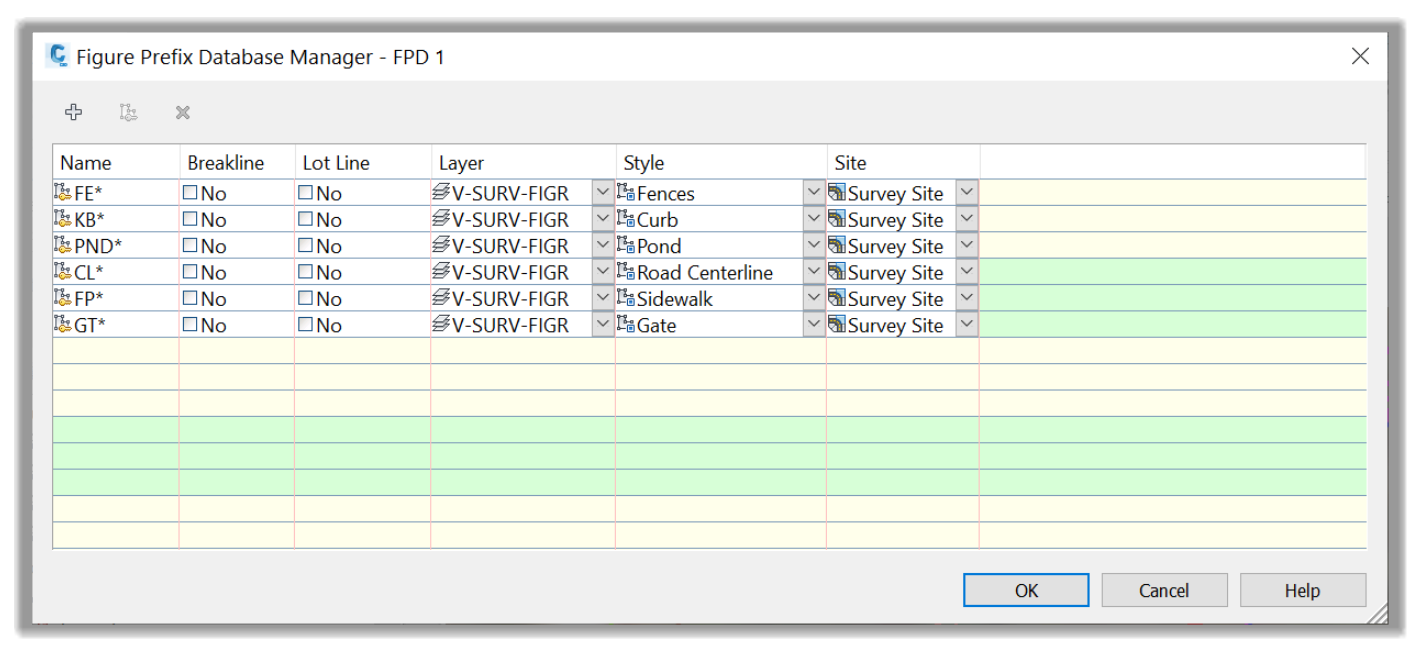
- So, let's keep adding more prefixes to the database like the Curb (KB) Line, Centerline (CL), Sidewalk (FP), Pond (PND), etc.
- Once we are done with the Database, we should have something similar to this.
- If the survey database is configured correctly, once the survey data is imported in Civil 3D and the proper database is applied, the measured lines will be converted to figures. They will be drawn with the desired line styles, colors, weight, etc., all automatically.
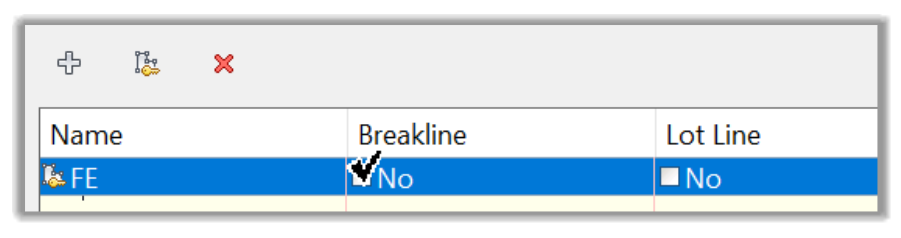
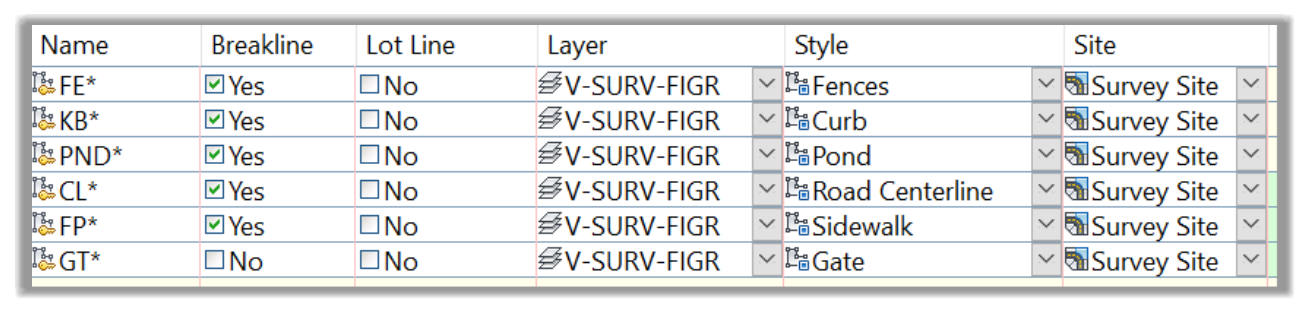
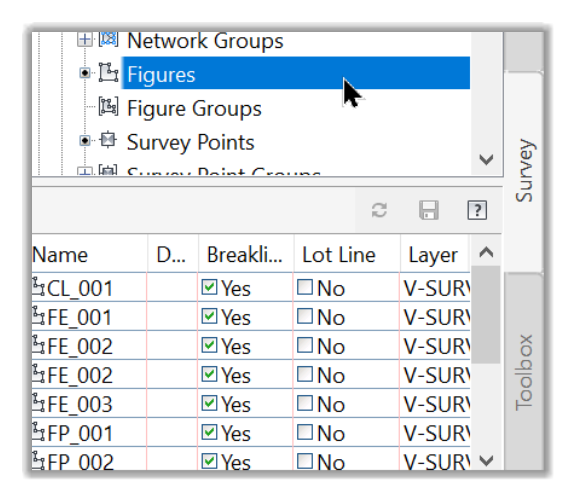
- Another great benefit of the Prefix Database is the option to define figures as breaklines so they can be used to define an existing ground surface automatically. This makes the process much easier and automatic. For example, let's define the Fence, Curb, Pond, and Sidewalk lines as breaklines by checking the box in the Breakline column.
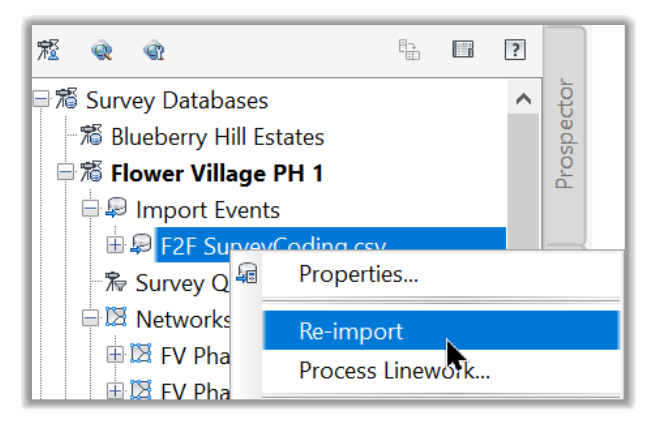
- If we have defined the breakline definition after the survey file is imported, we update the import operation by re-importing the Import Events section's survey file.
- In the figure section, we can now notice that all the figures we have defined as breaklines have a checkmark close to them.
- We can then create our existing ground surface from the Prospector or the ribbon.
- Then, from the definition section of the surface, we can add the existing ground point group to the definition.
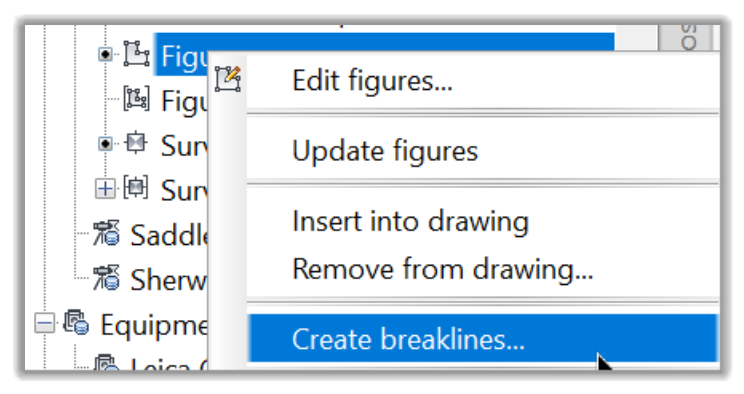
- Next, from the Figures section, we can right-click and automatically add all the figures to a chosen surface as breaklines. This makes the process so much easier than individually selecting figures and adding them as breaklines to a surface.
- In summary, a Figure Prefix Database is to lines what Description Keys are to points. They allow us to set the styles and appearance of survey linework.
Full Course and Free Book
-

Civil 3D Essentials Book and Practice Files
Course4.9 average rating (69 reviews)This mini-course offers a downloadable manual of Civil 3D. The eBook covers the features needed to successfully design most civil engineering projects, from field data collection to final design and layout.
Purchase$19.99
-

Advanced Civil 3D: Surveying and Construction
Course5.0 average rating (4 reviews)In this Online Survey and Construction Civil 3D training course, participants will learn and apply the tools offered by Civil 3D, to perform advanced survey and construction tasks.
$99 / year