Civil 3D Survey: Staking Out a DTM Surface
Field to Finish Surveying DTM Surface
Product: Autodesk Civil 3D | Subject: Surveying with Civil 3D
In this exercise, we will learn how to stakeout a Civil 3D DTM Surface in field survey.
Staking a Surface (DTM)
A Digital Terrain Model (DTM)[IC1] is a topographic model that contains the triangulation of elevation data over a spatial area, often used in earthworks or on engineering projects. The DTM file is created by exporting a Civil 3D Surface, as we saw earlier.
Let's see how to stakeout a DTM in our example surface controller.
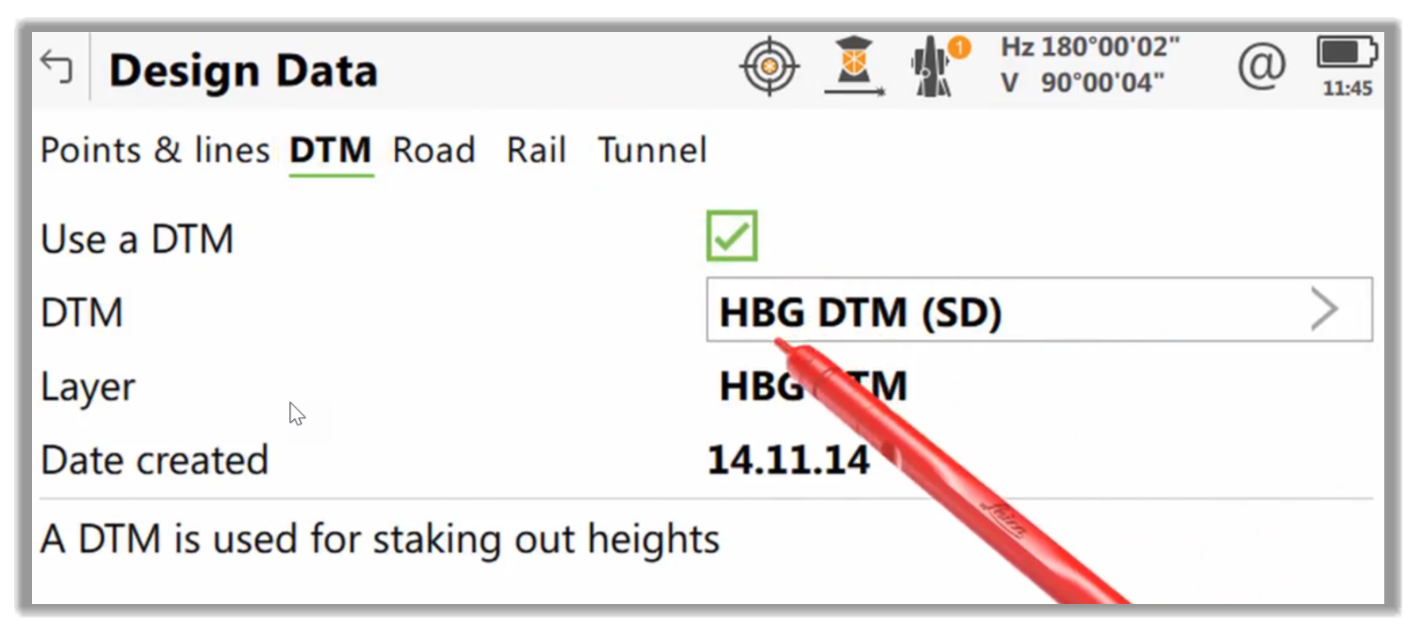
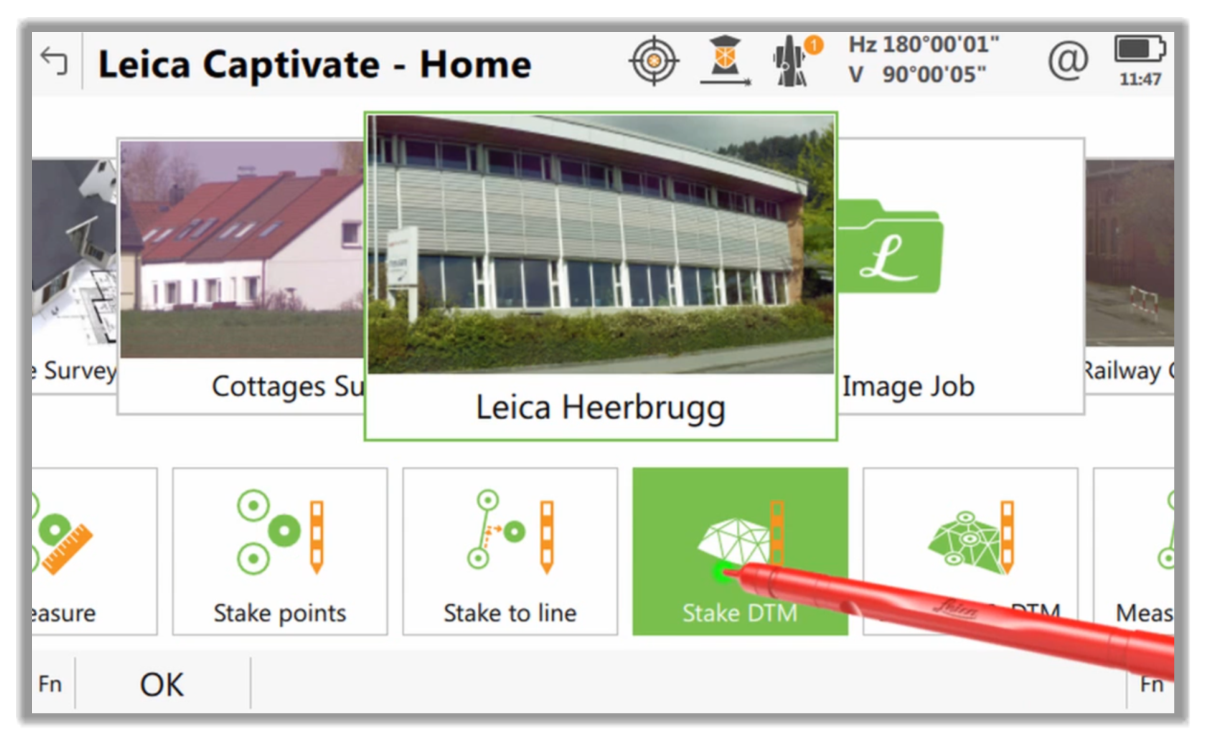
- First, we need to select the DTM to use.
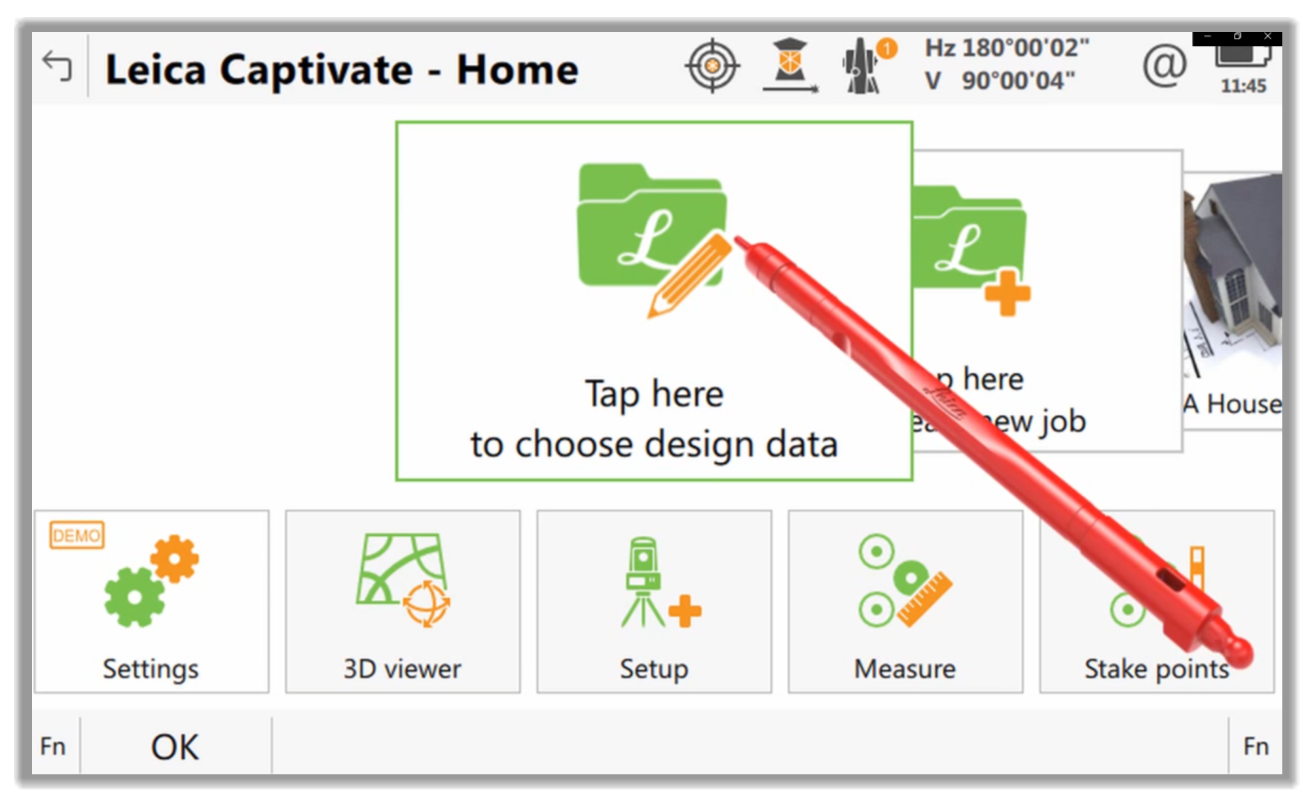
- Then, we activate the DTM module of our controller and select the file to use.
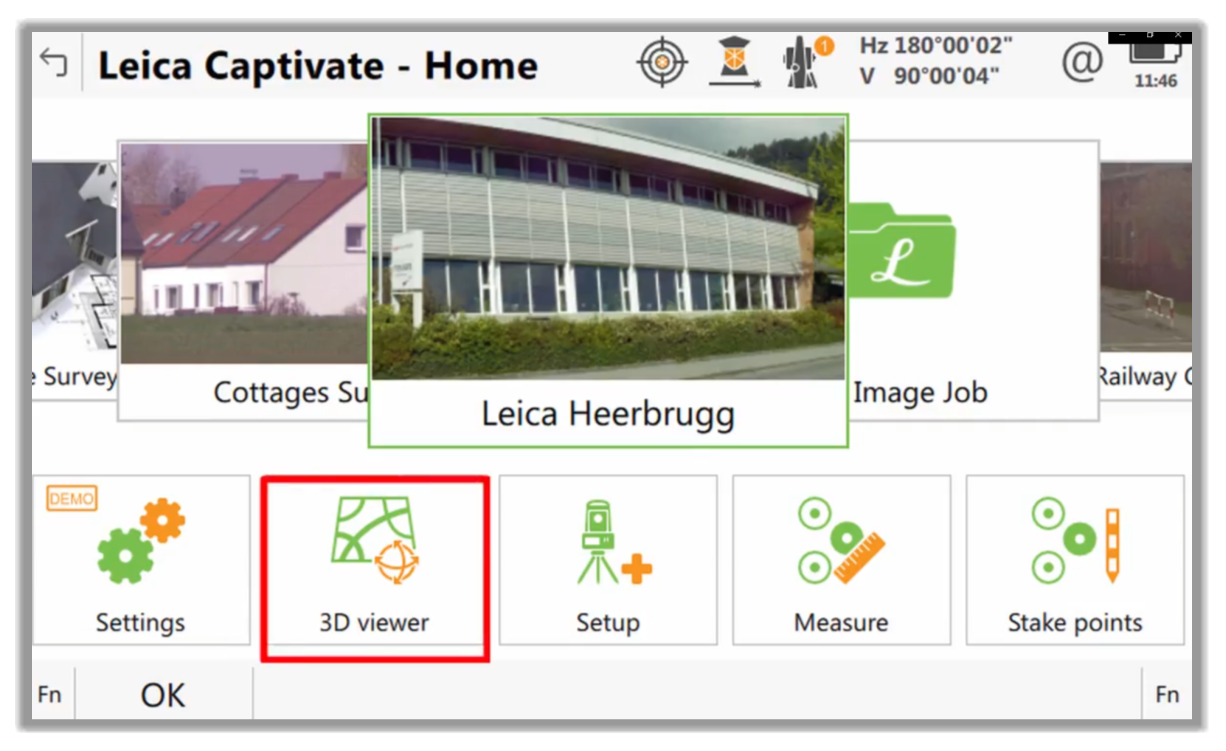
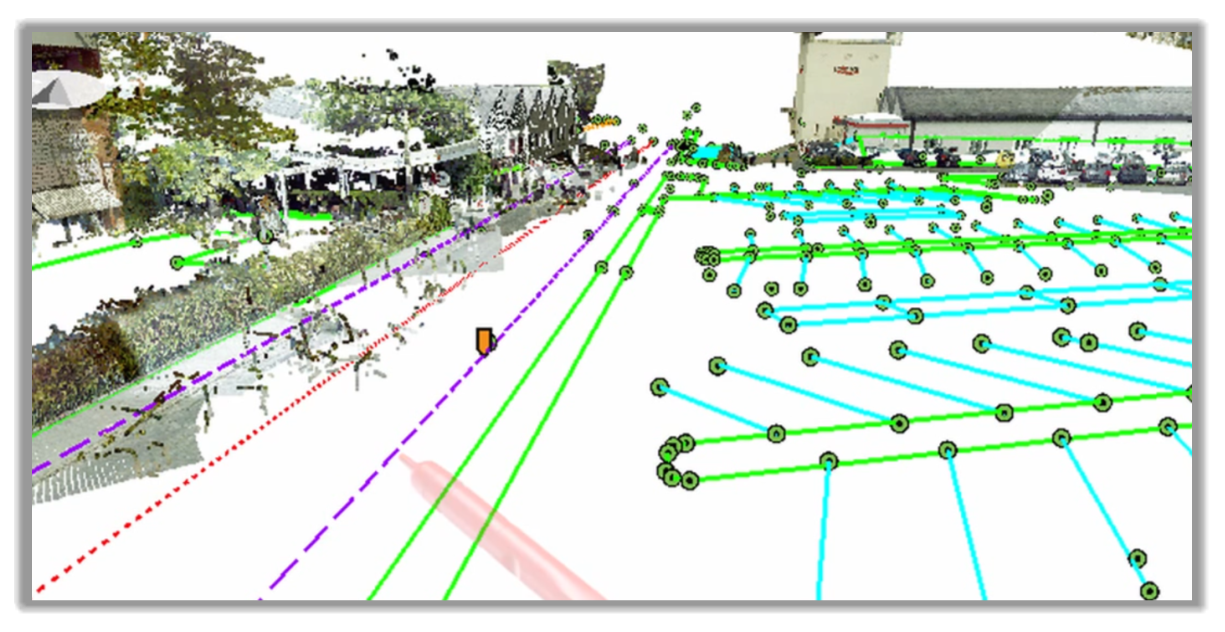
- Next, the DTM will be imported into the active project and viewed in the 3D Viewer.
- In most controllers, the DTM will be a layer that can be turned on and off as needed.
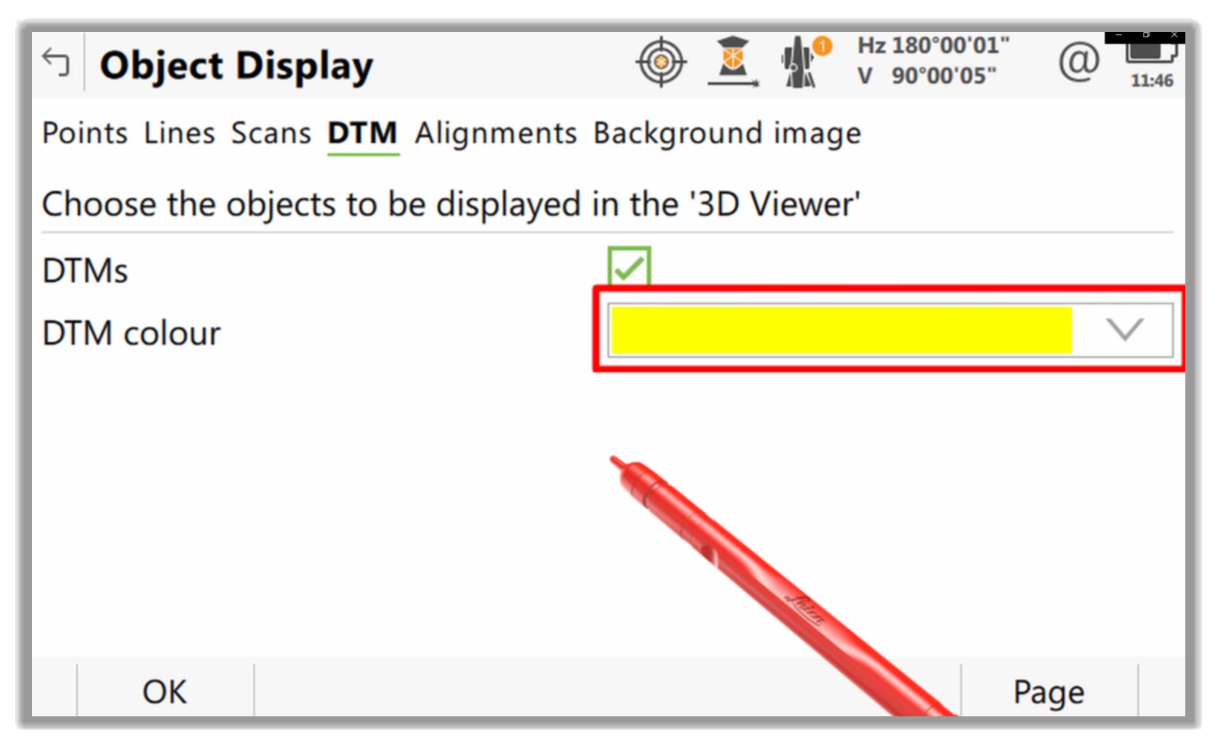
- From here, depending on the controller, we have options to display numbers, descriptions, colors, etc.
- With our DTM parameters set, we can now move on to stake it.
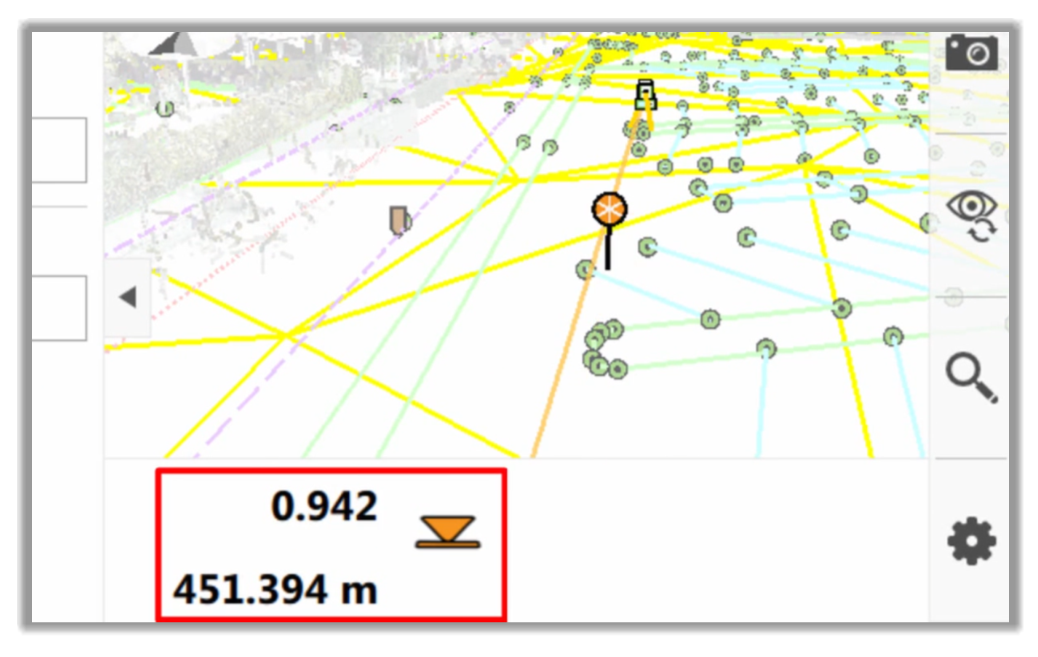
- During the stakeout for each point, the height will be computed based on our location within the DTM, and we can stake values for cut and fill, meaning below or above the surface elevation.
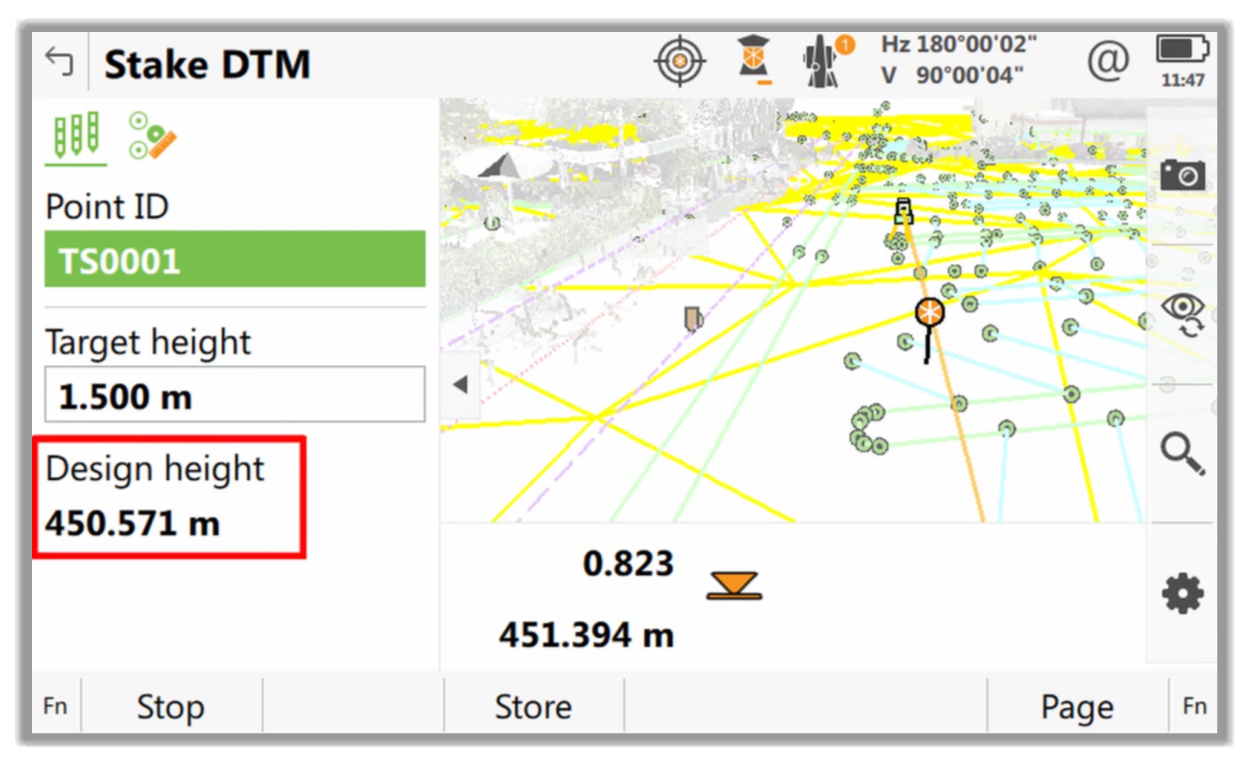
- At any point on the DTM, have values for a cut or fill. So, knowing the difference between our current height and the design height, we simply put a note on the stake indicating the difference, plus or minus.
.
Full Course and Free Book
-

Civil 3D Essentials Book and Practice Files
Course4.9 average rating (69 reviews)This mini-course offers a downloadable manual of Civil 3D. The eBook covers the features needed to successfully design most civil engineering projects, from field data collection to final design and layout.
Purchase$19.99
-

Advanced Civil 3D: Surveying and Construction
Course5.0 average rating (4 reviews)In this Online Survey and Construction Civil 3D training course, participants will learn and apply the tools offered by Civil 3D, to perform advanced survey and construction tasks.
$99 / year